

What is the 403 Forbidden Error & How to Fix it
(3 Methods Explained)
If you are reading this, you recently came across an error message saying 403 Forbidden – you don’t have permission to access ‘/’ on this server’. And most likely, you have no idea what it is all about. Well, don’t worry! This is a quite common scenario that many webmasters run into.

In this tutorial, you are going to learn about the reasons that might be liable for a 403 forbidden error in detail and possible solutions that will help you get rid of it. As an example, we will show you how to fix this error on a WordPress site. However, steps would be almost identical on any other CMS or static websites.
It is worth mentioning that 403 errors might differ based on various circumstances. Occasionally, this error can also be a result of a few changes that your hosting company might have made in their system or due to the implementation of some updates.
Whatever it is, let’s look deeper into the error and find out more details about it. We will then list out various reasons responsible for this error, and the possible solutions for it.
What is the 403 Forbidden Error?
Before we dig deeper and try to fix the 403 Forbidden Error, let’s first understand what it actually is. 403 forbidden error is an HTTP status code. When you encounter this error message, you are basically trying to reach an address or a website that is forbidden to access.
Here are examples of some these errors that are commonly thrown:
Forbidden: You don't have permission to access [directory] on this server
HTTP Error 403 – Forbidden
403 forbidden request forbidden by administrative rules
403 Forbidden
Access Denied You don't have permission to access
So what causes these errors? Let’s find out.
Causes of 403 Forbidden Error
Getting a 403 Error message in the middle of development might seem disturbing. But before we can fix it, we need to know about the actual reason causing it. The simple reason why we are seeing this error is because you are trying to access something you don’t have the permission to. Throwing a 403 forbidden error is your website’s way of stating that you don’t have enough permissions to proceed further.
This error is basically due to:
- Incorrect file or folder permissions
- Incorrect settings in the .htaccess file
That said, let’s have a quick look at how you can make it disappear.
Fixing the Error 403 Forbidden message
Now that we know the various factors causing the error, it is time to look at how to get rid of it. The steps mentioned here mainly focus on WordPress, but they can be applied to other websites as well. Let’s go through some of the steps involved.
Method 1 – Checking .htaccess File
You may not be familiar with the .htaccess file. This is because the file often remains hidden in the project directory. However, if you are using Hostinger File Manager, you should be able to see .htaccess by default.


In other cases, for example, if you are using cPanel, it can be done by accessing your hosting Control Panel with the help of File Manager. Let’s go through the steps involved:
- Locate File Manager from the hosting Control Panel
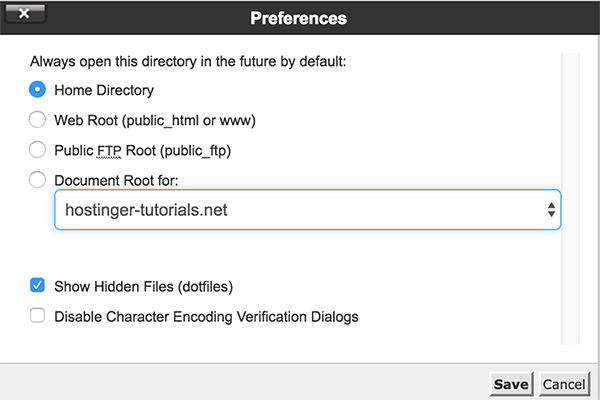
- In the public_html directory, look for .htaccess file.
- If you do not come across any .htaccess file, you can click on Settings and enabled Show Hidden Files (dotfiles) option.

To help you understand the .htaccess file better – it’s a server configuration file and mainly works by altering the configuration on the Apache Web Server settings.
Although the .htaccess file is present in almost all WordPress websites, in some rare events, when your website doesn’t have a .htaccess file or is deleted unintentionally, you need to create a .htaccess file manually.
Now, that you have found your .htaccess file, all you need to do is:
- Download the .htcacess to your computer to have a backup of it.
- Once done, delete the file.
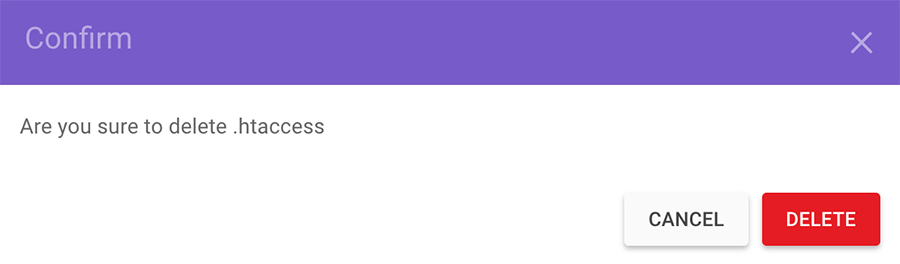
- Now, try accessing your website.
- If it works fine, this simply indicates that your .htaccess file was corrupt
- Now, to generate a fresh .htaccess file, login to your WordPress dashboard, and click on Settings › Permalinks.
- Without making any changes press Save button at the bottom of the page.
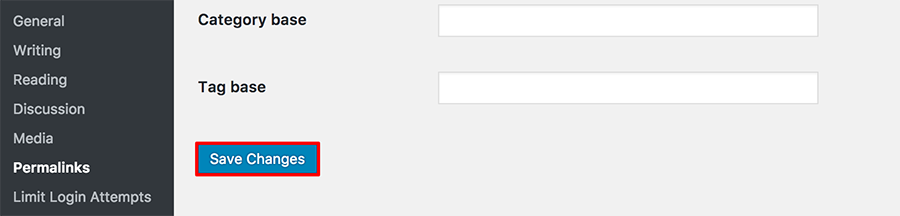
- This will generate a fresh .htaccess file for your website


However, if this doesn’t solve the issue, move onto the next step.
Method 2 – Resetting File and Directory Permissions
Another reason for encountering a 403 Error Forbidden message is bad permissions for your files or folders. In general, when files are created, they come with certain default permissions. These basically control how you can read, write and execute the files for your use.
If you’re using Hostinger, there’s a special tool that will take care of all your permission problems in just a single click. Enter the Fix File Ownership section at the bottom of your control panel to begin.
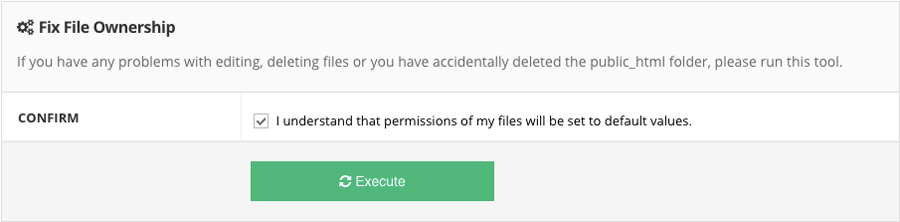

This tool will save you loads of time and will restore all file and directory permissions to default values.
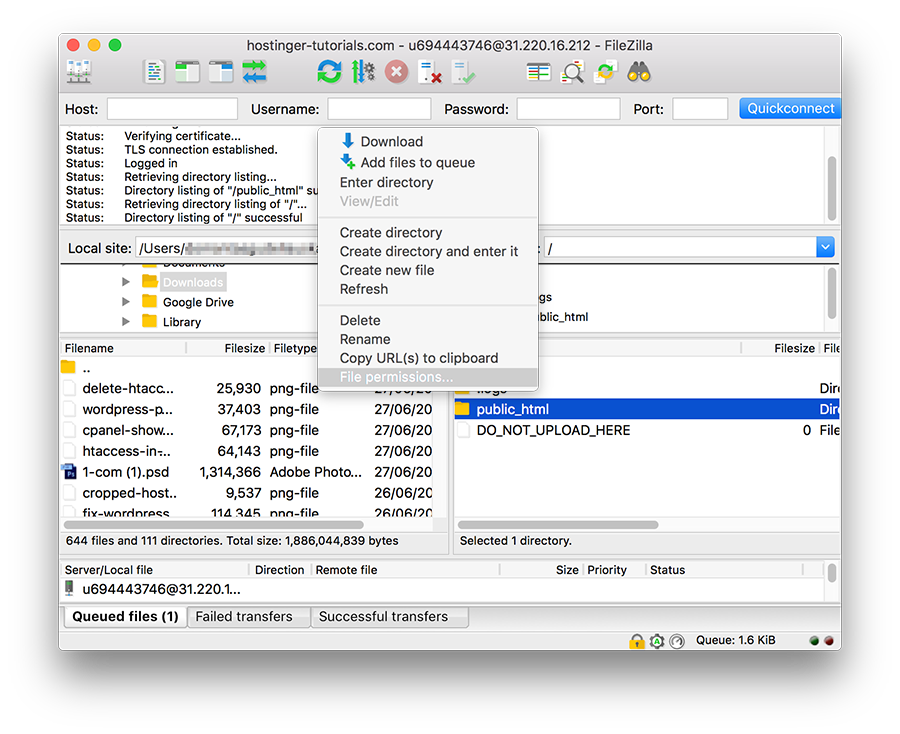
However, a FileZilla FTP client also provides all you need to edit file and folder permissions. To begin, you should:
- Access your website files using any FTP client.
- Navigate to the root directory of your hosting account.
- Select the main folder which contains all your website files (usually it’s public_html), right-click on it and select File Permissions.
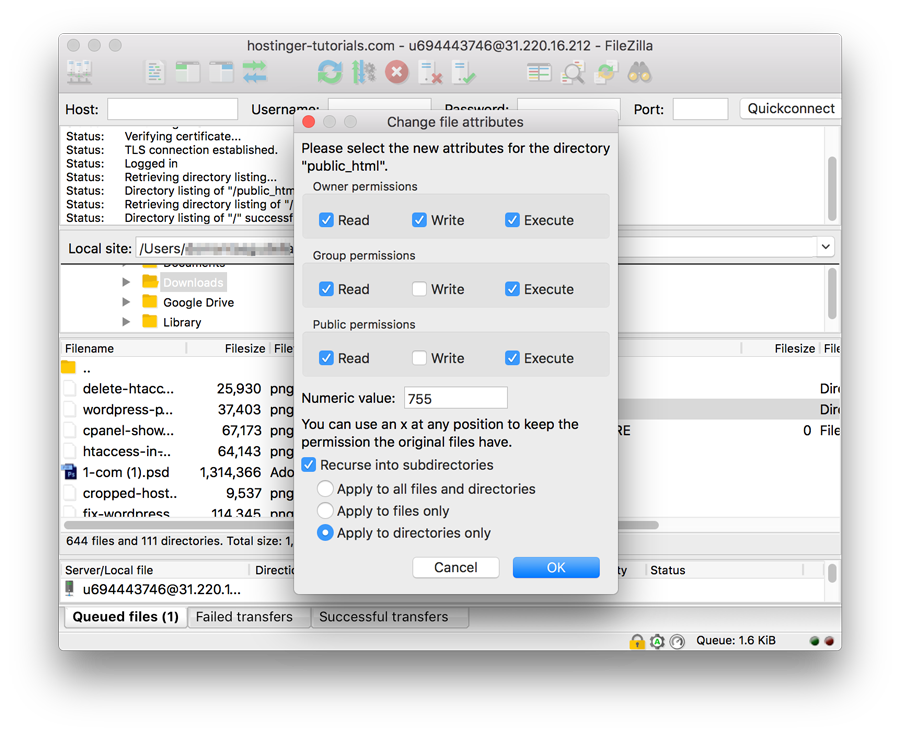
- Check Apply to directories only, enter permission 755 in the numeric value field and press OK.
- Once FileZilla is done changing folder permissions repeat the step 3, but this time choose to apply to files only option and enter 644 in the numeric value field.
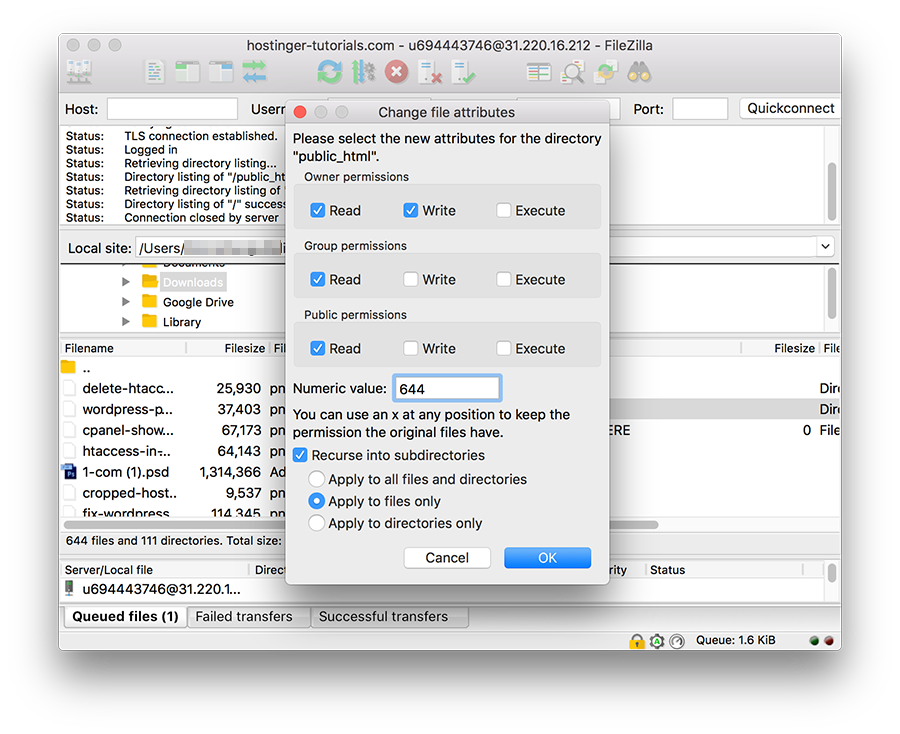
- Once done, try accessing your website now, and see if the error is solved.

If you want to get a better insight on how file and folder permissions work in a Linux environment or learn to use the command line to change permissions, see this tutorial.
However, if nothing seems to happen, it is the time to move onto the next step.
Method 3 – Disabling WordPress plugins
If you have come this far, chances are high that the error was thrown due to an incompatible or faulty plugin. In this step, we will try disabling plugins to see if it fixes the 403 Forbidden Error.
The best thing to do would be to disable all the plugins at once instead of going through the process individually. With this step, you would be able to detect the problem and work towards a solution. Here is what you have to do:
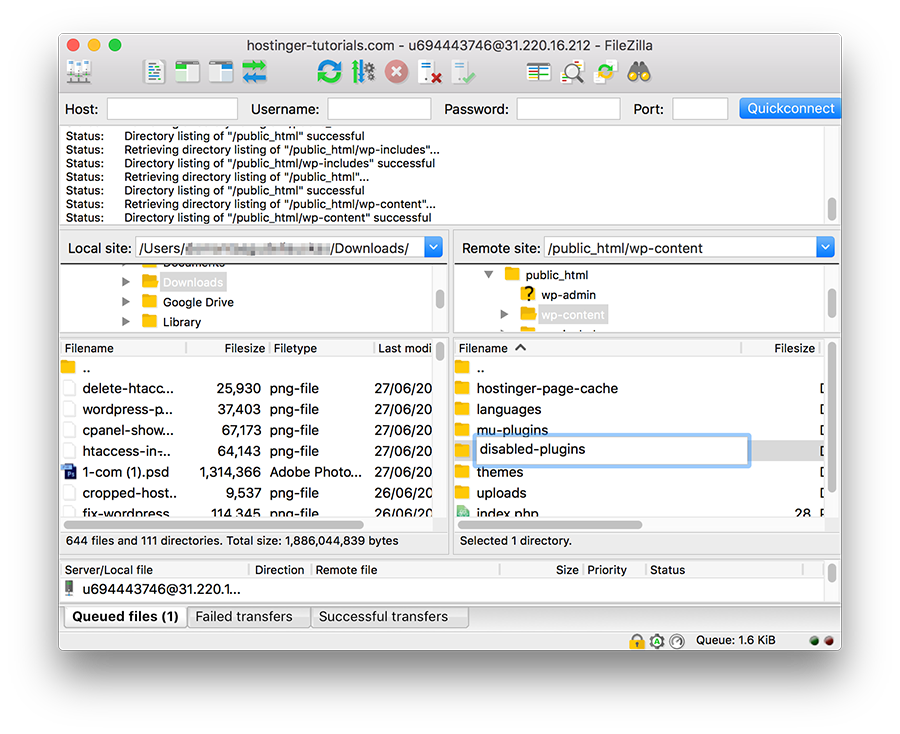
- Access your hosting account with FTP and look for the public_html folder (or folder containing your WordPress installation files).
- Locate the wp-content folder on the page.
- Locate the Plugins folder, and rename it to something different like ‘disabled-plugins’ so that it is easier to keep track of.
Once you have disabled all the plugins, try accessing your website again. Did this fix the problem? If yes, a problematic plugin is the actual source of error. Try deactivate plugins one by one, and check if your website is back to action now. This way you will be able to detect the faulty plugin.
You can then choose to update the plugin if it is necessary or install a new one. However, if nothing of the above-mentioned steps worked for you (which is rare!), you may need to contact your hosting provider.