Smart objects are powerful layers in Photoshop that allow you to make non-destructive edits. In this tutorial, we will use smart objects to help build a custom text effect as well as a complex, animated texture. By working with smart objects, we will be able to quickly update our scene simply by editing the smart objects. Let’s get started!
1. Creating the Text
Step 1
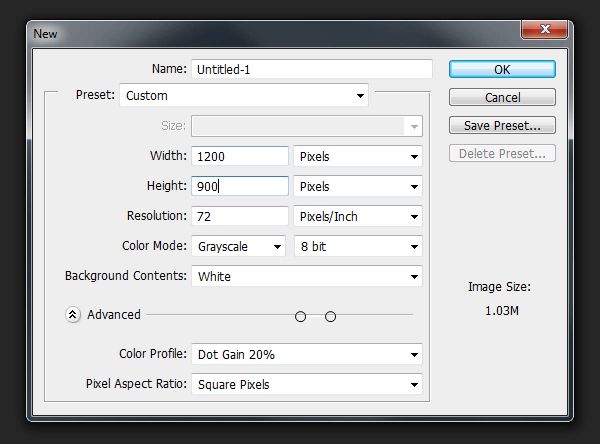
Create a new document. I’m creating my document at 1200px x 900px in order to be versatile.
Step 2
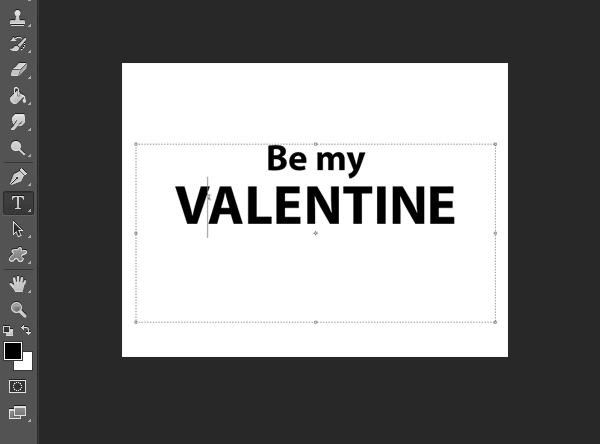
Select the Type Tool (T) and add the desired text. Make sure it is centered and fills the document.
Step 3
Convert the text layer into a smart object by right-clicking the layer and choosing Convert to Smart Object.

Step 4
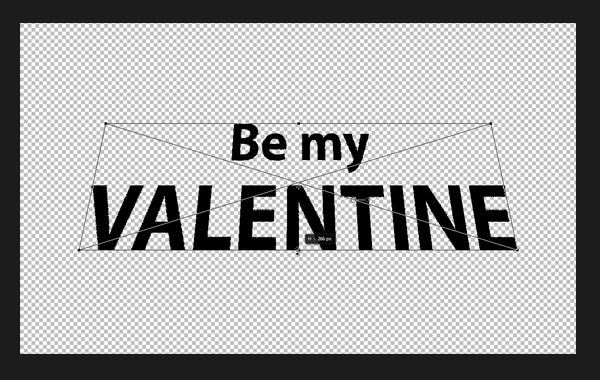
Transform (Command/Ctrl-T) the new smart object into perspective as shown in the image below. This will give us the illusion of a 3D space—this will come in handy when we start animating.
2. Creating Glitter Text
Step 1
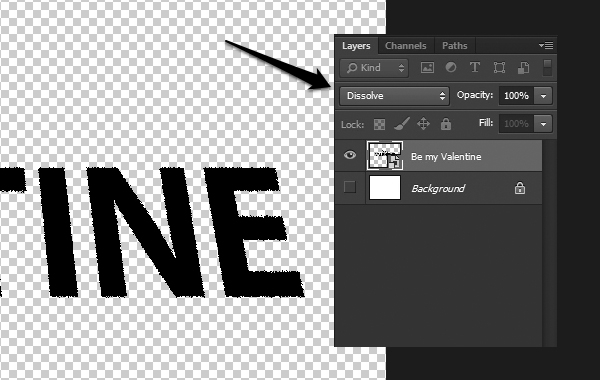
Change the Blend Mode of the smart object to Dissolve. This doesn’t do much at first, but once we add a blur in the next step, we’ll see some interesting effects.
Step 2
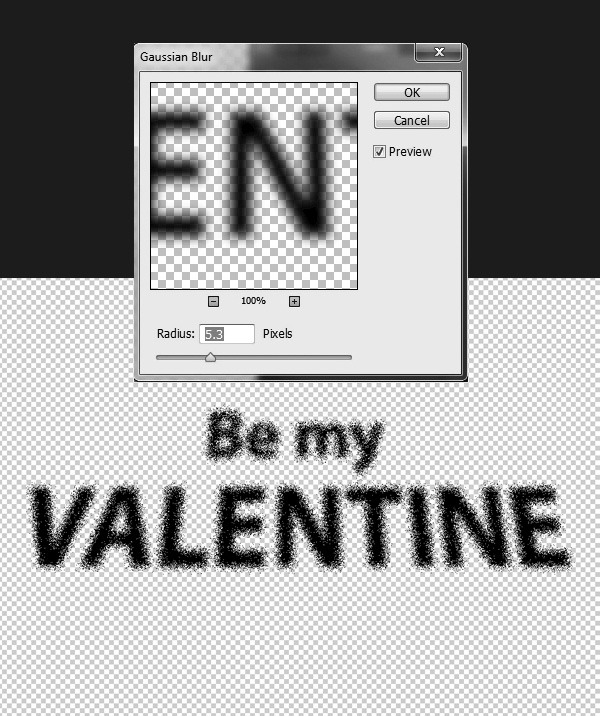
Now, apply a Gaussian Blur (Filter > Blur > Gaussian Blur) with a Radius of 5.3px.
Since we are applying the Gaussian Blur Filter to a smart object, it becomes a Smart Filter (meaning we can edit the values at any time).
Step 3
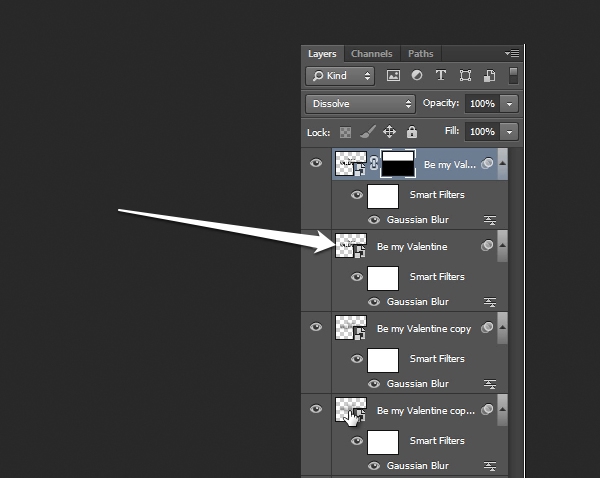
Make a copy of the text smart object by pressing Command/Ctrl-J (this will also copy any smart filters applied). Adjust the Gaussian Blur smart filter on the new smart object copy to a Radius of 19.6px.

Step 4
Repeat the last step, this time setting the Radius to 30.5px.

Step 5
The text looks good. I do notice that the words “Be my” might be too obscure. As an optional step, we can add one more copy of the smart object and set the Radius of the Gaussian Blur filter to 3px. Then, we can use a layer mask to mask out everything but the top line. This should darken the top line just enough to make it more legible.

Step 6
Let’s test our smart object. Double-click any of the smart object layers to open it up.
Step 7
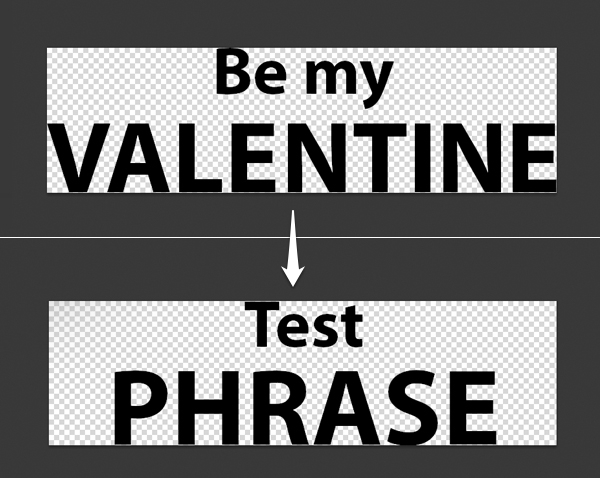
Replace the text with a generic phrase and Save (Command/Ctrl-S) the smart object document.
Step 8
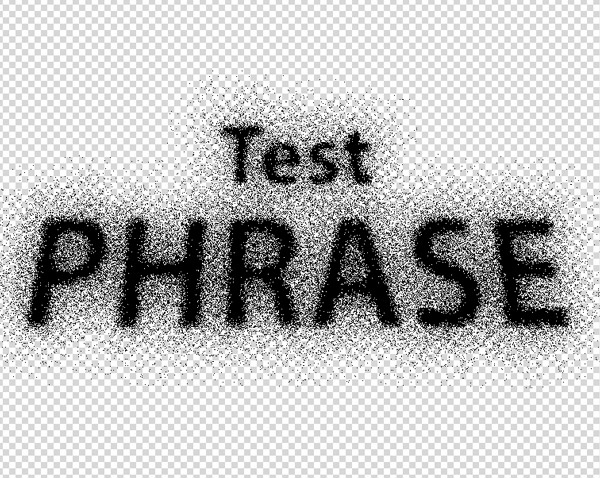
Go back to the working document to see if the phrase updated. If it did, then our smart objects were set up properly. Go ahead and reset it to the original phrase.
Step 9
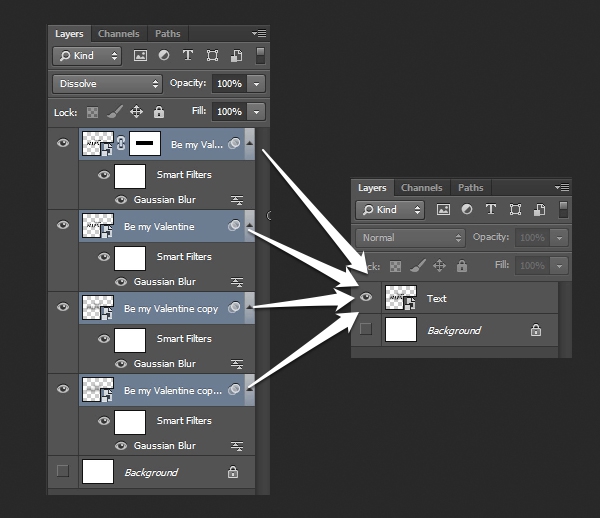
The last step is to convert all of our text layers into one smart object. To do this, select all the text layers in the Layers Panel and right-click. ChooseConvert to Smart Object. Rename the new smart object to Text.
3. Creating Glitter Texture
Step 1
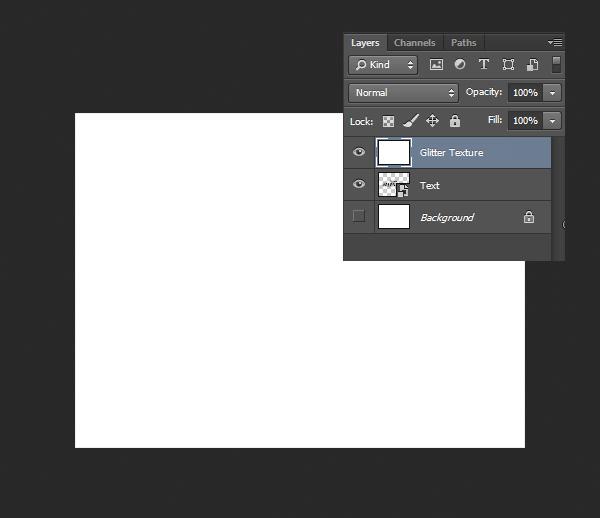
Create a new layer. Fill with white and name the layer Glitter Texture.
Step 2
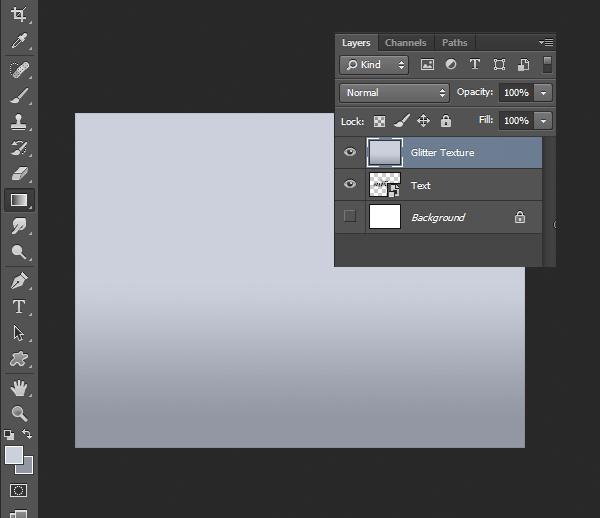
Use the Gradient Tool to fill the layer with a blue gradient. Below are the colors used:
- Light blue:
#b5beda - Dark blue:
#949aa7
Step 3
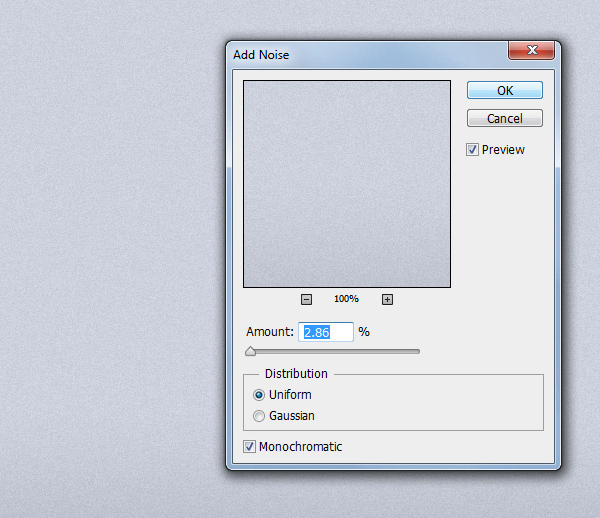
To make this look more like glitter, we need to add some noise. Go to Filter > Noise > Add Noise and set the Amount to 2.86%.
Step 4
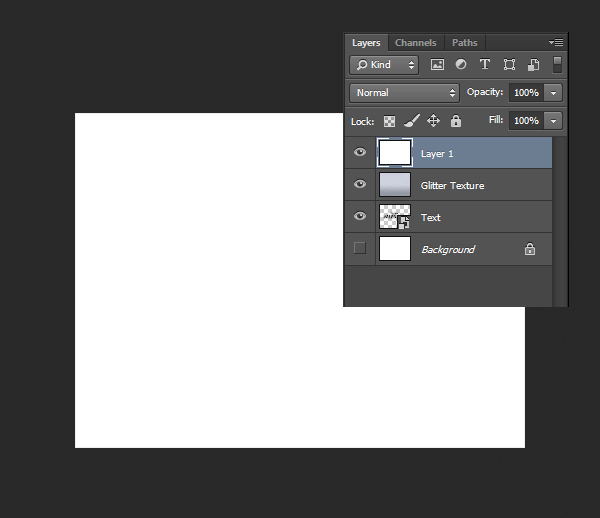
Create a new layer and Fill with white.
Step 5
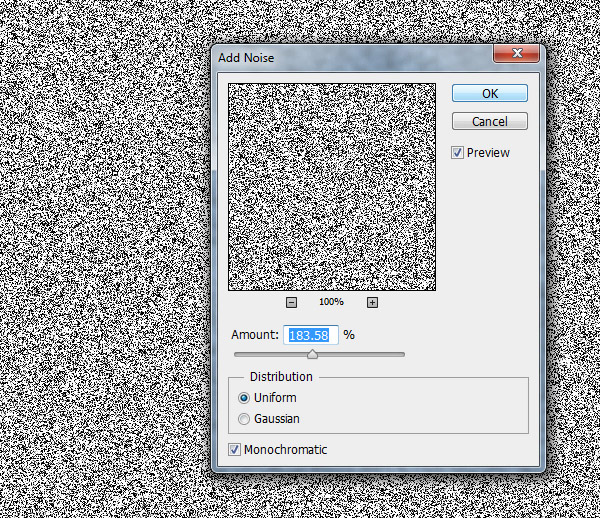
Add Noise to this layer with an Amount of 184%.
Step 6
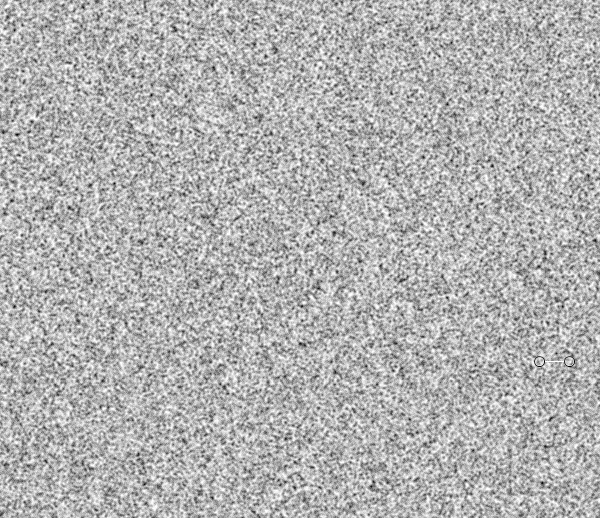
Go to Filter > Blur > Blur More. This will blur the noise slightly so that it does not appear as grainy.
Step 7
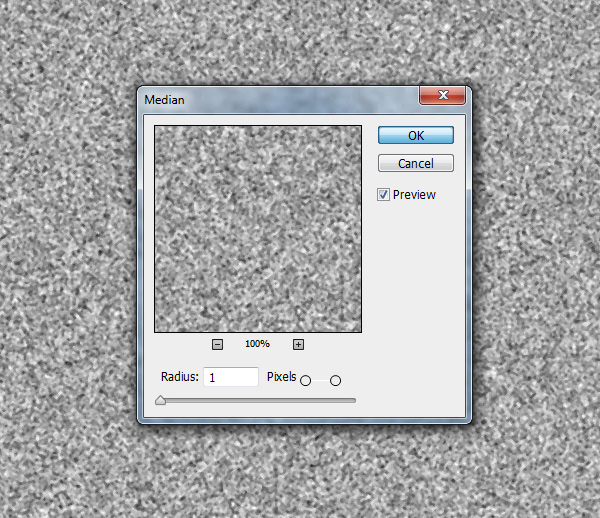
Apply the Median Filter (Filter > Noise > Median) with a Radius of 1px. This step will help give the illusion of individual flakes of glitter.
Step 8
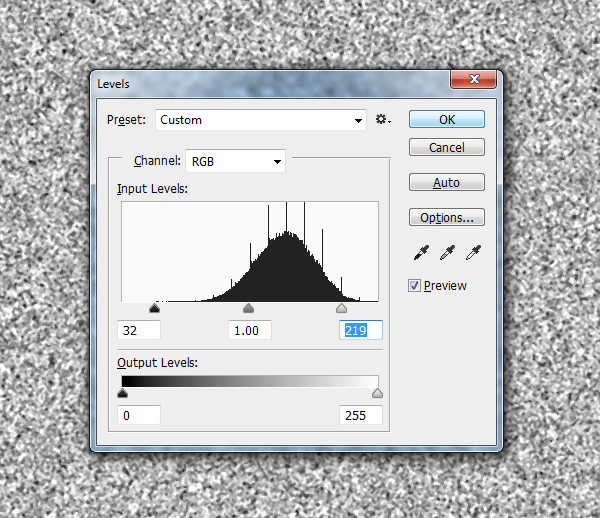
Adjust Levels (Command/Ctrl-L) to add some contrast to the glitter texture.
Step 9
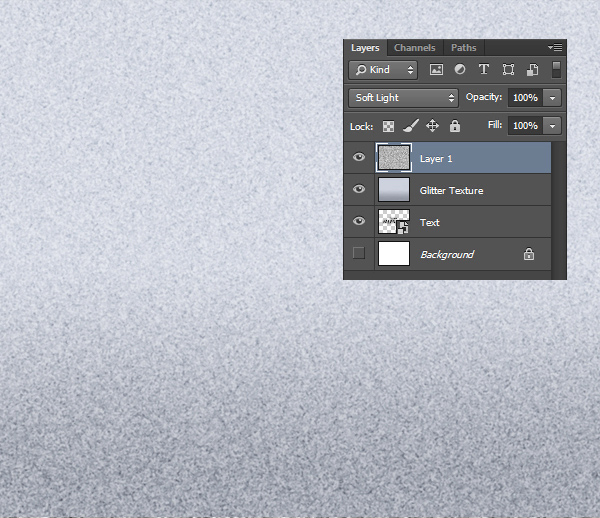
Change the layer’s Blend Mode to Soft Light.
Step 10
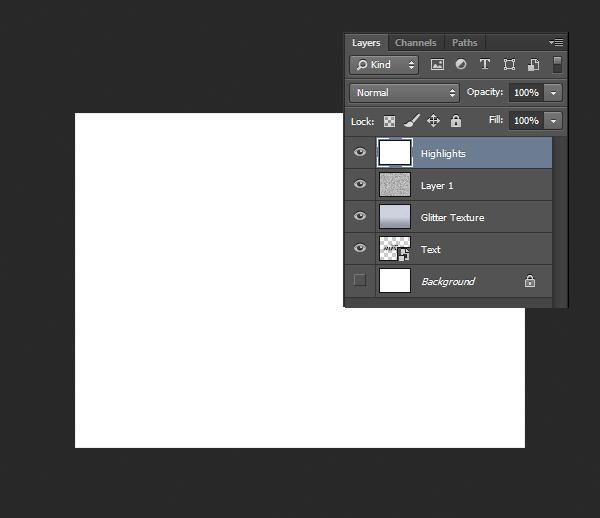
The last things I want to add are the extreme highlights and lowlights that often appear as the individual flakes of glitter reflect light. We will star this effect now, but finish it in a later step.
Create a New Layer and Fill with white.
Step 11
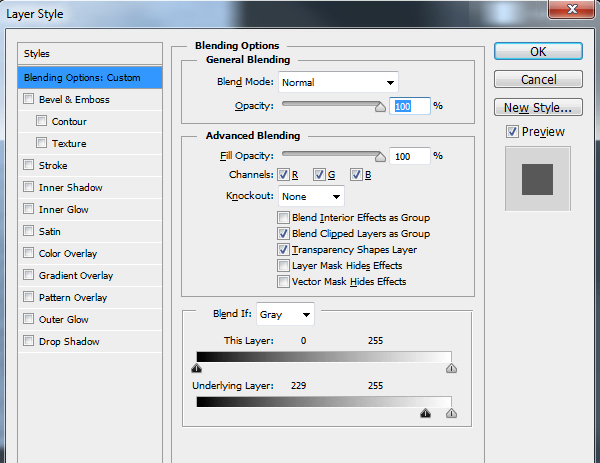
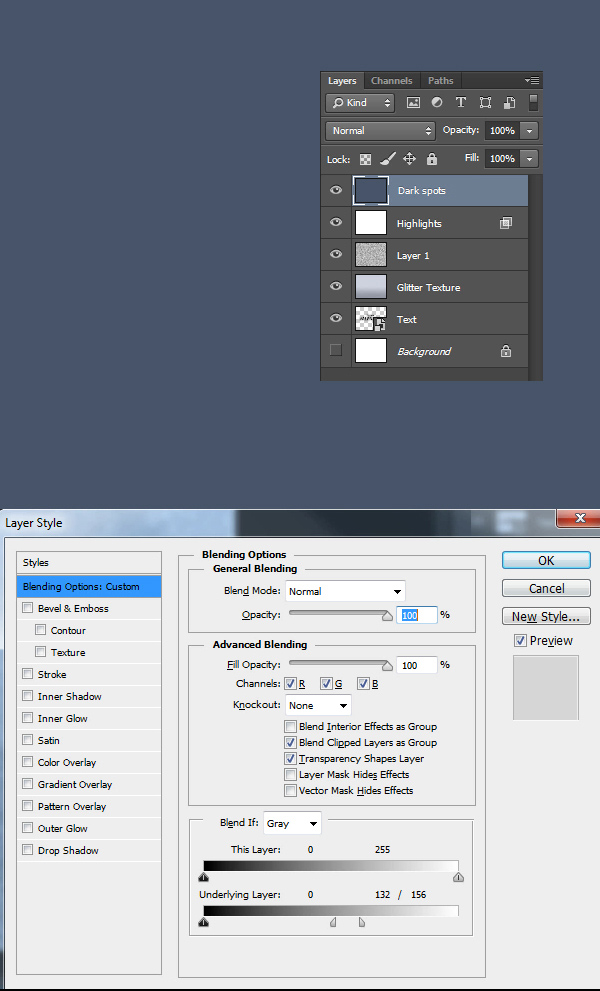
Adjust the Blend If sliders (found in the Layer Style’s Panel) as shown. The goal is to have a small amount of glitter reflect the pure white color.
Step 12
Repeat the last two step in order to create the lowlight reflections. Instead of using white, use a dark blue color. Adjust the Blend If sliders as shown.
Step 13
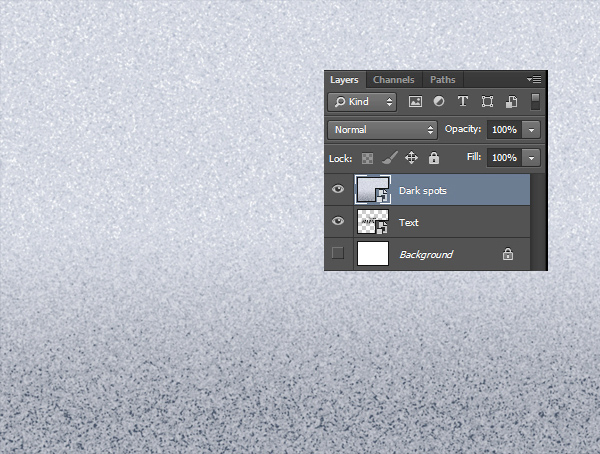
Now, your glitter layer should have areas of white and dark blue specs. Select all of the layers used to build the glitter texture and Convert to Smart Object. We will come back to this later.
4. Creating the Sparkles Base Layer
Step 1
We all know that glitter’s main attribute is that ability to sparkle. In fact, a still image of glitter never does it justice since the sparkle requires some amount of motion (let’s call this effect Sparkle Motion). In order to create this sparkle motion effect, we will eventually need to rely on Photoshop’s animation abilities. However, before we start animating, we’ll need to create the static sparkles.
To start, create a new layer and Fill with black.
Step 2
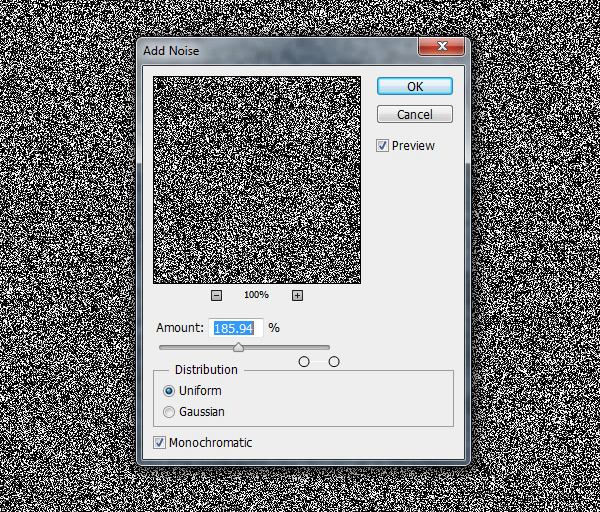
Add Noise with an Amount of about 190%.
Step 3
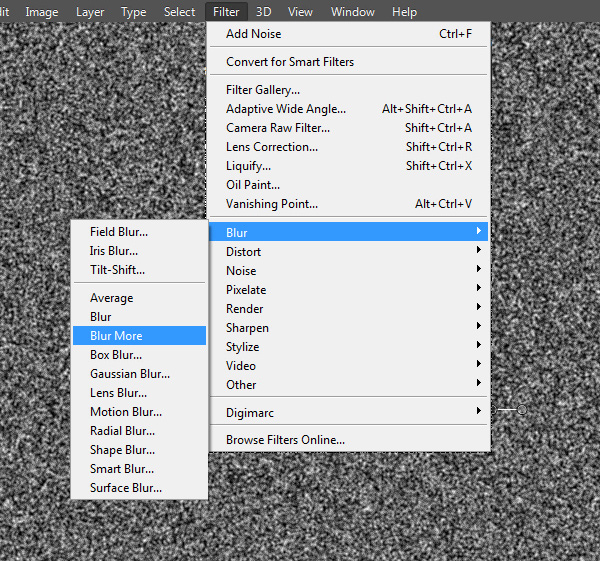
Blur the noise slightly by using the Blur More Filter (Filter > Blur > Blur More). Add the Blur More filter a second time. This can be done quickly by pressing the keyboard shortcut Command/Ctrl-F.
Step 4
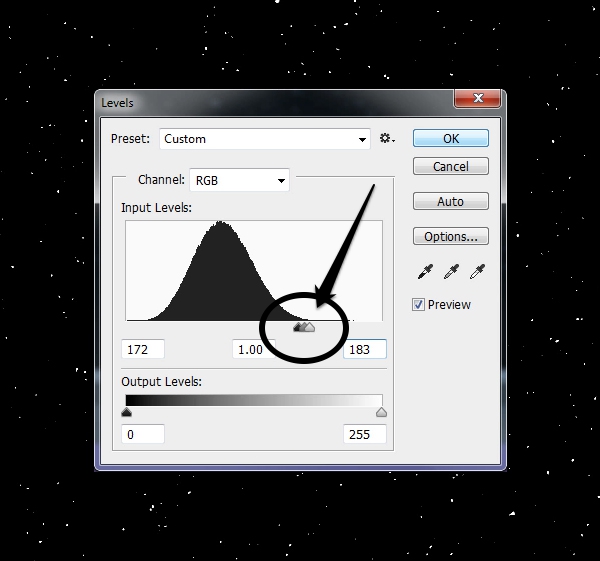
Adjust the Levels (Command/Ctrl-L) until the noise becomes sparse.
Step 5
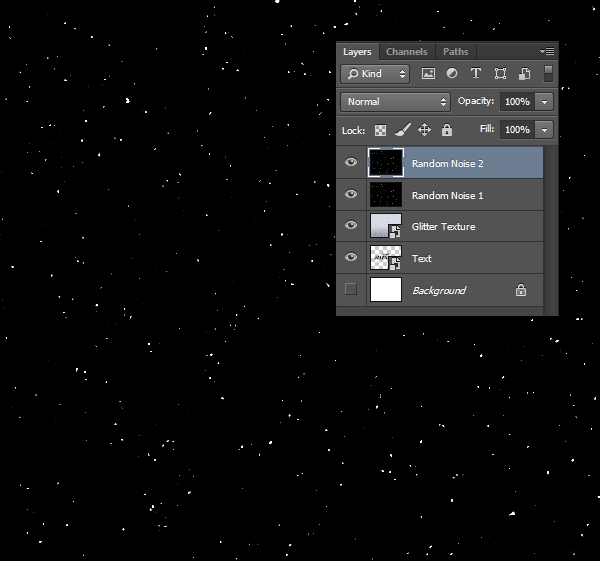
In order to make sure we get enough variety in our sparkles, repeat this technique to create a new layer with this noise.
Since Noise is randomly generated each time, following the exact same steps will still result in a different pattern of noise.
Step 6
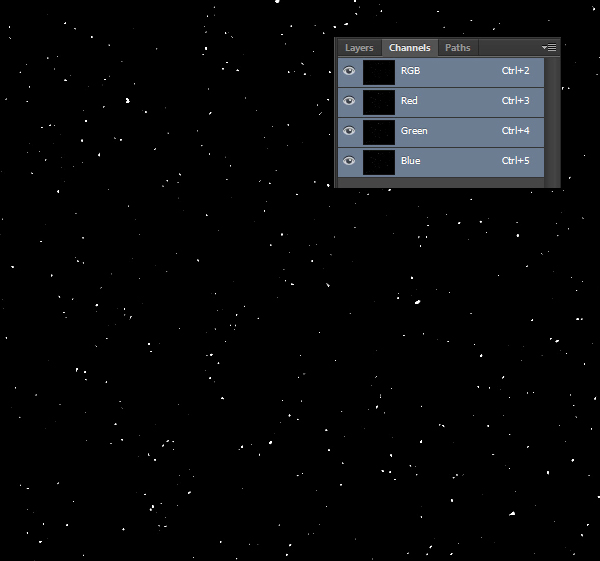
Now that we have two sets of random noise, we need to extract them so the background is transparent. Select one of the noise layers and open up theChannels Panel.
Step 7
Command/Ctrl-click the RGB layer’s thumbnail. This will select only the white areas in our layer.
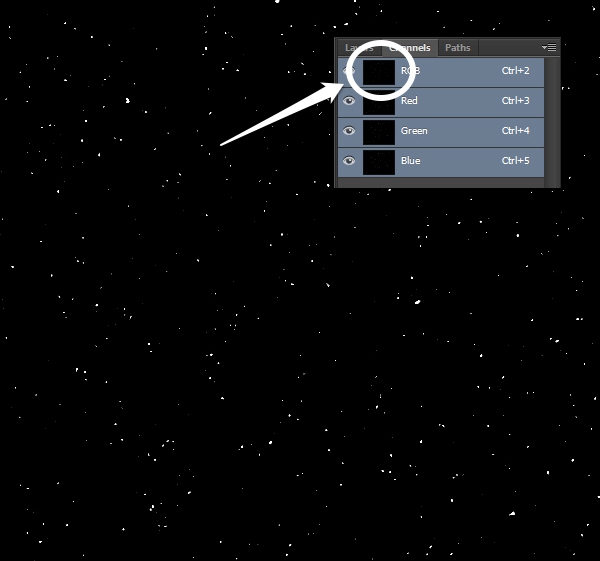
Step 8
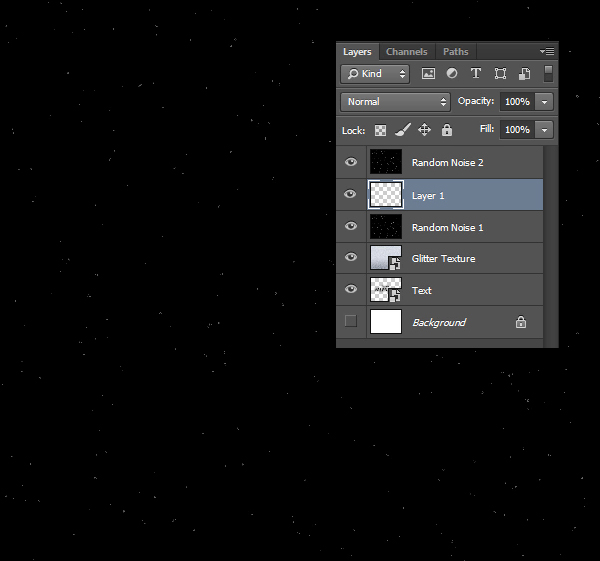
Go back to the Layers Panel and create a new layer. You may notice that there is a selection still active. Fill the selection with black. It may appear that nothing happened, but that’s normal.
Step 9
Repeat this process with the other noise layer. As you can see, I’ve added a temporary white layer in order to see the noise better.

5. Animating the Sparkles Top Layer
Step 1
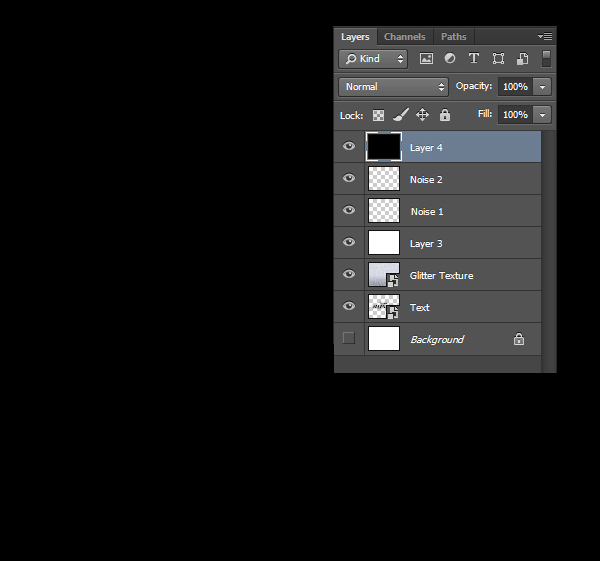
Now that we have two layers of random noise, we need to create our sparkles. Create a new layer and Fill with black.
Step 2
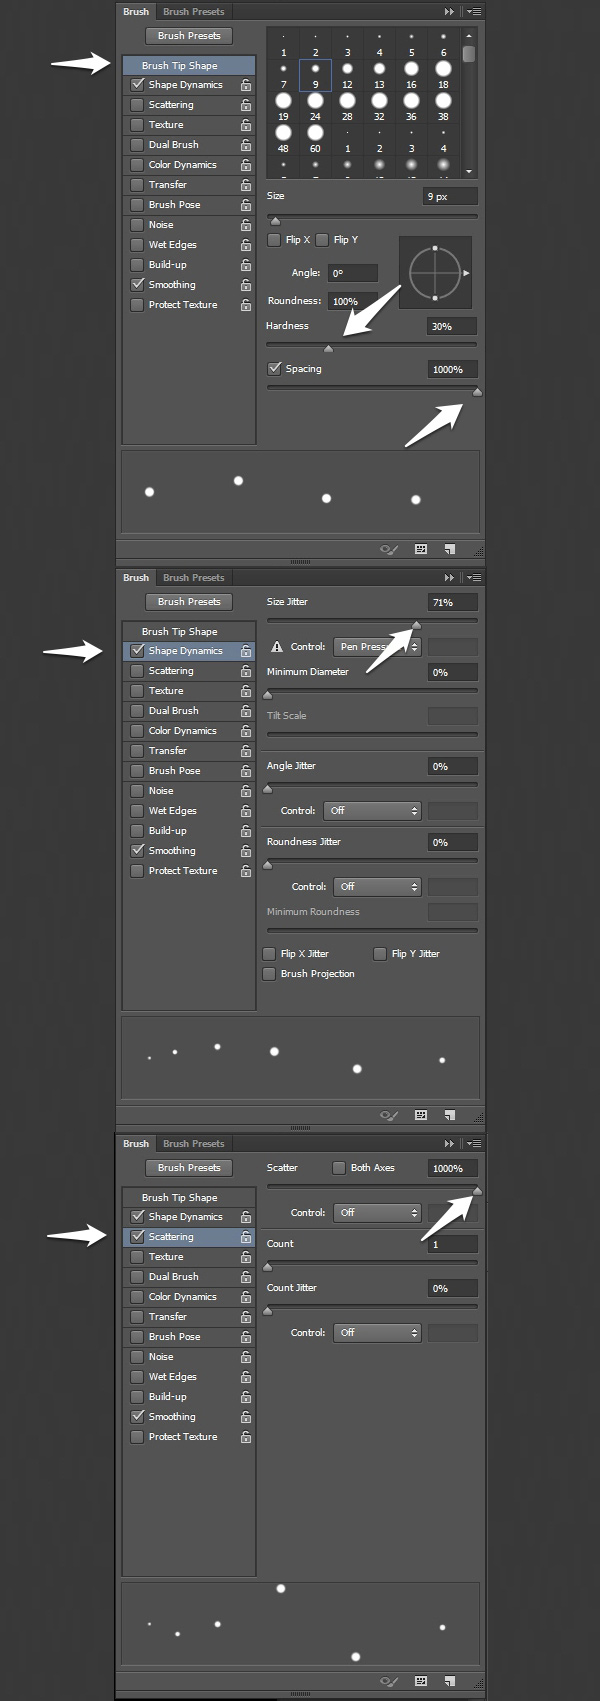
We will be utilizing a custom Photoshop brush to help us paint the sparkles. Select one of the default brushes and open the Brushes Panel. Use the settings below.
You can test the custom brush on the canvas at anytime while you’re editing the properties.
Step 3
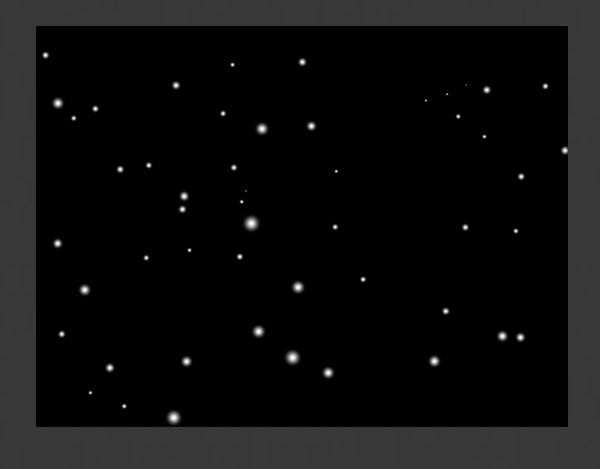
Using the new brush, paint over the canvas until it is filled with random dots. These will become our sparkles.
Step 4
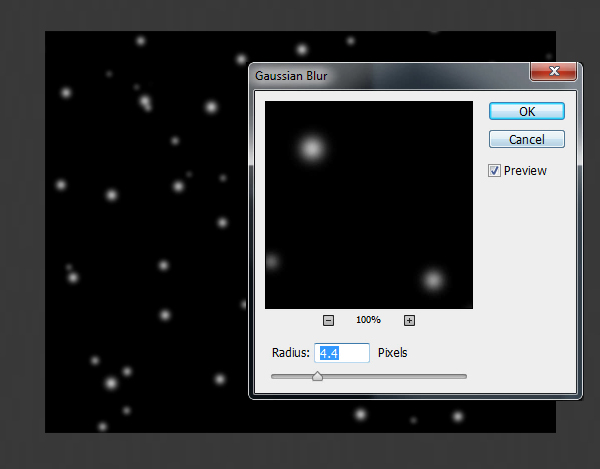
To soften the dots, apply a Gaussian Blur filter with a Radius of around 4.0px.
Step 5
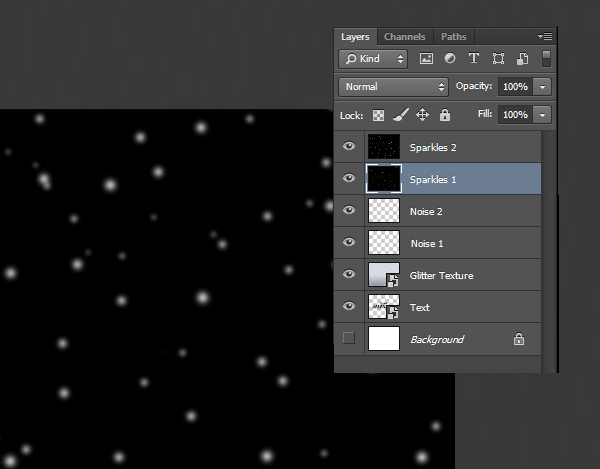
Repeat this process to create a second layer of sparkles.
6. Animating the Sparkles
Step 1
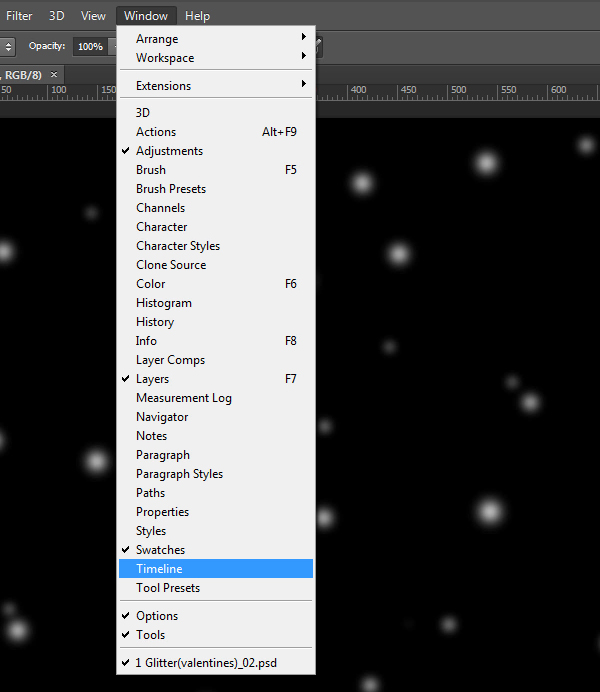
We will now start animating the different components to create the sparkling effect. Start by going to Window > Timeline to open the Timeline Panel.
Step 2
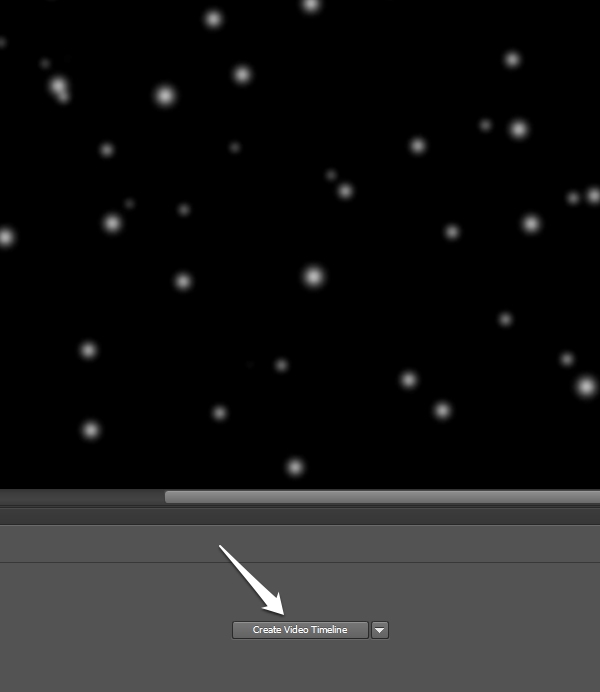
The Timeline Panel should appear at the bottom of the screen. Since we want to keyframe our animation, we’ll need to click on the Create Video Timelinebutton.
If the Create Video Timeline button is not visible, then click the dropdown arrow and select it there.
Step 3
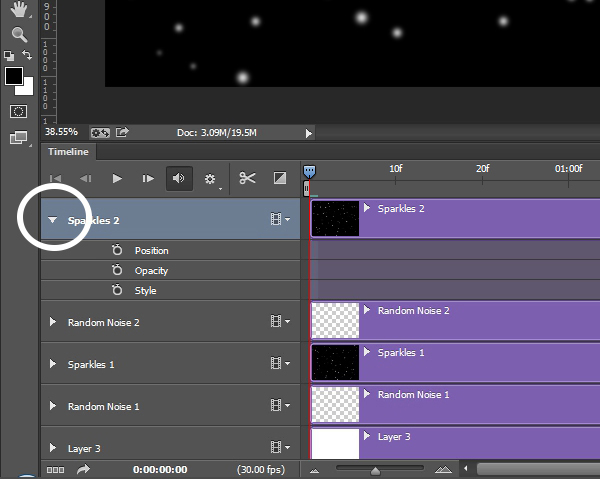
The timeline should populate with animation layers that are named according to the layers in the Layers Panel. Click the drop down arrow for one of the Sparkle layers to access the properties that can be animated. The goal is to animate the rotation of the Sparkle layers, and to do that, we will need to keyframe the Transform property. As you can see, there is no Transformproperty.
Step 4
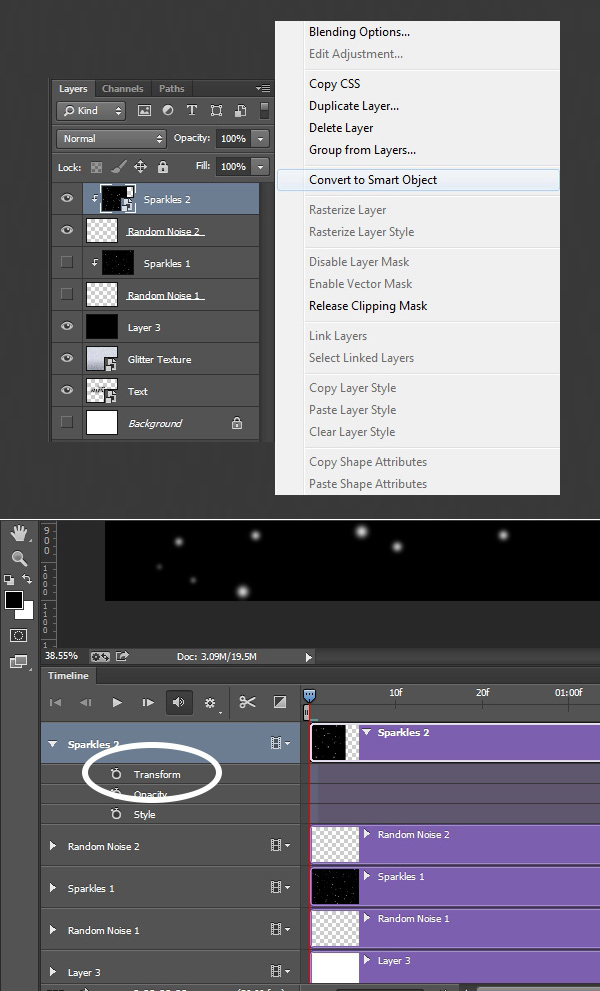
To access the Transform property, simply convert the Sparkle layer to a smart object. Now, look at the animation properties in the timeline – Transform is now visible.
Step 5
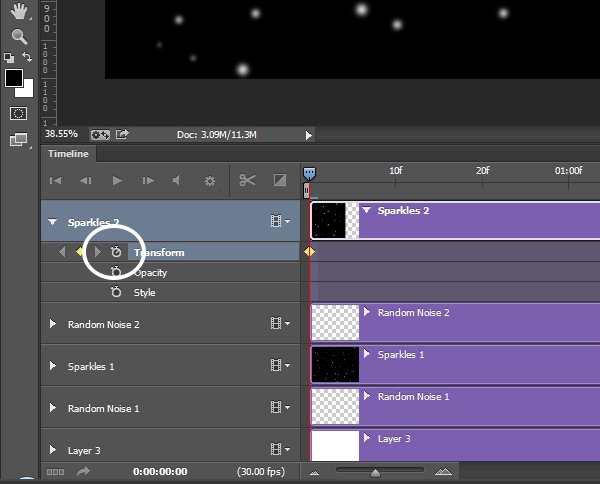
Starting at the first frame, Click the stopwatch icon for our Sparkle layer. This will enable keyframing and place a keyframe at the first frame.
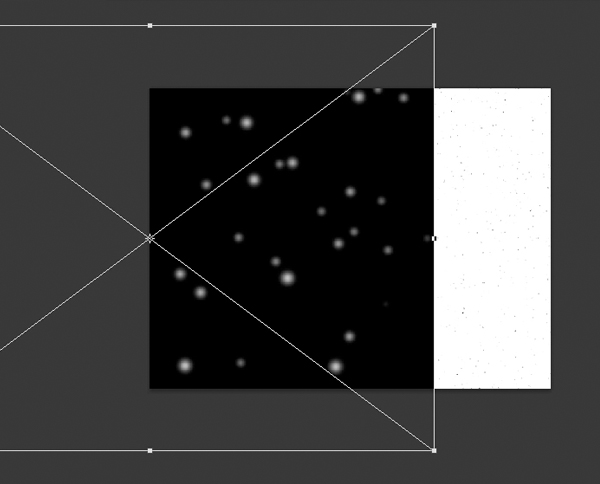
Step 6
Transform (Command/Ctrl-T) this layer to scale it up and move it off center.
Step 7
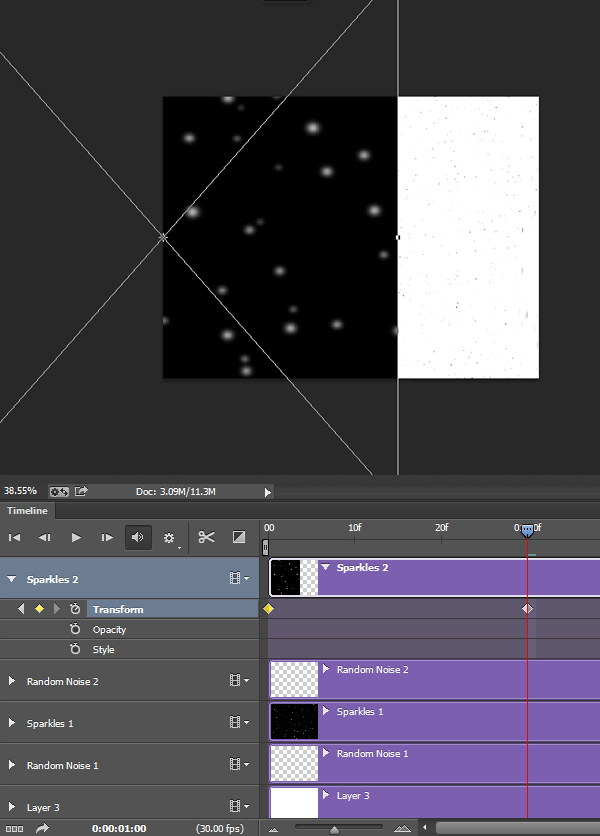
Click on the 1 sec marker in the timeline to advance the playhead. Rotate the layer clockwise 90 degrees by using the Transform command (Command/Ctrl-T).
Note that a keyframe is automatically inserted when an adjustment to the layer is made.
Step 8
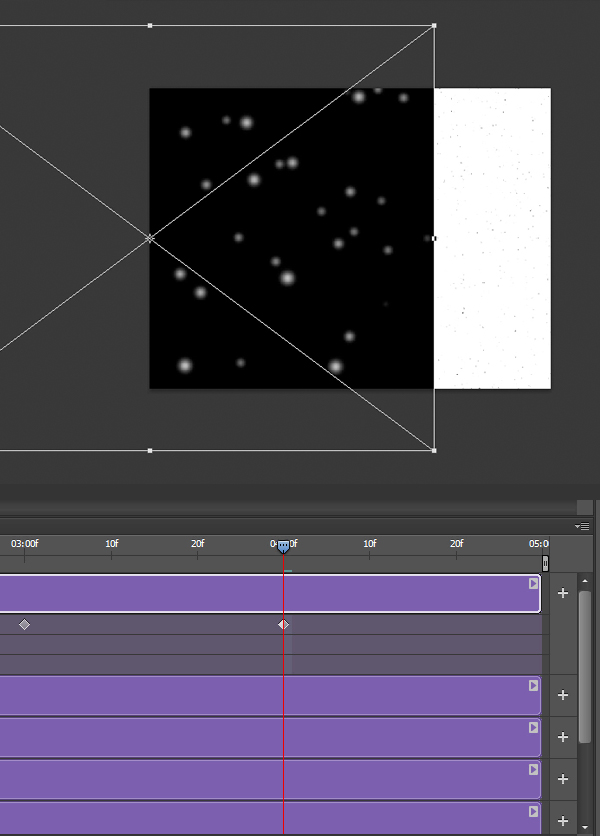
Continue moving the playhead by one second increments and rotating the layer to add keyframes. Do this until the layer has been rotated 360 degrees.
Step 9
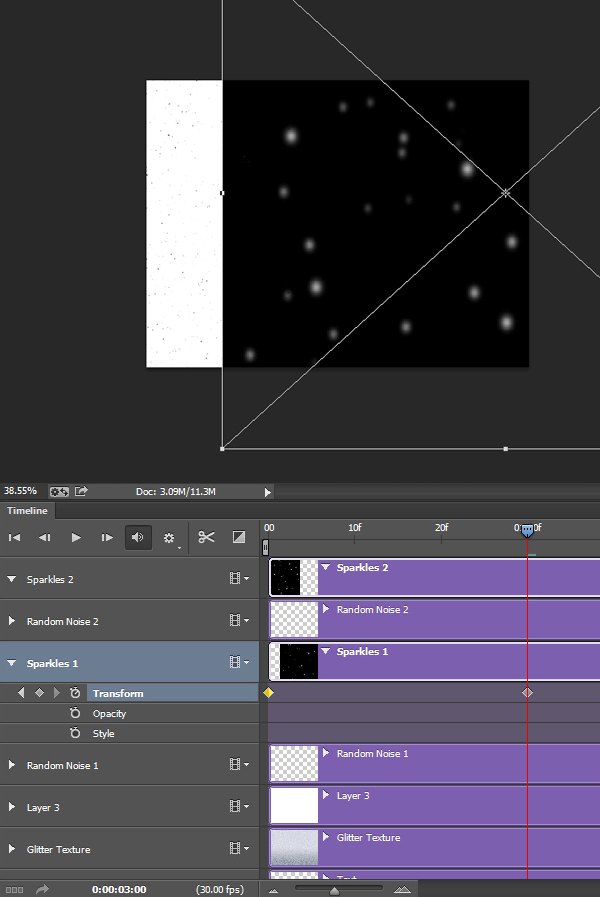
Repeat this process with the other Sparkle layer, but move this one to the other side of the canvas. Playing the animation should appear similar to the one below:

Step 10
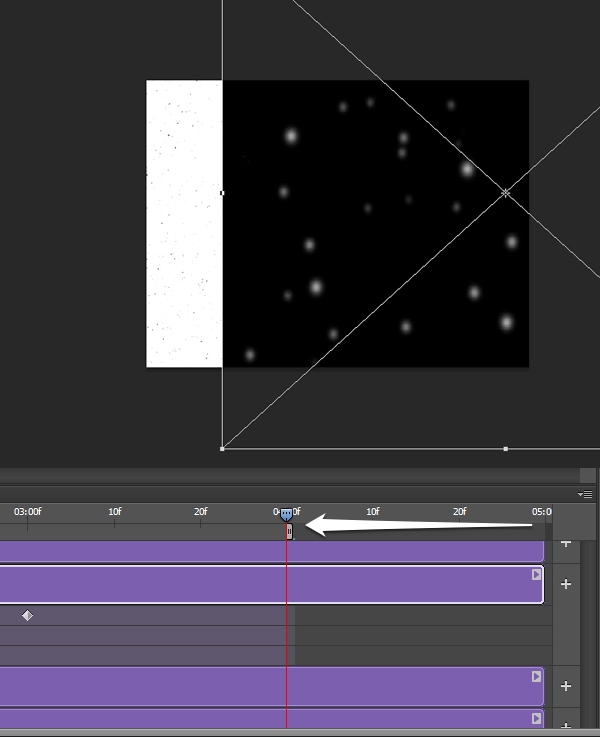
Notice that the timeline’s work area indicates that it is five seconds long but our last keyframe is at the four second marker. Set the end of the work area to four seconds by dragging the End of Work Area marker.
Step 11
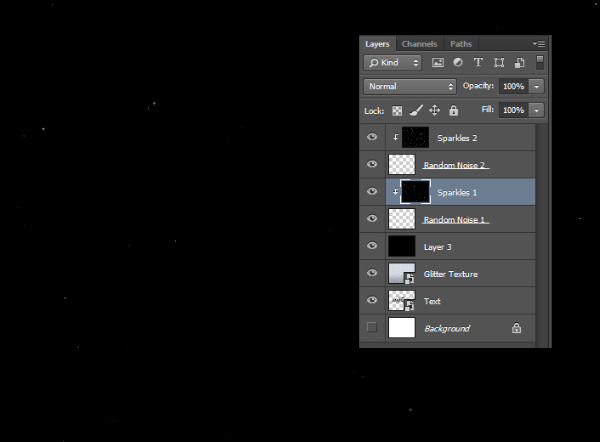
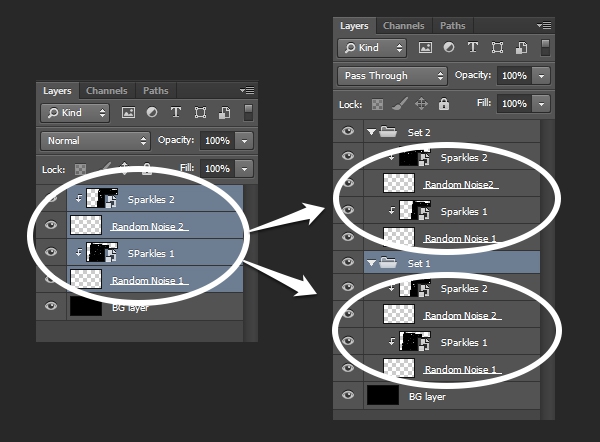
Make the Sparkles 2 layer a clipping layer to the layer directly below it. Do this with the Sparkles 1 layer, too.
Step 12
Playing back the animation will show a subtle sparkling effect. It may not look like much yet, but we will enhance this later.
Step 13
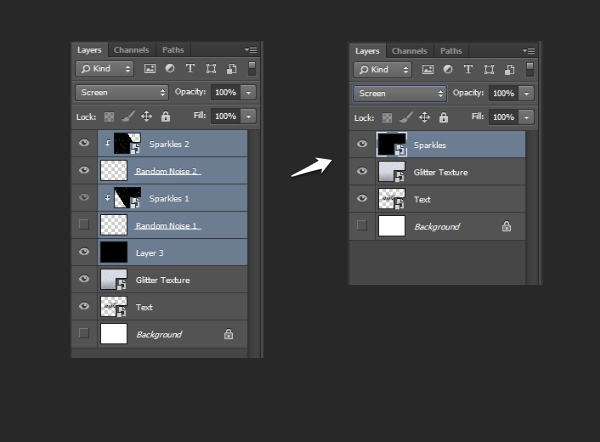
Go ahead and select all the layers that make up the animation (including a layer with a black fill) and Convert to Smart Object. Rename the smart object Sparkles.
Step 14
As an optional step, go into the Sparkles smart object and create another set of animated sparkles.
7. Enhancing the Sparkles
Step 1
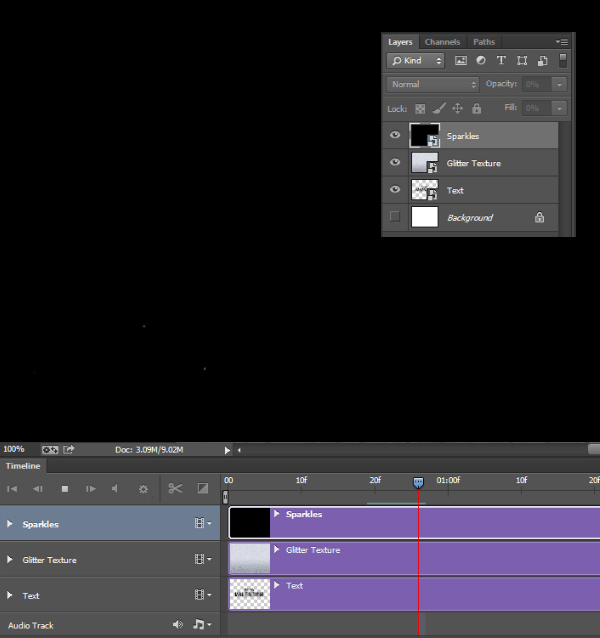
Save all smart objects and go back to the working document. At this point, there shouldn’t be much to see. However, it’s important to know that our working document will still play all animations that we previously set up. In the next few steps, we will use the animated smart object to exaggerate the sparkle effect.
Step 2
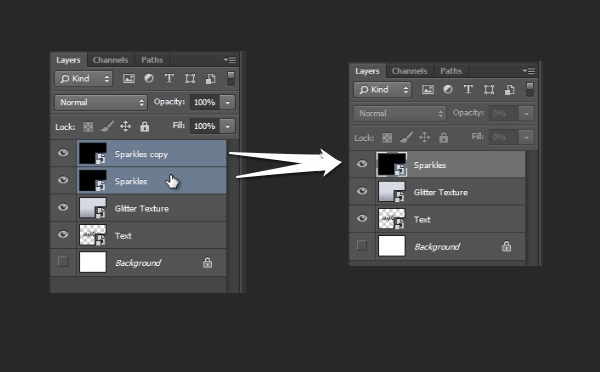
Duplicate (Command/Ctrl-J) the Sparkles smart object.

Step 3
Select both Sparkles smart objects and convert these to a single smart object.
Step 4
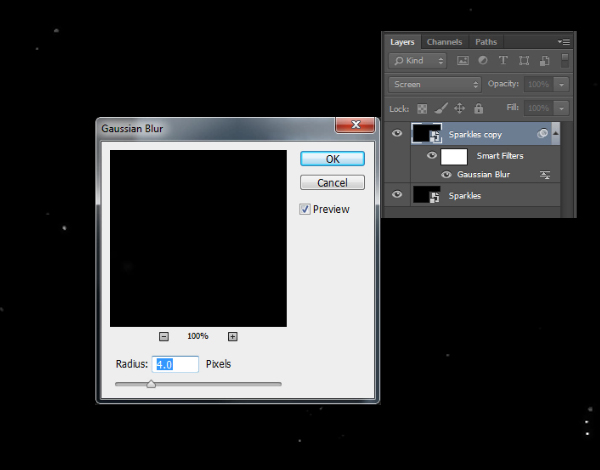
Double-click the smart object’s thumbnail to open it up. Add a Gaussian Blurwith a Radius of 4.0px to the top most layer.
Step 5
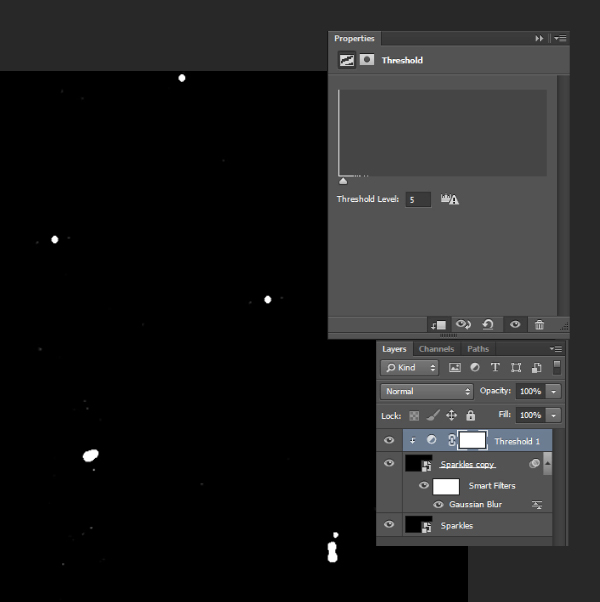
Next, add the Threshold adjustment layer as a clipping layer the Sparkles Copylayer. Adjust the Threshold settings in the Properties Panel until the dots become much larger.
Step 6
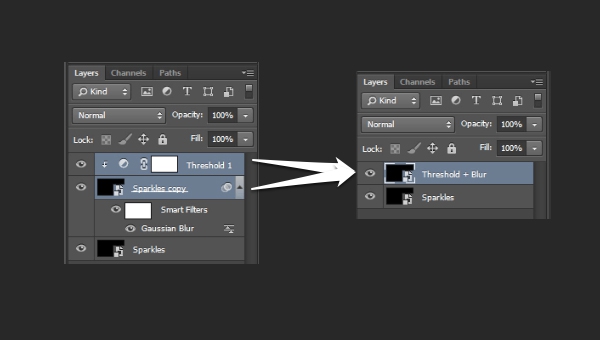
Select both the Threshold clipping layer and the Sparkles Copy layer and Convert to Smart Object. Rename this layer Threshold-Blur in order to keep track of it.
Step 7
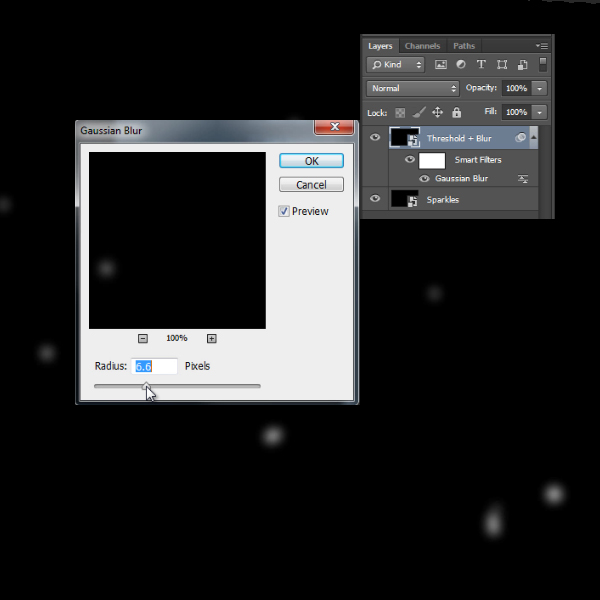
Next, add another Gaussian Blur to the same layer with a Radius of about 6px.
Step 8
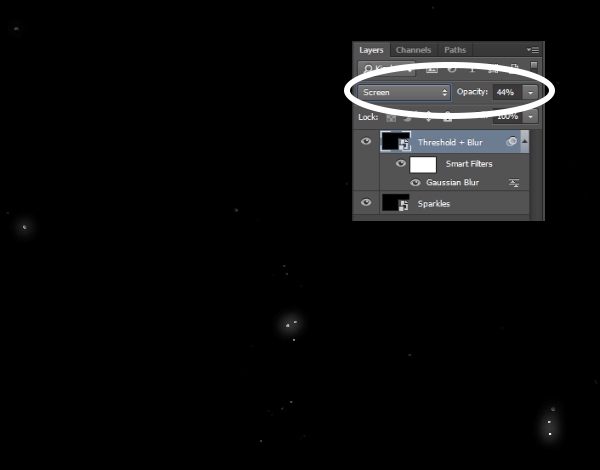
Change the Blend Mode to Screen and the Opacity to around 40%. Each sparkle on our canvas should now appear to glow.
8. Adding a Lens Flare to the Sparkles
Step 1
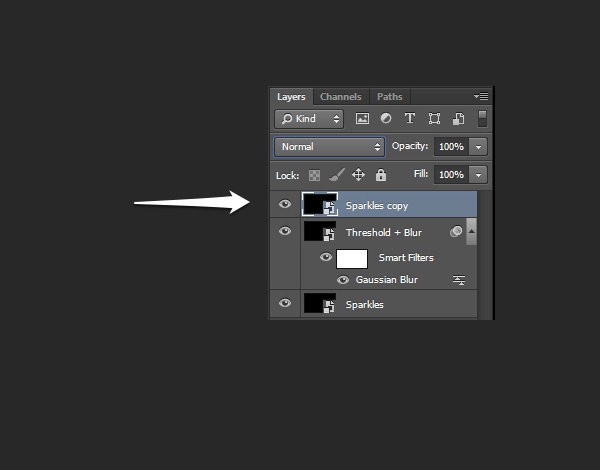
We want to continue building upon the sparkles. Create another duplicate of the original Sparkle layer and place the copy on top of the stack.
Step 2
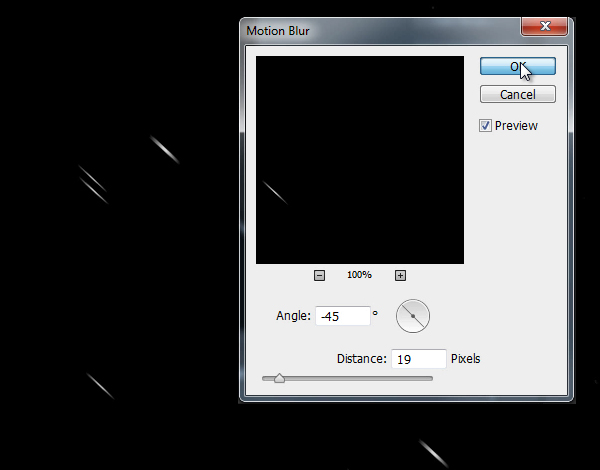
Apply a Motion Blur (Filter > Blur > Motion Blur) with an Angle of -45 degrees and a Distance of 19px.

Step 3
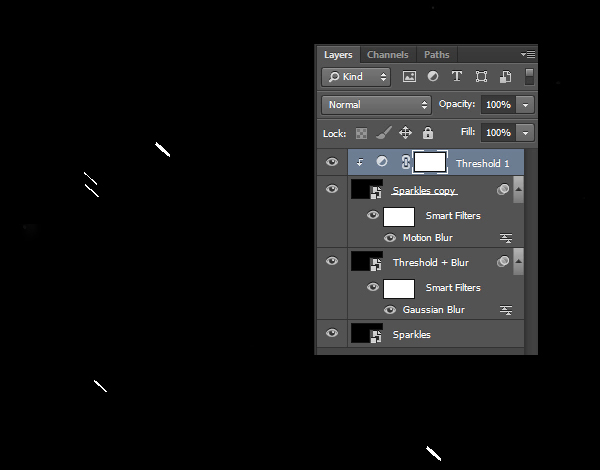
Now, add a Threshold adjustment layer as a clipping layer. Adjust the settings until the blurred lines become more visible.
Step 4
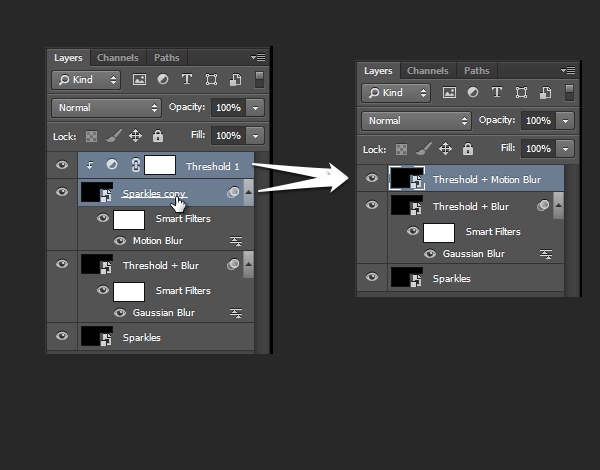
Select both of these layers and Convert to Smart Object. Rename this layer Threshold-Motion Blur.
Step 5
Add another Motion Blur to this smart object to soften the line. This time, increase the Distance to 23px.
Step 6
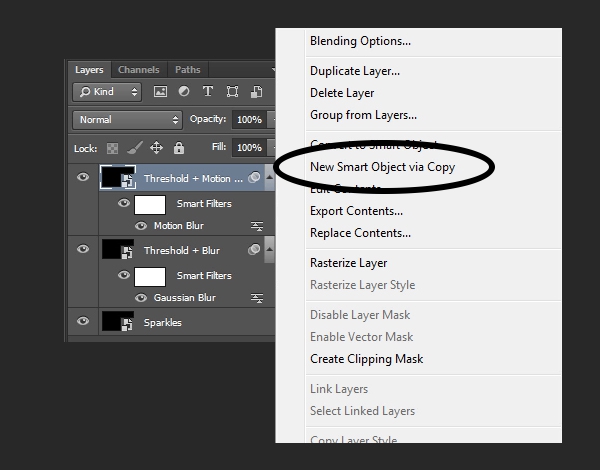
Right-click on the Threshold-Motion Blur layer and select New Smart Object via Copy. This will break the link between the original layer and the layer copy and allow us to change the contents without affecting the other smart objects.
Step 7
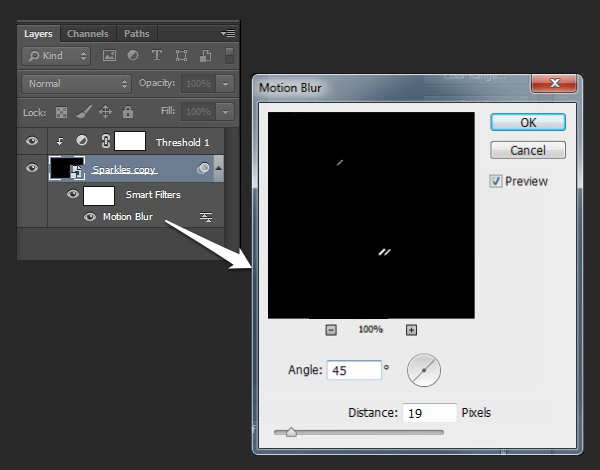
Double-click the new smart object’s thumbnail to open it. Change the Angle of the Motion Blur inside the smart object to 45 degrees. Save and close in order to return to the previous document.
Step 8
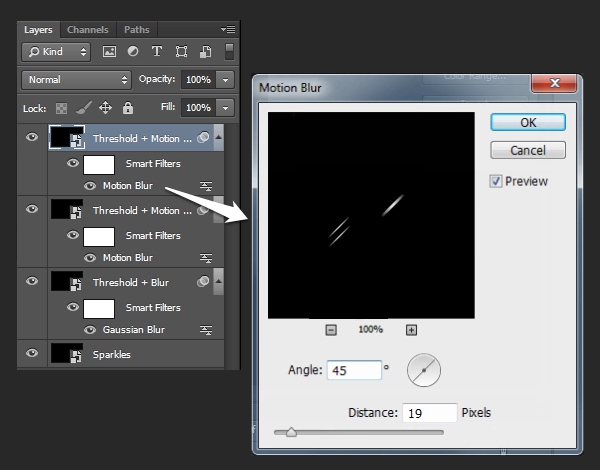
Now, change the Motion Blur Angle on the Threshold-Motion Blur Copy layer to 45 degrees.
Step 9
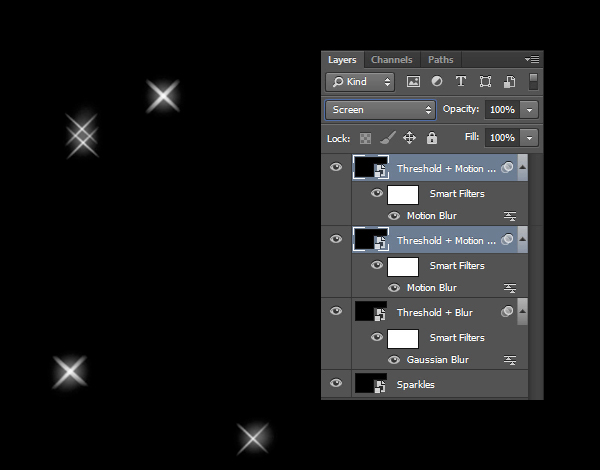
Change the Blend Mode of the top two smart objects to Screen. The result should appear like the image below.
Step 10
We can preview the animated sparkle effect by pressing Spacebar. When you’re done, Save this document and go back to our working document.

9. Building the Scene
Step 4
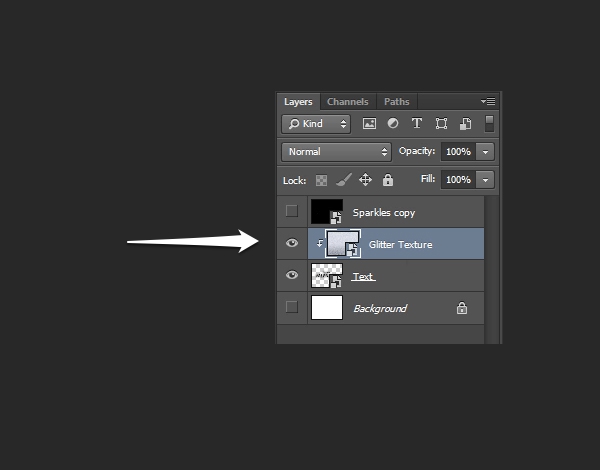
In our working document, make the Glitter Texture layer a clipping layer to the Text layer. This will force the glittering animation to only appear over the text.
Step 2
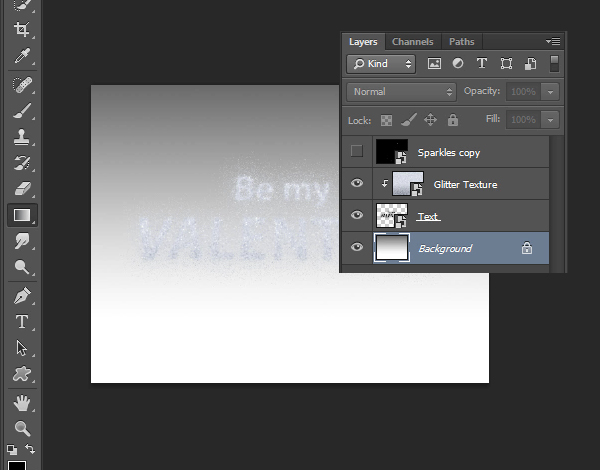
Using the Gradient Tool add a black-to-white gradient to the Background layer.
Step 3
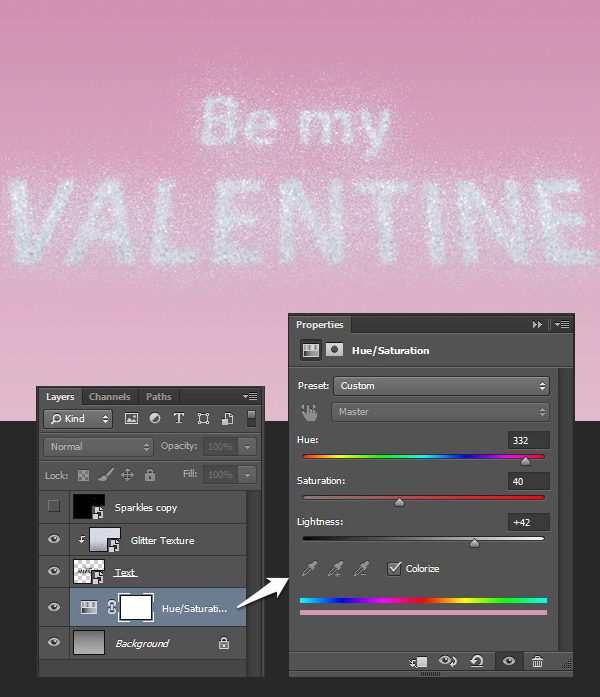
To introduce color to the background, we will be using adjustment layers. Go ahead and add the Hue/Saturation adjustment layer directly above the Background layer. Use the settings shown.
Step 4
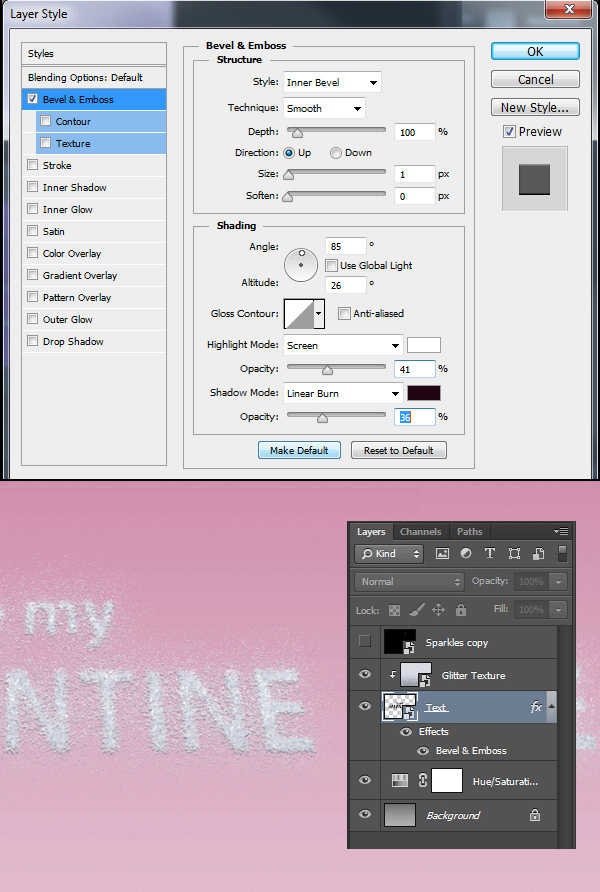
To give the Text layer a little more depth, add the Bevel and Emboss layer style. Use the settings shown.
Step 5
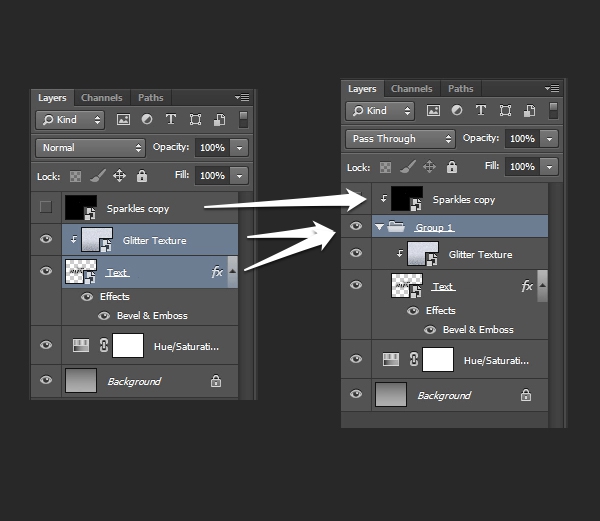
To organize our Layers Panel, select the Text and Glitter Texture layers and Group (Command/Ctrl-G) together. Also, at this time, make the Sparkles layer a clipping layer to the new group.
Step 6
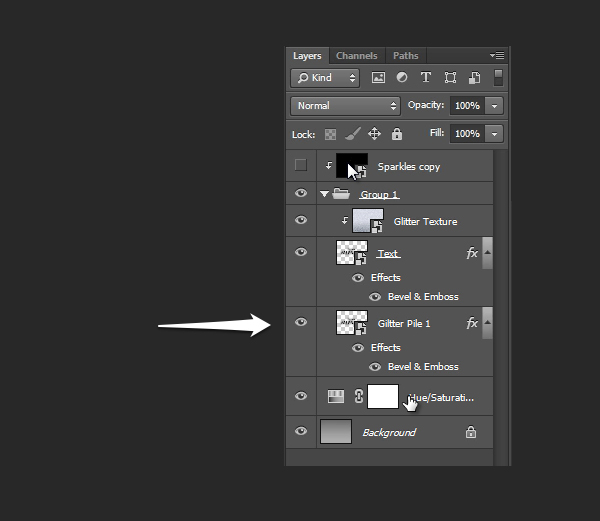
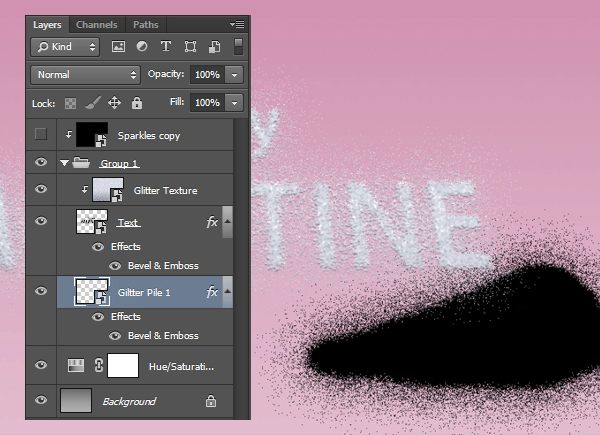
Next, we want to add some piles of glitter around the text. To do this, select the Text layer and Right-click. Select New Smart Object Via Copy. This will break the link between the Text smart objects and allow us to change the contents without changing the other smart objects. Rename this layer Glitter Pile 1 and position as shown in the image below.
Step 7
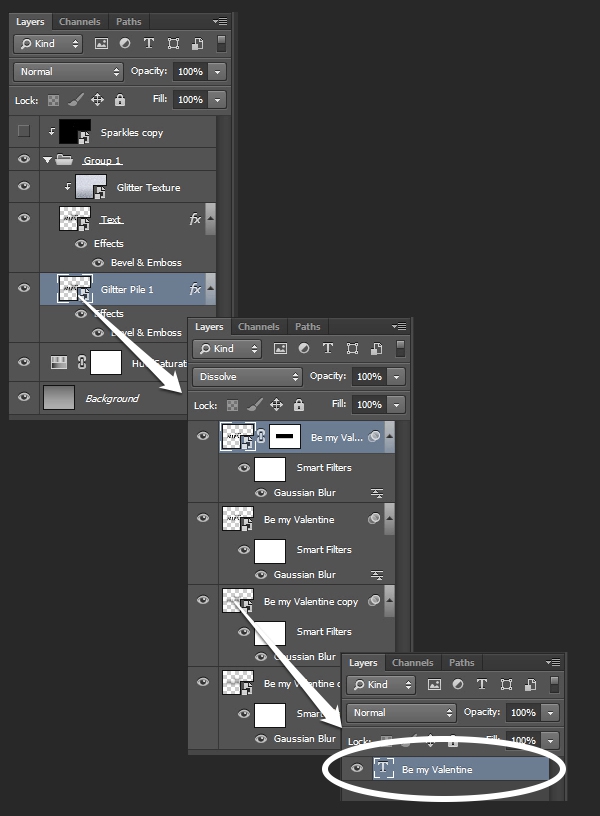
Double-click on the thumbnail to edit the smart object. This will open to another set of smart objects. Double-click one of the thumbnails to access the original text layer.
Step 8
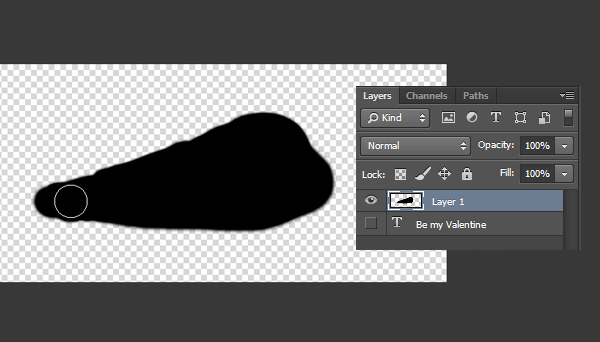
Hide the text layer and use the Brush Tool to draw a blob of black. This will become our glitter pile.
Step 9
Save and Close each smart object document until we get back to our working document. As you can see, we have a new object in our scene. Position this towards the bottom right of our scene.
Step 10
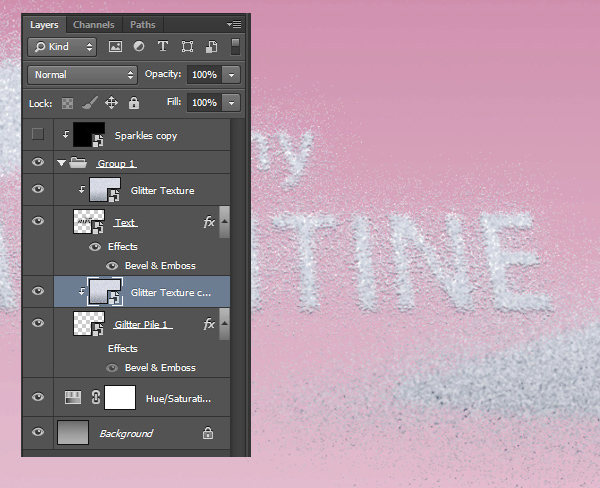
Duplicate (Command/Ctrl-J) the Glitter Texture layer and apply it as a clipping layer to our Glitter Pile 1 smart object.
Step 11
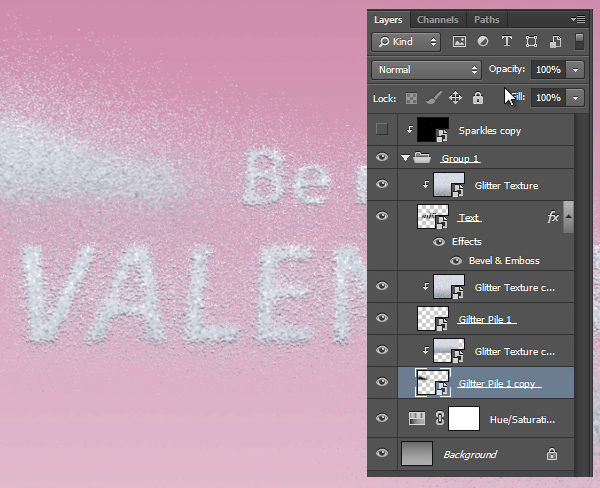
Repeat this technique to create a copy of the glitter pile for the top left of our scene.
10. Finishing the Glitter
Step 1
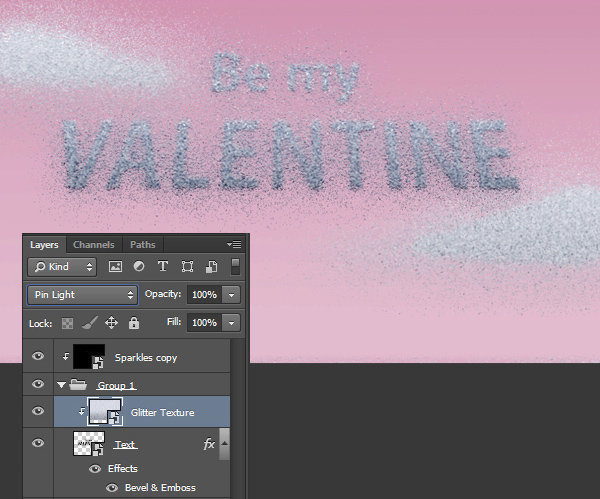
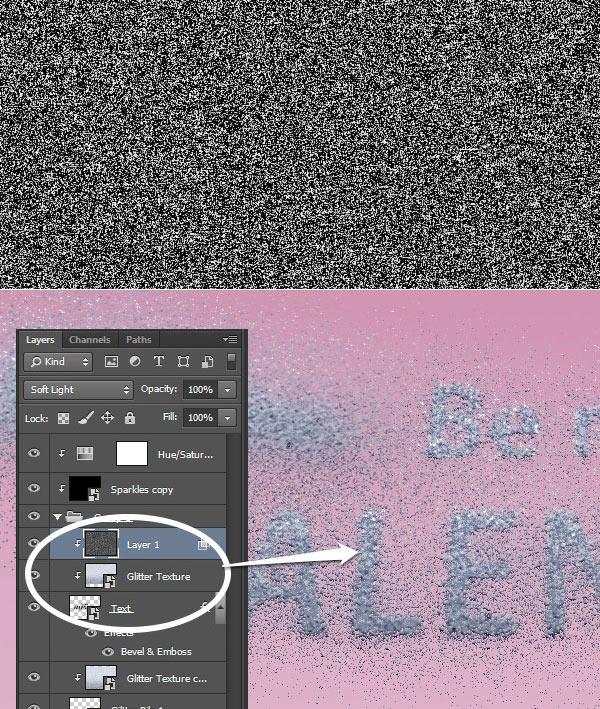
Next, select one of the Glitter Texture smart objects and change its Blend Mode to Pin Light. This will add some detail to the glitter. Repeat this for allGlitter Texture layers.
Step 2
As an optional step, we can add some more detail to the glitter by creating another clipping layer to each instance where the Glitter Texture smart object is used. Just fill a new layer with some heavy noise and use the Blend If sliders to control how the noise blends with the texture. Set the Blend Mode to Soft Light. Repeat this with every instance of the Glitter Texture layers.
Step 3
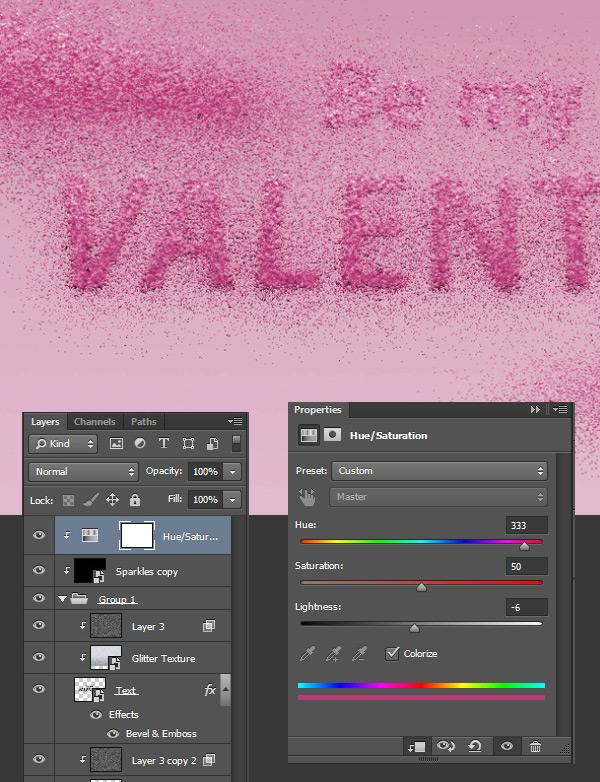
Now, it’s time to adjust the color of the glitter. Add the Hue/Saturationadjustment layer as a clipping layer above the Sparkles layer. Adjust the settings as shown.
Make sure the Colorize option is checked.
Step 4
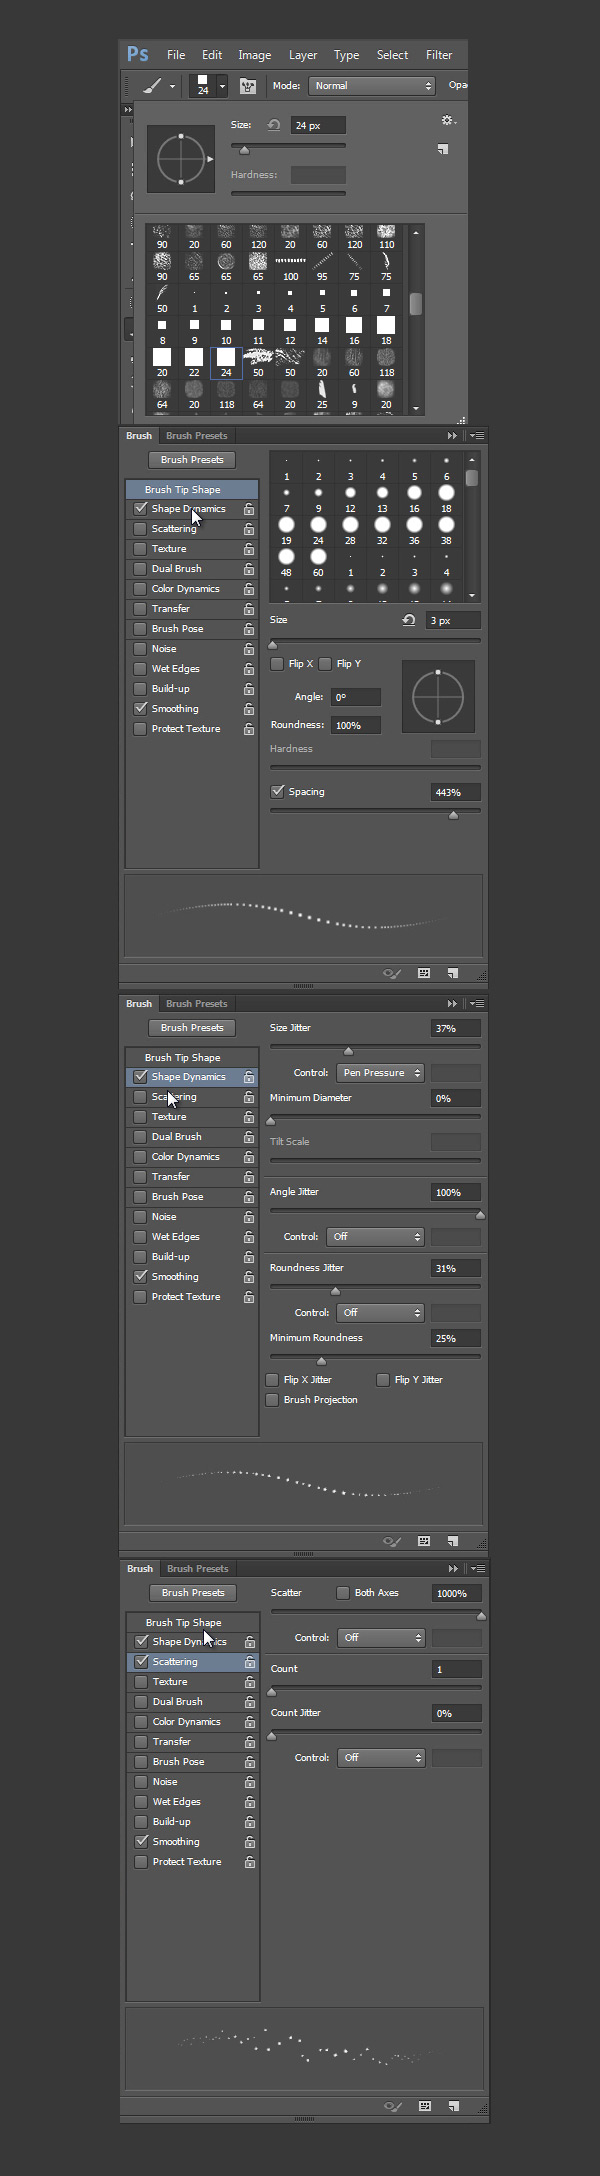
The last thing we can do to the glitter is to add some additional reflected light. We can do this manually by creating a custom glitter brush. Start by selecting a square brush and adjust the settings as shown.
Step 5
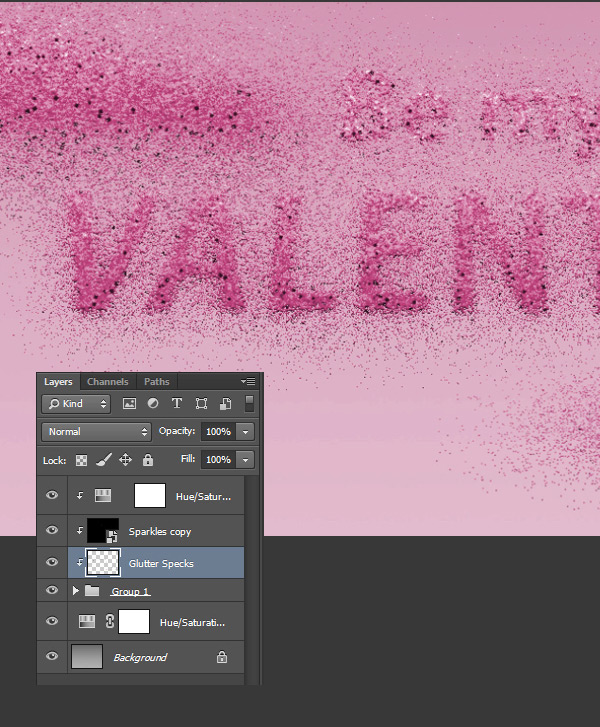
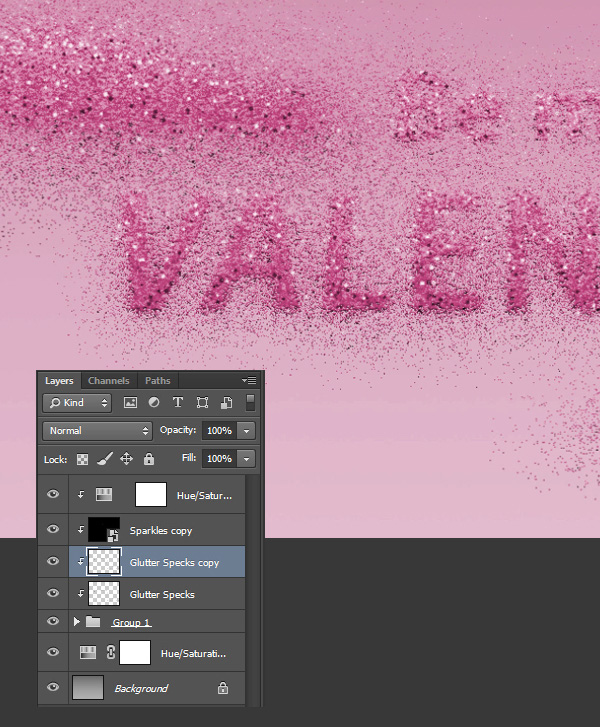
On a new clipping layer to the group layer, paint some dark red glitter specs over our image. Since this is a clipping layer, the specs will only appear over the glitter objects
Step 6
Repeat the previous step using white.
11. Finishing the Scene
Step 1
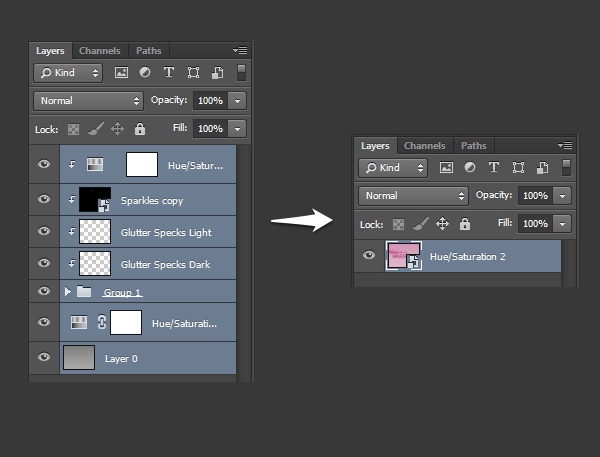
Select all of the layers and Convert to Smart Object. This is necessary as it gives us a single object to animate.
Step 2
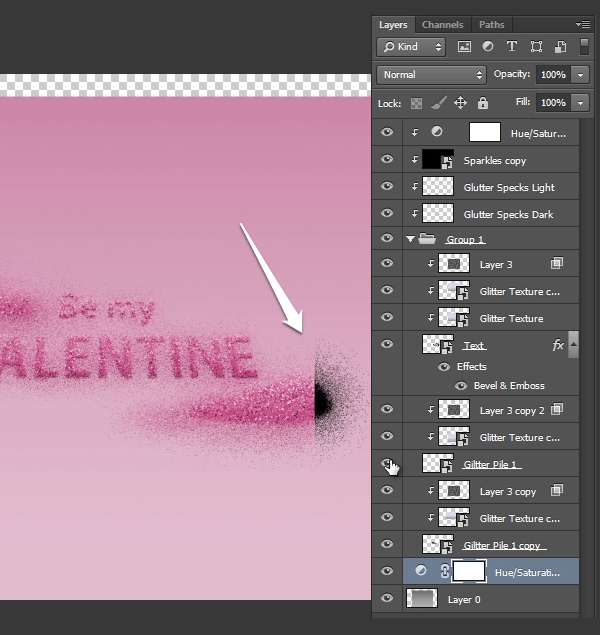
Before we continue, we need to check the smart object to see if everything looks good. Double-click the thumbnail to edit the smart object. Notice that the lower glitter pile appears to not have any texture on part of it. We will fix this in the next step.
Step 3
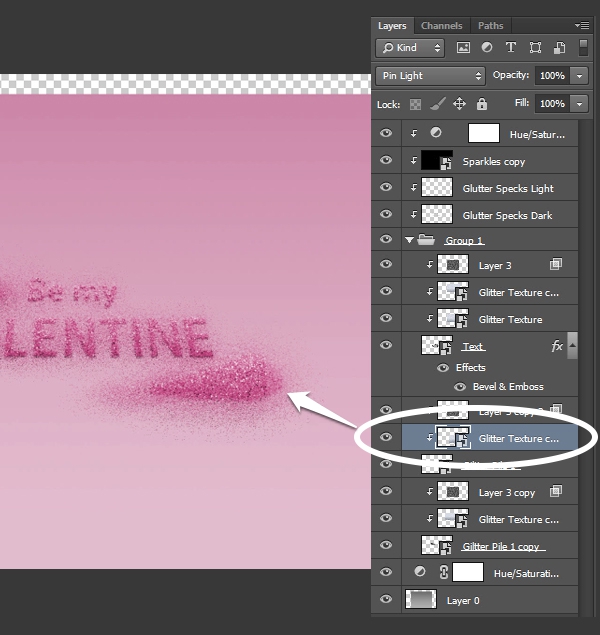
Find the Glitter Texture layer that is applied to the Glitter Pile 1 and adjust it to cover the entire object.
Step 4
Save the smart object document and go back to our working scene.
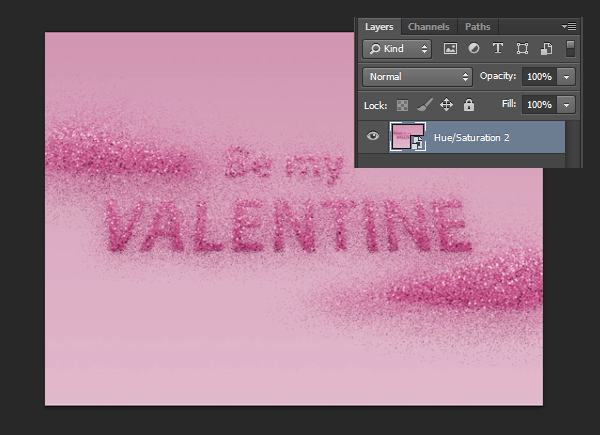
Step 5
To add a vignette, Fill a new layer with dark red and add a Layer Mask.
Don’t forget to make sure the playhead is set to the first fame when adding new layers.
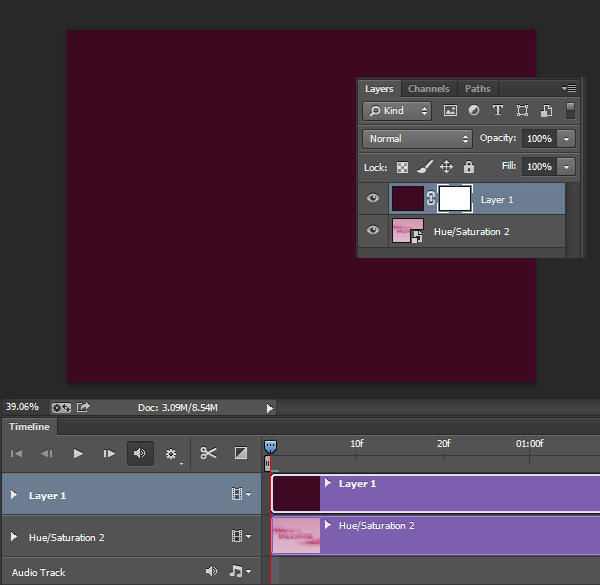
Step 6
Use the Brush Tool to hide the mask around the center of the scene. You can also Scale (Command/Ctrl-T) the make up to help position the vignette.
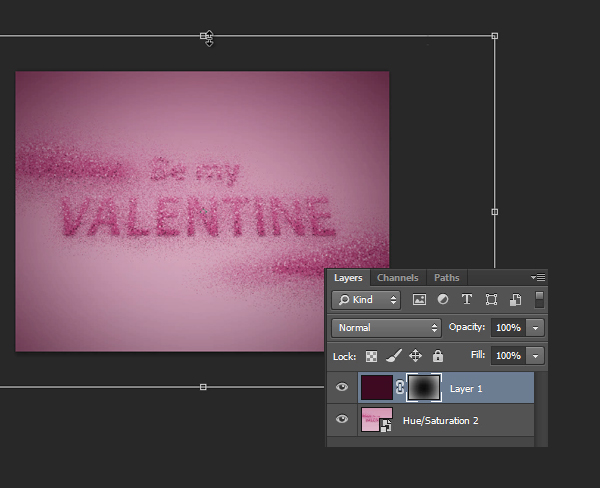
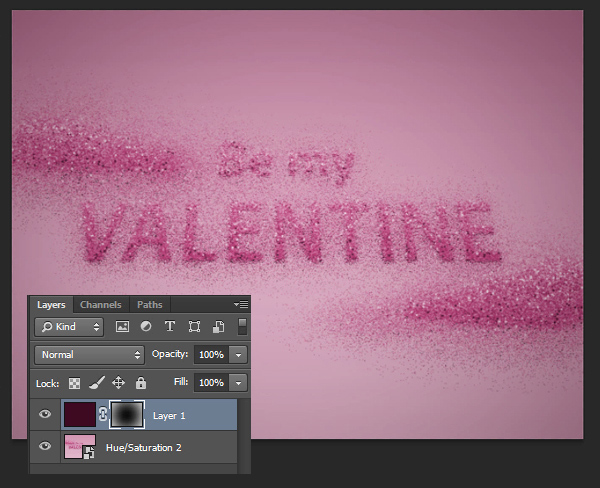
Step 7
To finish the vignette, set the Blend Mode to Multiply and adjust the Opacity as desired.
Step 8
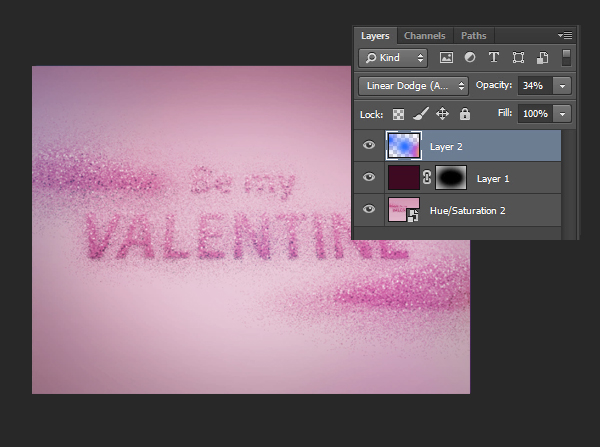
Lastly, we are going to add some lighting effects. On a new layer, use the Brush Tool to add some larger, soft spots of color.
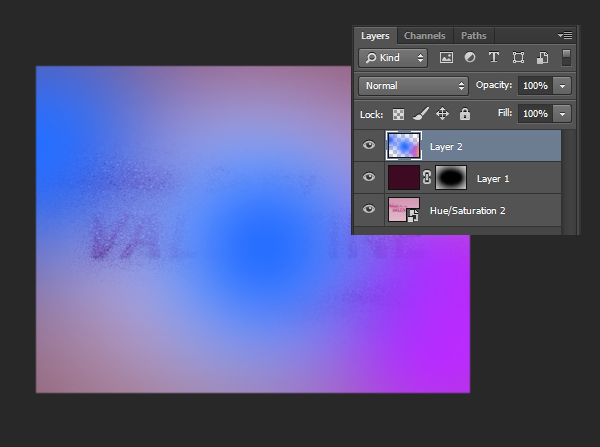
Step 9
Change the Blend Mode to Linear Dodge (Add) and the Opacity to 34%.
12. Animating the Entire Scene
Step 1
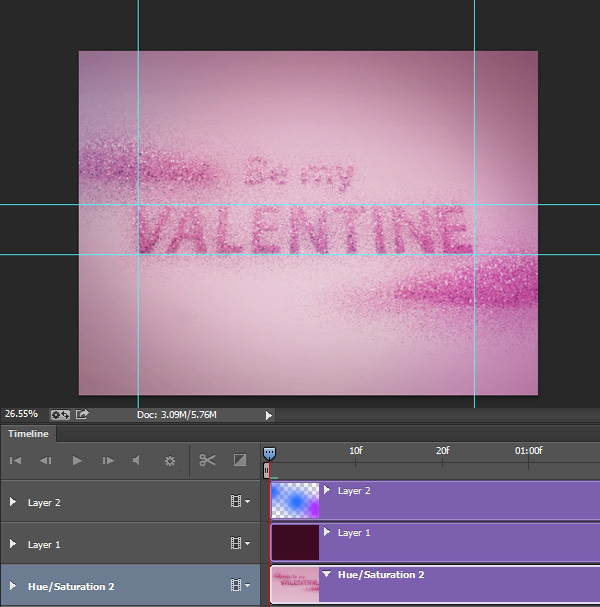
The last thing we want to do is add the illusion that a camera is panning past the scene. This movement will give credibility to the glittering effect. For this animation effect, I’ll be using a technique from Andrew Kramer of Video Copilot.
To start, add some guides around our text. This will help us line everything up later.
Step 2
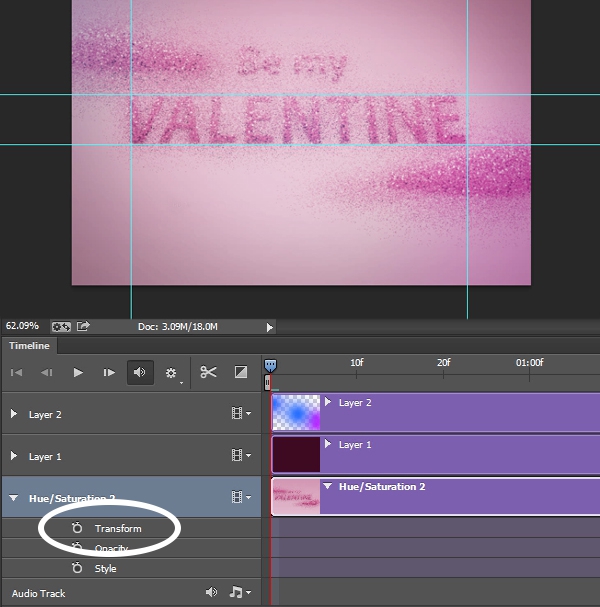
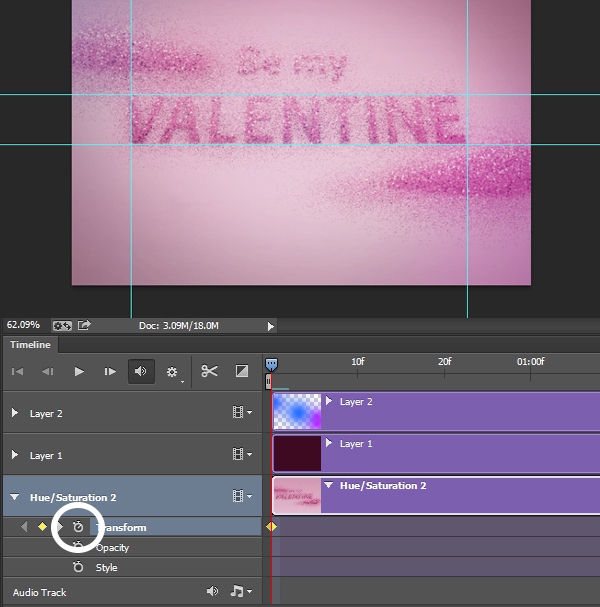
In the Timeline Panel, click the arrow next to our scene layer to access the animation properties. We should see Transform as one of the properties.
Step 3
Make sure the playhead is set to the first frame and click on the stopwatch icon to enable keyframing.
Step 4
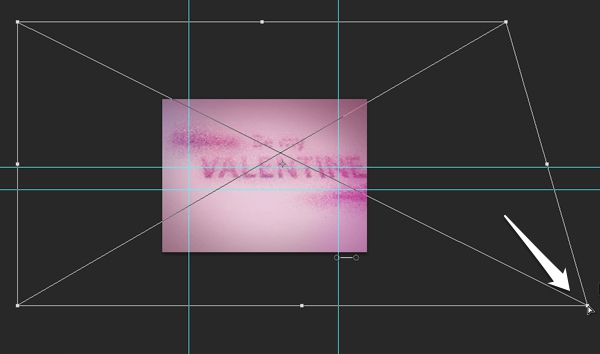
Press Command/Ctrl-T to Transform the scene layer. For this first frame, Command/Ctrl-click the bottom-right handle and drag it out a ways.
Holding Shift will constrain to a straight line.
Step 5
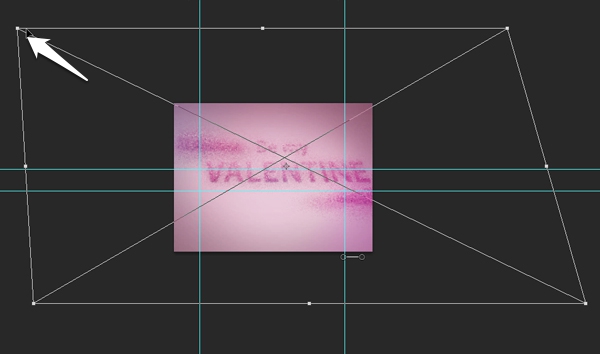
Do the same for the top-left handle, only move it out about half the distance as the bottom-right handle. Press Enter to apply the transformation.
Step 6
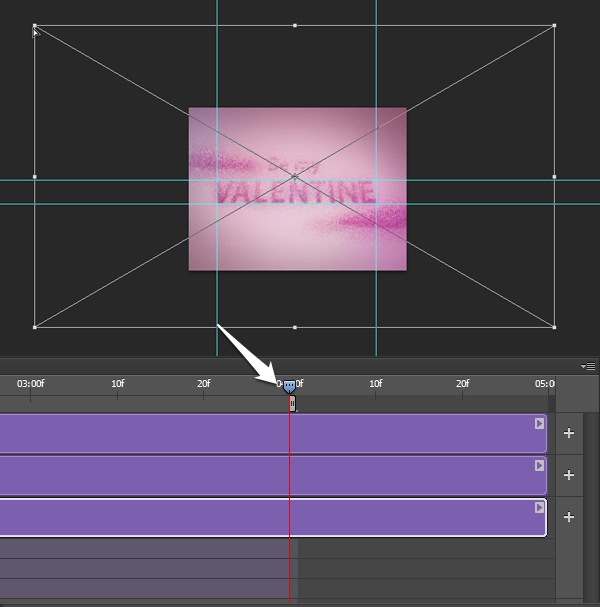
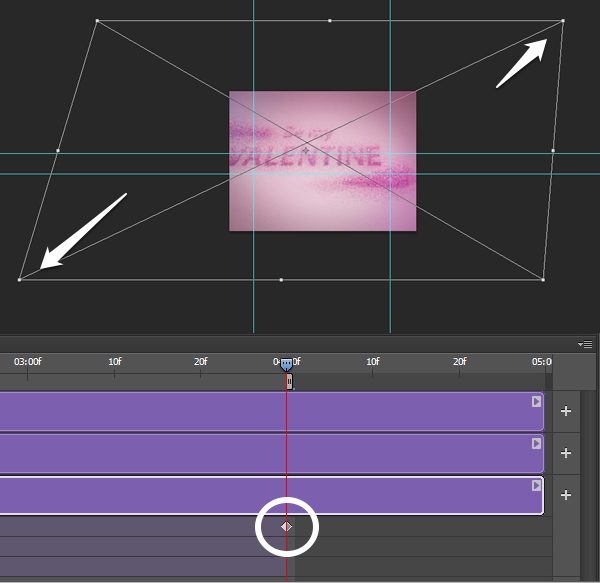
Move the playhead to the last frame and press Command/Ctrl-T to Transformthe scene layer. Drag the same two handles back to their original location so the bounding box appears to be a rectangle. This will reset the transformation.
Do not commit to the transformation, yet.
Step 7
Now, grab the other two handles and move them in opposite directions as the first two. Notice that a keyframe was automatically added to our timeline. Commit to this transformation.
Step 8
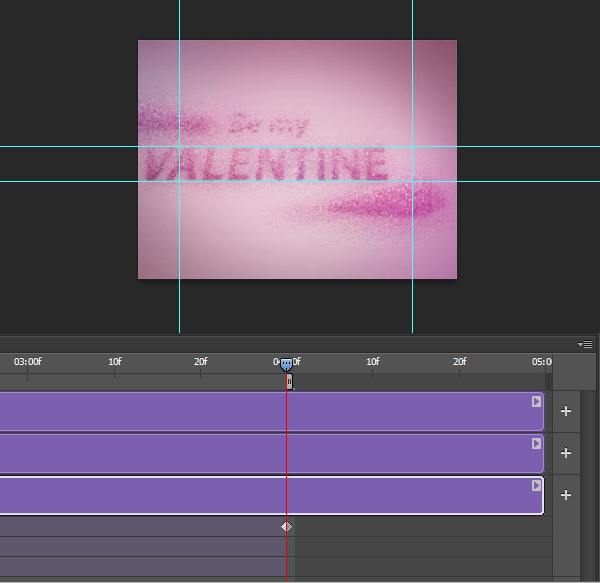
Using the guides we’ve added, position the scene in between the guides, but more toward the left side of the frame.
Step 9
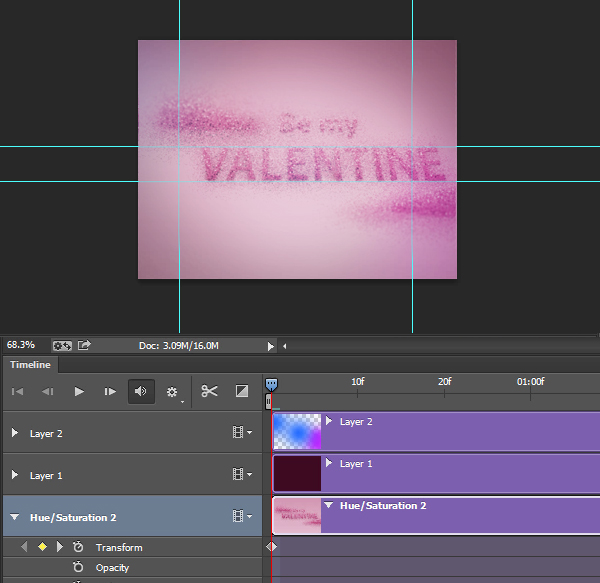
Move the playhead back to the first frame and position the scene layer more toward the right side of the frame.
Step 10
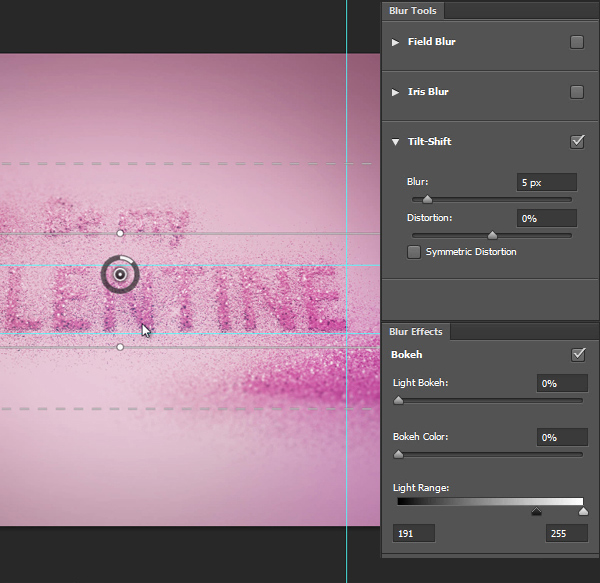
As an optional step, we can add a Tilt Shift (Filter > Blur > Tilt Shift) effect to provide some depth of field. Since we are applying this to a smart object, it becomes a smart filter.
13. Rendering the Final Scene
Step 1
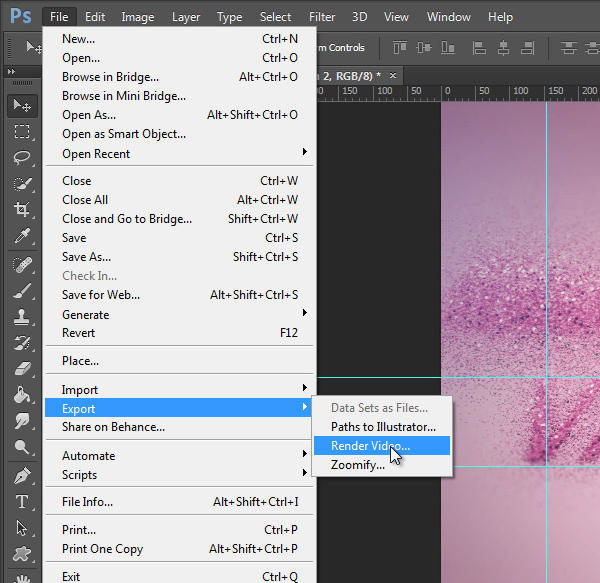
As the final step, we can now render the video to a movie file. Go to File > Export > Render Video.
Step 2
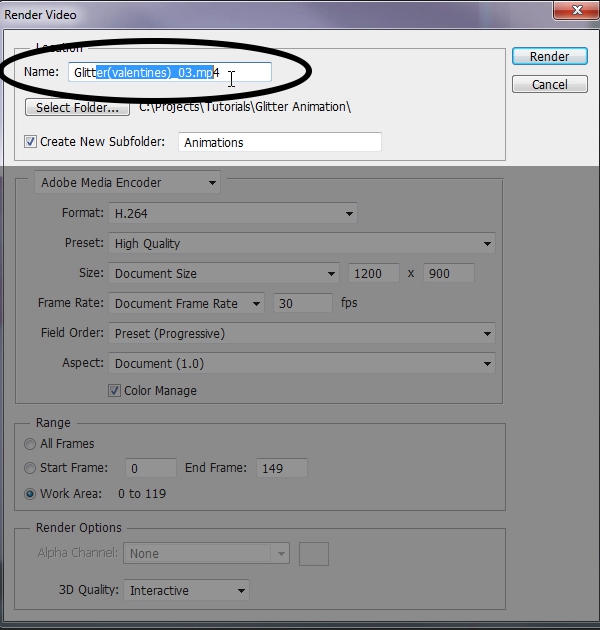
In the Render Video dialogue box there are four sections. In the first section, you can name the files and set the destination to save.
Step 3
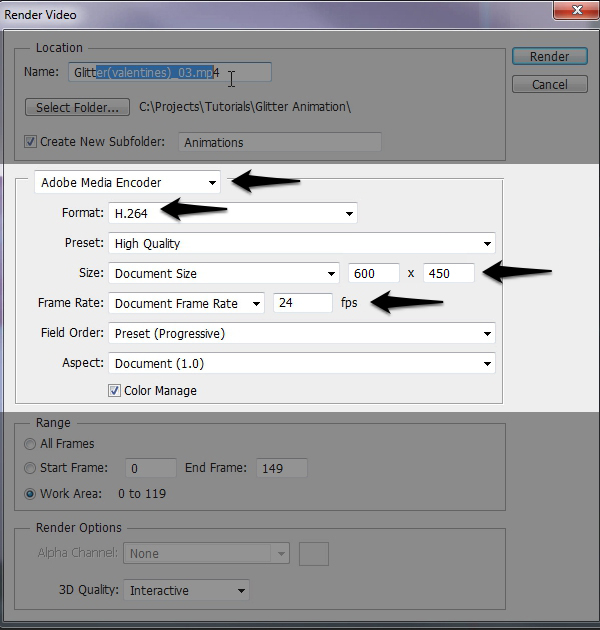
In the second section, select Adobe Media Encoder to enable Photoshop to output the file in a video format. For the Format, I have selected H.264 (feel free to change these settings). Also, feel free to change the Size and Frame Rate. The default Frame Rate was set to 30 fps, but I’ve set it to 24 fps.
Step 4
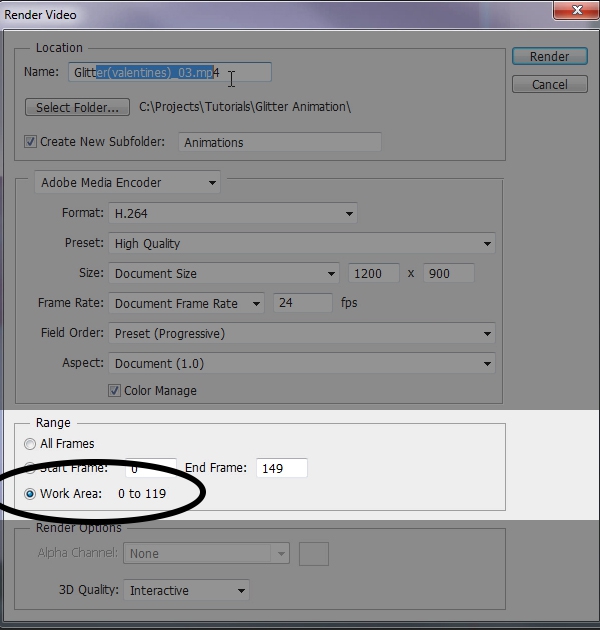
In the third section, make sure that Work Area is selected. We do not need to worry about the fourth section since we are not using 3D in our scene.
Step 5
Lastly, click Render and you’re done. Since we built this entire scene using Smart Objects and Adjustment Layers, we can easily go back and make changes.
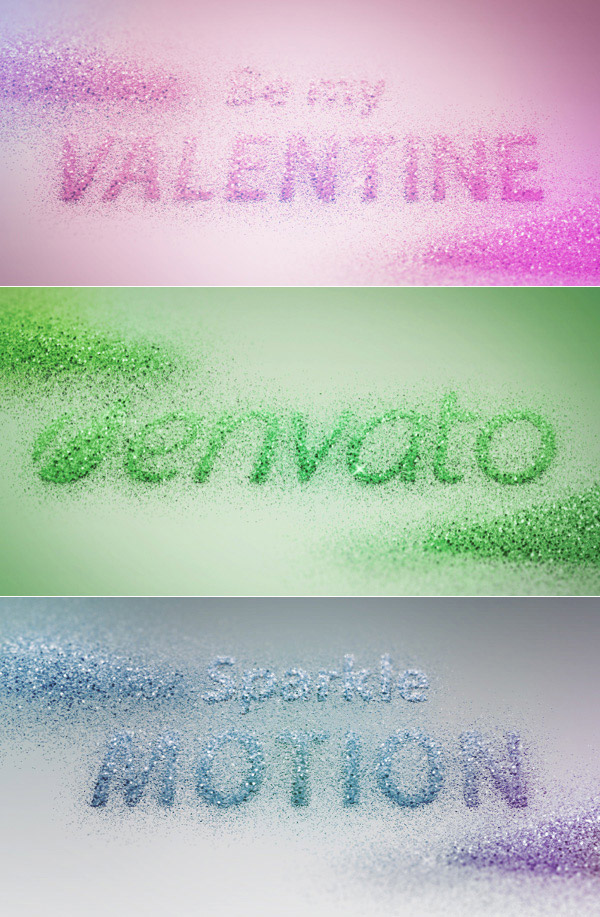
Congratulations! You’re done.
In this tutorial, we’ve learned how powerful smart objects can be—especially in creating a simple text effect. We’ve also learned how to utilize and manipulate smart objects in order to create a complex animation. Hopefully, you can use what you’ve learned here and take smart objects even further in your next project.