Before sharing a document, you’ll want to make sure it doesn’t include any information you want to keep private. You may also want to discourage others from editing your file. Fortunately, Word includes several tools to help inspect and protect your document.
Document Inspector
Whenever you create or edit a document, certain personal information may be added to the file automatically—for example, information about the document’s author. You can use Document Inspector to remove this type of information before sharing a document with others.
Because some changes may be permanent, it’s a good idea to use Save As to create a backup copy of your document before using Document Inspector.
To use Document Inspector:
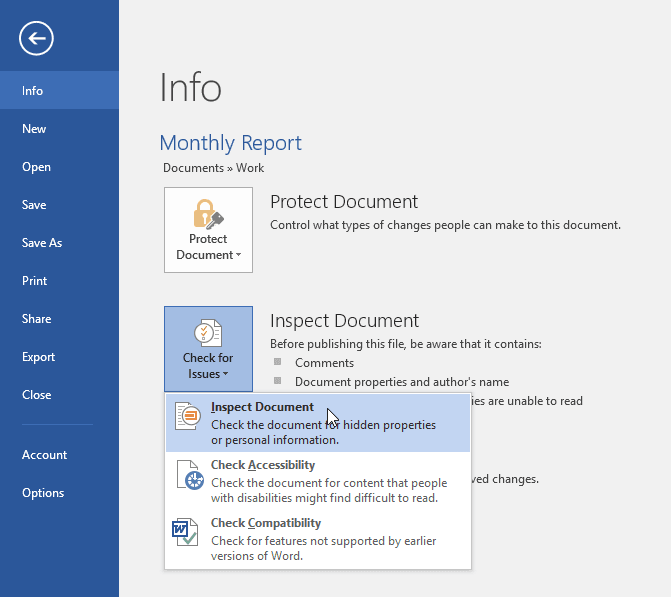
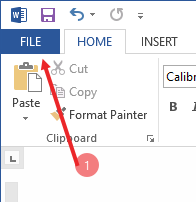
Click the File tab to go to Backstage view.
From the Info pane, click Check for Issues, then select Inspect Document from the drop-down menu.

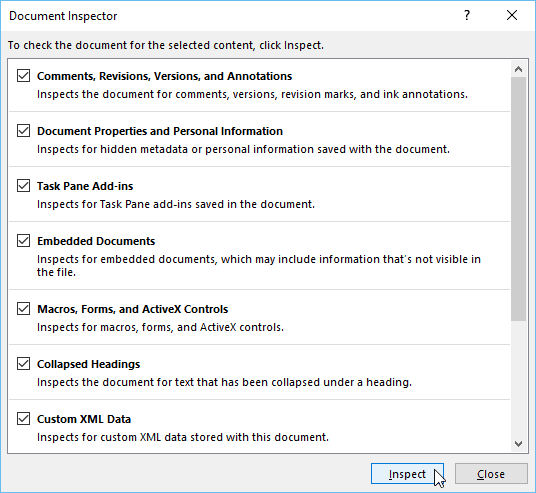
Document Inspector will appear. Check or uncheck the boxes, depending on the content you want to review, then click Inspect. In our example, we’ll leave everything selected.

The inspection results will show an exclamation mark for any categories where it found potentially sensitive data, and it will also have a Remove All button for each of these categories. Click Remove
All to remove the data.
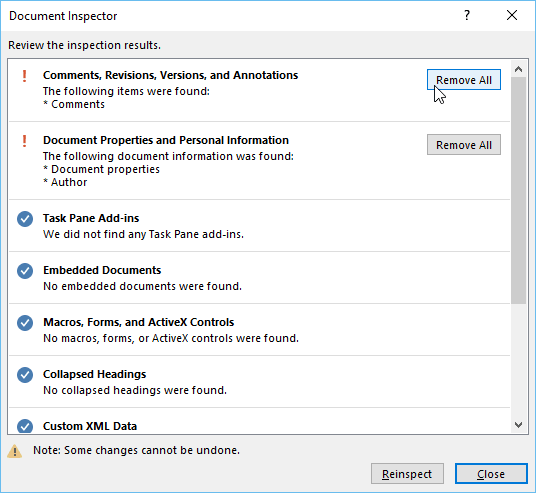
When you’re done, click Close.
Protecting your document
By default, anyone with access to your document will be able to open, copy, and edit its content unless you protect it. There are several ways to protect a document, depending on your needs.
To protect your document
Click the File tab to go to Backstage view.
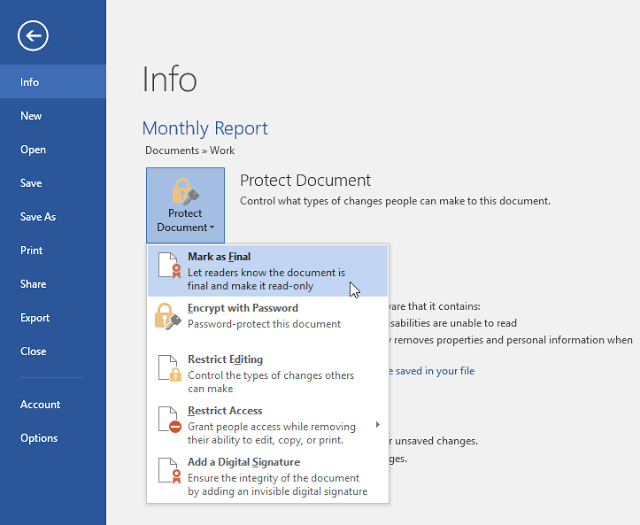
From the Info pane, click the Protect Document command.
In the drop-down menu, choose the option that best suits your needs. In our example, we’ll select Mark as Final. Marking your document as final is a good way to discourage others from editing the file, while other options give you more control if you need it.

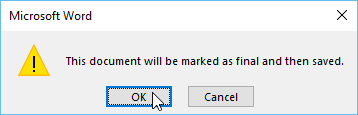
A dialog box will appear prompting you to save. Click OK.

Another dialog box will appear. Click OK.
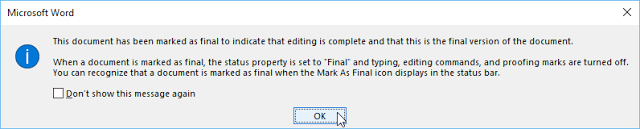

The document will be marked as final. Whenever others open the file, a bar will appear at the top to discourage them from editing the document.


Marking a document as final will not actually prevent others from editing it because they can just select Edit Anyway. If you want to prevent people from editing the document, you can use the Restrict Access option instead.
Restrict Editing MS Word File
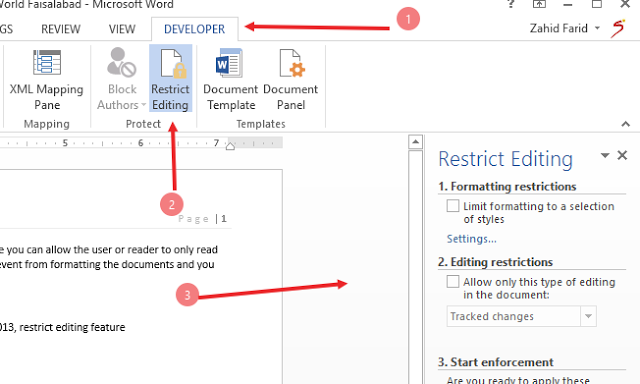
Limit how much can others edit or format a document, for example you can allow the user or reader to only read the document, allow to add comments or fill the form. You can prevent from formatting the documents and you can also force to track the changes made by users.


You can reach Restrict Editing option by three ways.
1 File Button
First of all, click the File tab.
Click Info option.

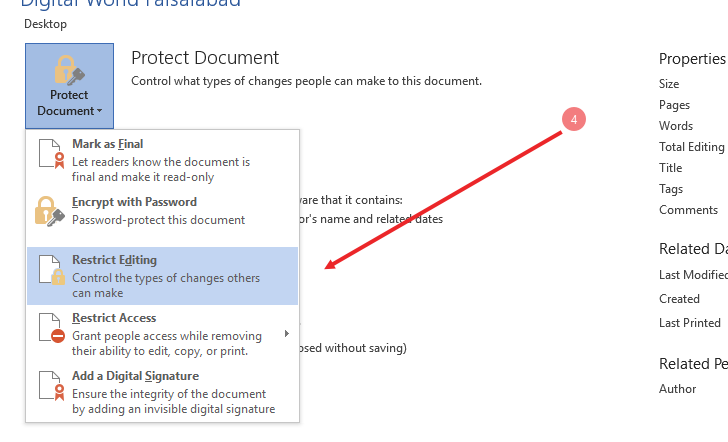
Click Protect Document icon box,

here you can see Restrict editing option, click it
2 Review Tab
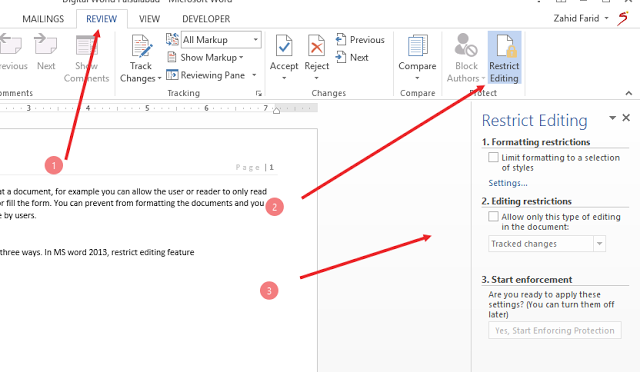
Second way to just to Restrict editing page is through Review tab,
Click on review tab and then click on restrict editing button, see below

How to restrict the document, I will tell you later in this post.
3 Developer Tab
Click on review tab and then click on restrict editing button, see below

If you can not find Developer tab on the ribbon of your Word Document then follow these steps to show this tab
- Go to File tab
- Go to Option
- Word option will appear
- Then on left side click Customize Ribbon
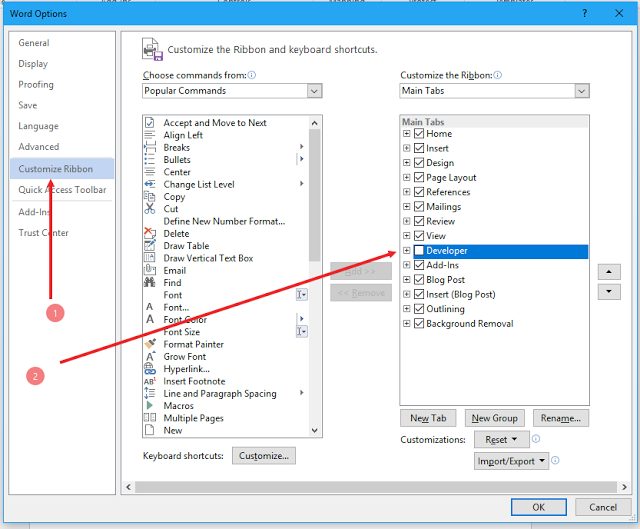

5. on right side you can see Developers tab is not checked, click on box to check it
How to restrict the document.
Formatting Restrictions

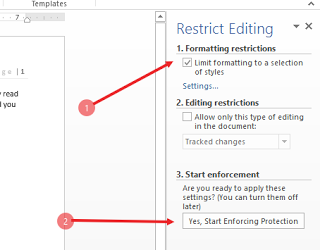
Editing Restriction
check “How to restrict the document, I will tell you later in this post “Allow only this type of editing in the document”. See Below
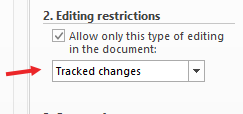

In above figure see drop down arrow button and see the four options
- Tracked changes: Selecting this option will allow the user to make changes in your documents but it will force to track the changes. write can easily see those changes later.
- Comments: selecting this option will allow the users only to make comments on word text.
- Filling the form: Selecting this option will allow the user to fill only form (If document have any form) no other part will be allowed to be changed.
- No Change (Read Only): This option will prohibit the user to make any changes, user can only read the document, Nothing can be made.
How to Stop Protection
- Go to Review tab,
- Click restrict editing
- On right side where you have set your password for Editing Protect, See at the end of the pane, You will see STOP PROTECTION Button, click on it and enter your password that you have entered while setting the protection, click OK and its done, you have successfully disabled editing protection feature.
This feature can help the reader and writer to make more and more of their document safe and protected from unwanted changes.
Protect the MS Document
Keywords: Password Protection, Setting Password to MS Word, Modification Protection on MS Word.

Applies To: Excel 2007 Word 2007 PowerPoint 2007 Access 2007 Publisher 2007 Visio 2007 OneNote 2007 Office 2007 Office 2010 Visio Standard 2007
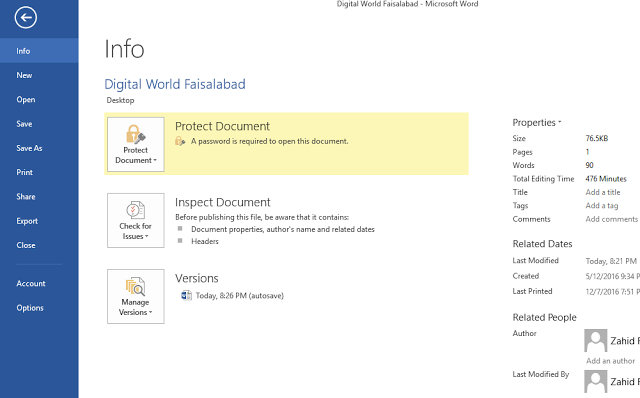
MS has provided password protection facility to its user to protect your file against editing, changing and modificating the text or any thing else. with this facility now writer use it to protect their file and they send it free from any tension.
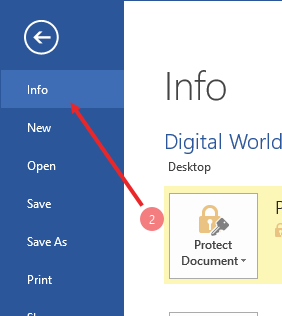
First of all, click the File tab.


Click Info option.
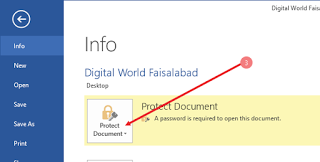
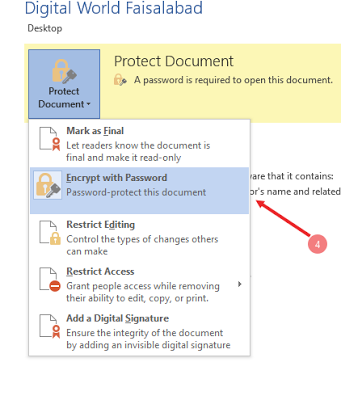
Click Protect Document icon box,
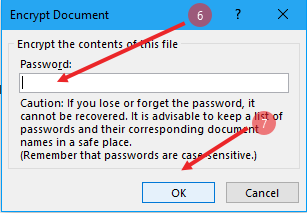
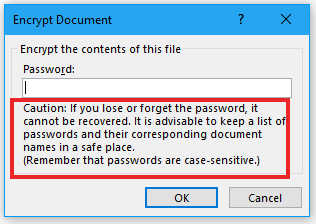
Click Encrypt with Password.

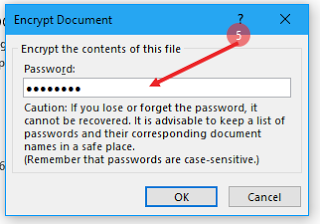
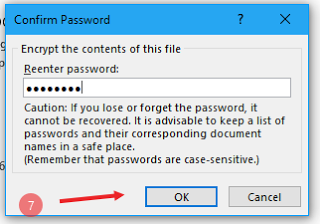
In password box, type your password.

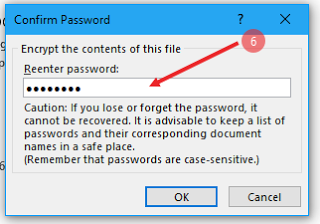
In the Confirm Password box, type the password again.
Click OK.
NOTE:
Please remember that here Password is case-sensitive. You should make sure the status of CAPS LOCK key when you enter a password for the first time. In case of forgetting password, you will not be able to access your data.

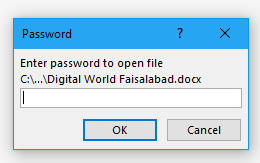
Now whenever anyone want to open your password protected file, it will ask password first to enter the document, See below

Remove Protection from MS Document
Microsoft Office is so popular, because it not only helps to edit words, but also allows users to setup passwords to prevent their important files from accessing. In previous post we learnt how to set up a password to prevent the access of file.
If you have become able to set MS file document password then its easy to remove the password.
You can protect a document by using a password.
First of all, click the File tab.
Click Info option.
Click Protect Document icon box,
Click Encrypt with Password.
In password box, you will see you password dots, See below
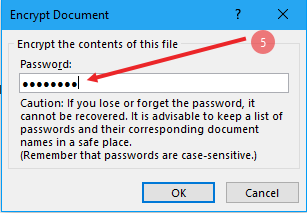

Remove this password and left it blank, then click OK, Password have been removed successfully.