How To Resize Images With Smart Objects
Setting Up The Document
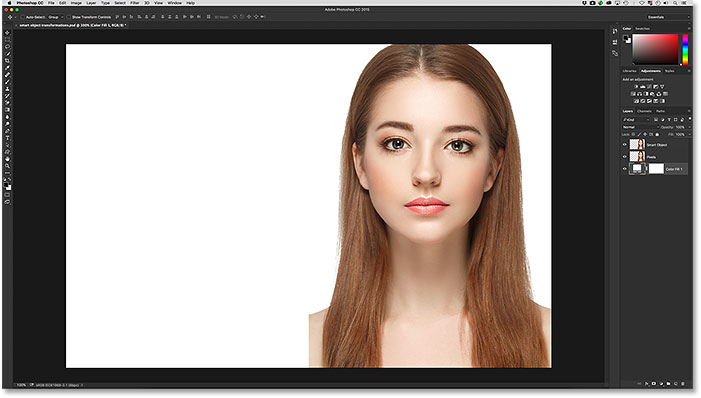
Here’s an image I’ve opened in Photoshop. I downloaded this one from Adobe Stock but you can use any image to follow along:

I’m going to quickly set up my document so we can view a side-by-side comparison between a pixel-based version of the image and the same image converted to a Smart Object. If you don’t want to follow along with this part and would rather jump straight into the details on scaling Smart Objects, scroll down to the next section, “Converting A Layer Into A Smart Object”.
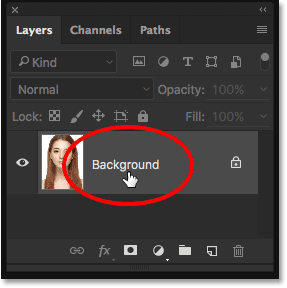
I’ll start by renaming my Background layer in the Layers panel. To do that, I’ll double-click directly on the name “Background”:
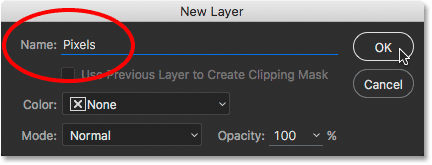
This opens the New Layer dialog box where we can change the layer’s name. By default, Photoshop will suggest changing it to “Layer 0” but I want to use this layer as the pixel-based version of my image, so I’ll rename it “Pixels”. Then, I’ll click OK to close out of the dialog box:
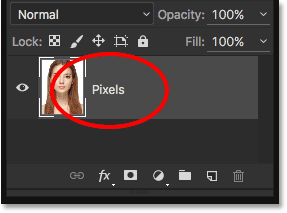
If we look again in the Layers panel, we see that the Background layer is now the “Pixels” layer. So far, so good:
Next, I’ll make a copy of this layer which I’ll use for my Smart Object. To do that, I’ll press and hold the Alt (Win) / Option(Mac) key on my keyboard as I click on the “Pixels” layer and drag it down onto the New Layer icon at the bottom of the Layers panel:
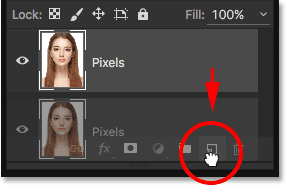
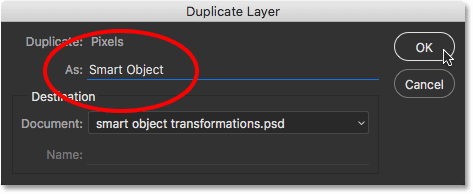
Adding the Alt (Win) / Option (Mac) key tells Photoshop to first open the Duplicate Layer dialog box before making a copy of the layer. This lets us name the duplicate layer before it’s added. I’ll name it “Smart Object”, then I’ll click OK to close out of the dialog box:
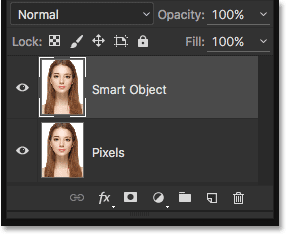
And now, we see in the Layers panel that we have two identical layers; one named “Smart Object” and one named “Pixels”. Don’t let the names fool you, though. At the moment, both are still normal, pixel-based layers. We’ll see how to actually convert a layer into a Smart Object in a moment:
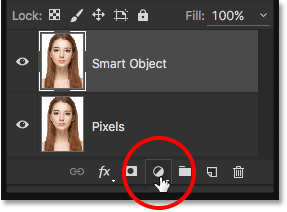
Next, I’ll add a Solid Color fill layer to serve as the background for the document. To add one, I’ll click on the New Fill or Adjustment Layer icon at the bottom of the Layers panel:
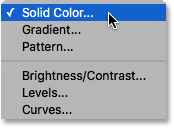
Then I’ll choose Solid Color from the top of the list that appears:
This opens Photoshop’s Color Picker where we select a color for the fill layer. I’ll choose white, then I’ll click OK to close out of the Color Picker:
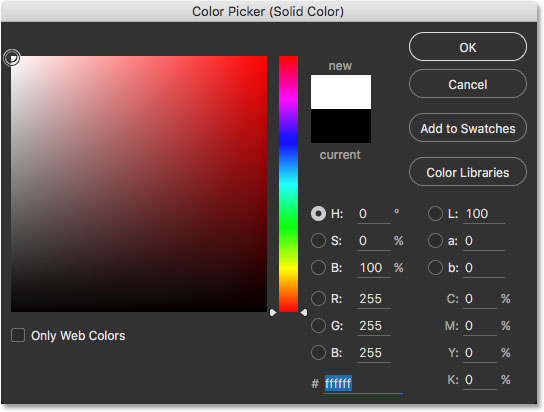
Photoshop adds the new white-filled Solid Color layer (named “Color Fill 1”) to the document. The problem is, I want to use this fill layer as the background for my document, but Photoshop added it above the other two layers. This means that my document is currently filled with white since the fill layer is blocking the layers below it from view:
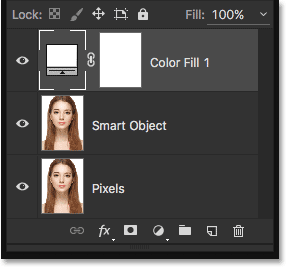
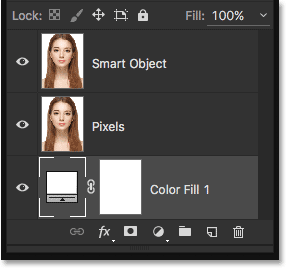
To fix that, I’ll click on the Solid Color fill layer and drag it downward below the other two layers until a highlight barappears below the “Pixels” layer. The highlight bar tells me where the layer will be moved to when I release my mouse button:

I’ll go ahead and release my mouse button, at which point Photoshop drops the fill layer into place at the bottom of the layer stack. The image is now once again visible in the document:
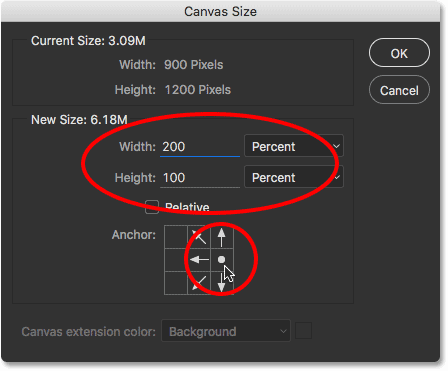
Finally, I need to add more canvas space to my document so I can fit both images side-by-side. To do that, I’ll go up to the Image menu in the Menu Bar along the top of the screen and choose Canvas Size:

This opens the Canvas Size dialog box. I need to add twice as much canvas space to the width of the document, so first, I’ll change the measurement type for both the Width and Height to Percent. Then, I’ll leave the Height set to 100 Percent but I’ll change the Width to 200 Percent. I’ll leave the Relative option unchecked, and finally, in the Anchorgrid, I’ll select the square in the right column, middle row. This tells Photoshop to place all of the extra canvas space to the left of the current canvas. When I’m done, I’ll click OK to close out of the dialog box:
And here, we see the extra canvas space that’s been added to the left of the image. It’s filled with white because what we’re actually seeing is the white Solid Color fill layer below the two image layers:
All I need to do now is move the Smart Object layer over to the left of the Pixels layer. To do that, I’ll select the Move Toolfrom the Toolbar along the left of the screen:
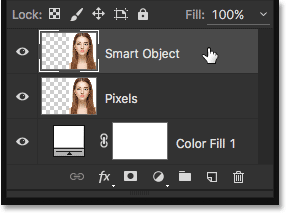
Then, I’ll click on the “Smart Object” layer in the Layers panel to make it active:
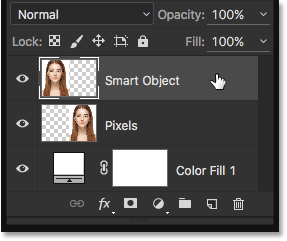
With the “Smart Object” layer selected and the Move Tool in hand, I’ll press and hold my Shift key and drag the layer towards the left until it snaps into place beside the image on the “Pixels” layer. Holding the Shift key as I drag limits the angle in which I can move, making it easier to drag straight across horizontally:

And with that, my Photoshop document is set up for our side-by-side comparison. All we need to do now is convert one of the images into a Smart Object, which we’ll do next:

Converting A Layer Into A Smart Object
To convert a layer into a Smart Object, first make sure you have the correct layer selected in the Layers panel. In my case, I want to convert my “Smart Object” layer, so I’ll click on it to select it (even though in this case, it already was selected):
Like everything we do in Photoshop, there’s a few different ways to convert a layer into a Smart Object, but one of the quickest ways is to click on the small menu icon in the upper right corner of the Layers panel:

Then, choose Convert to Smart Object from the menu that appears:

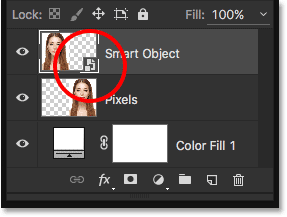
Nothing will seem to have happened with the image, but if we look again in the Layers panel, we see that I now have a Smart Object icon in the lower right of the layer’s preview thumbnail, telling us that the layer has successfully been converted into a Smart Object:
Downscaling A Pixel-Based Image
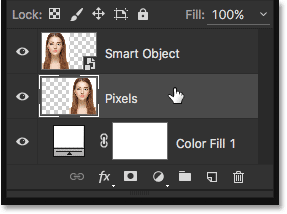
Now that we have our document set up, let’s see what happens when we scale a pixel-based layer and compare it with what happens when we scale a Smart Object. I’ll start with the pixel version. First, I’ll click on the “Pixels” layer to select it:
To scale it, I’ll use Photoshop’s Free Transform command which I can get to by going up to the Edit menu at the top of the screen and choosing Free Transform. I could also press the keyboard shortcut Ctrl+T (Win) / Command+T (Mac). Either way works:

This places the Free Transform box and handles around the image on the right (the pixel-based image):

Let’s say I need to make the image smaller. In fact, I need to lower both the width and the height down to just 10% of their original size. I could resize the image by dragging the Free Transform handles, but since I know the exact size I need, it’s easier to just enter the new values into the Width (W) and Height (H) fields in the Options Bar along the top of the screen.
Since I want to resize the width and height equally, I’ll link the two fields together by clicking the link icon between them. This way, when I change one of the values, Photoshop will automatically change the other one for me:
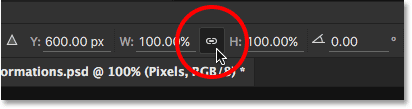
Then, I’ll click inside the Width (W) field and change it from 100% to 10%. Since the link icon was selected, Photoshop automatically changes the Height (H) field to the same value:

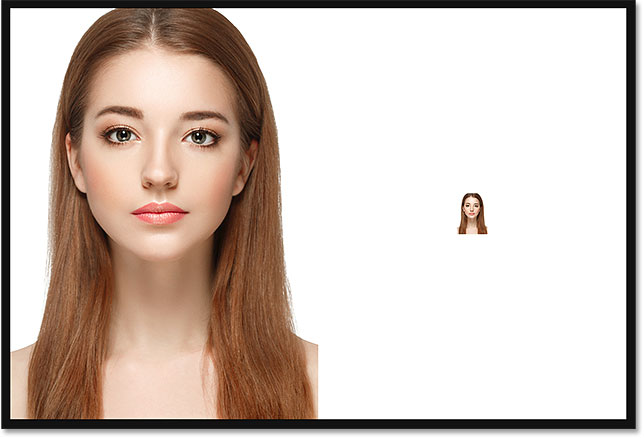
I’ll press Enter (Win) / Return (Mac) on my keyboard once to accept the new values, and then I’ll press Enter (Win) / Return (Mac) a second time to accept the transformation and close out of the Free Transform command. And here, we see that the pixel-based image on the right is now much smaller:
Downscaling A Smart Object
Let’s do the same thing with the Smart Object on the left. I’ll click on it in the Layers panel to select it:
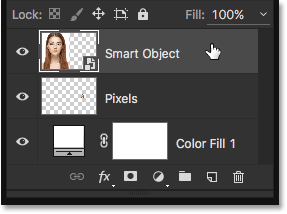
Then, I’ll go back up to the Edit menu at the top of the screen and choose Free Transform:
This time, the Free Transform box and handles appear around the Smart Object on the left:

I’ll scale the Smart Object the same way I did with the pixel-based layer. First, I’ll click the link icon between the Width (W) and Height (H) fields in the Options Bar to link them together:
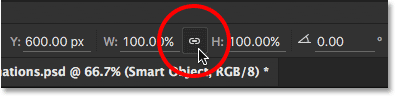
Then, I’ll click inside the Width (W) field and change it from 100% to 10%. Photoshop once again changes the Height (H) field to the same value:

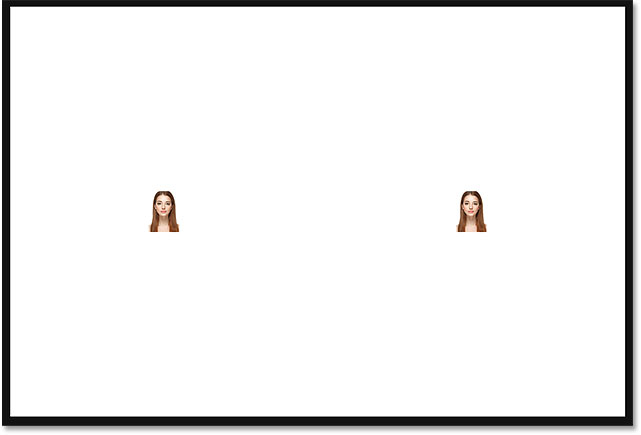
As before, I’ll press Enter (Win) / Return (Mac) on my keyboard once to accept the new values, and then I’ll press Enter(Win) / Return (Mac) a second time to accept the transformation and close out of the Free Transform command. Both versions of the image have now been scaled down to the same size:
Comparing The Results
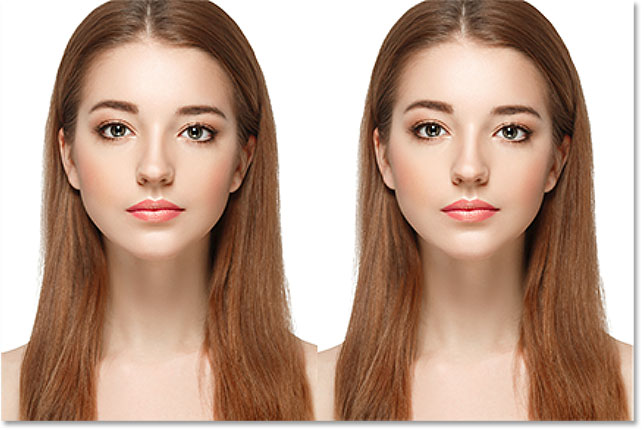
I’ll quickly drag the Smart Object over beside the pixel version and, since the images as so small, I’ll zoom in so we can get a better view of what both images look like at this point. So far, they look identical. The Smart Object version on the left does not show any advantage over the pixel version on the right:
Upscaling A Pixel-Based Image
I’ll zoom back out and move the Smart Object over to where it was originally on the left. So far, we’ve seen no difference between the pixel version of the image and the Smart Object when it comes to downscaling (making them smaller). Let’s see what happens, though, when I now try to upscale them to make them larger. I’ll scale the width and height of each one from 10% of the original size up to 50%.
We’ll start again with the pixel version on the right. I’ll click on the “Pixels” layer in the Layers panel to select it:
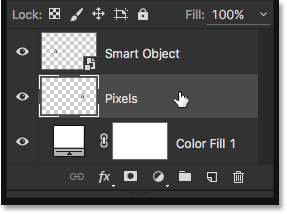
This time, to access Free Transform, I’ll just quickly press Ctrl+T (Win) / Command+T (Mac) on my keyboard which places the Free Transform box and handles around the pixel version of the image.
Notice what we’re seeing in the Options Bar. Even though I scaled the width and height of the pixel version down to 10% a moment ago, both fields are claiming that the image is actually back to being at 100% of its size:
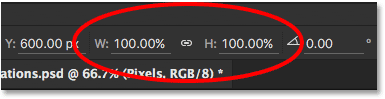
What’s going on here? I can clearly see that the image is much smaller now than it was before, so how can it be smaller and yet not be smaller at the same time?
To understand that, we need to understand what actually happened when I scaled the width and height of the pixel-based image. By scaling them down to 10%, Photoshop had to take 90% of the pixels that made up the width, and 90% of the pixels that made up the height, and throw them away. All of those pixels are now gone. I’ve lost 9 out of every 10 pixels that made up the initial width of the image, and 9 out of every 10 pixels that made up the initial height. In other words, I’m down to just 1% of the pixels I had originally. So when Photoshop tells me now that the width and the height are again at 100%, it’s not saying the image is back to being at its original size. Obviously, that’s not true. Instead, it’s saying that the image is at 100% of its new size after Photoshop threw a bunch of the original pixels away. In this case, it’s at 100% of the remaining 1%.
So, how do I scale the width and height of this image up to 50% of its original size, meaning the size it was back at the beginning? Since the Width and Height fields in the Options Bar are not being very helpful, I’ll need to do a bit of math in my head. I know that I initially scaled the width and height down to 10%, so to increase them to 50%, I’ll need to set the values this time to 500%:

I’ll press Enter (Win) / Return (Mac) on my keyboard a couple of times, first to accept the new values and then to close out of the Free Transform command. And here, we see that the pixel version on the right has been upscaled. We’ll take a closer look at it in a moment:

Upscaling A Smart Object
Next, I’ll do the same thing with the Smart Object, and (spoiler alert!) this is where we start to see the advantage that Smart Objects have over pixel-based images. I’ll select the Smart Object in the Layers panel:
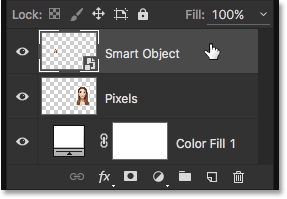
Then I’ll press Ctrl+T (Win) / Command+T (Mac) on my keyboard to quickly choose the Free Transform command, and this time, notice what the Width and Height fields in the Options Bar are telling us. With the pixel version of the image, even though I had downscaled the width and height to 10%, Photoshop was claiming that the image was back to 100% of its size. As we learned, that’s because it was at 100% of its new size after Photoshop threw away most of the original pixels.
Yet with the Smart Object, we’re seeing something very different. Instead of claiming that the image is back to 100%, both the Width and Height fields are still showing 10%, as if Photoshop somehow knows that the Smart Object is currently being displayed at something different from its actual size:
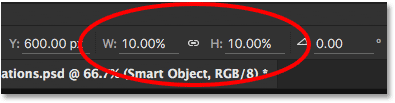
In fact, that’s exactly what’s happening. Unlike the pixel version of the image where Photoshop had to throw away pixels to make it smaller, Photoshop did not throw anything away when it resized the Smart Object. In fact, it didn’t touch the original image at all. Instead, it simply resized the Smart Object itself (the container holding the image), and then the Smart Object was redrawn from the untouched original image inside of it.
So what makes Smart Objects so special? Why is it okay to resize a Smart Object but not okay to resize a pixel-based image? The reason is that images are made of pixels, but Smart Objects are not. They’re just virtual containers. When we edit a regular image, we cause permanent damage to its pixels with each new edit. But because Smart Objects are virtual, they don’t have the same limitations. In fact, Smart Objects are entirely indestructible! You can resize them, stretch them, squeeze them or warp them any way you like, and because they’re just virtual containers, they can always return to their original size and shape at any time without any loss in quality.
Photoshop remembers the current state of the Smart Object, which is why the Width and Height fields in the Options Bar are still showing values of 10%. Photoshop knows that the Smart Object is not actually smaller than it was before; it’s simply being displayed at a smaller size, at least until we change it.
So how do I change it? How do I upscale the width and height of the Smart Object from 10% to 50% of its original size? Easy! Unlike with the pixel version, there’s no need to do any math in my head. All I need to do is change the values in the Width and Height fields from 10% to 50%:

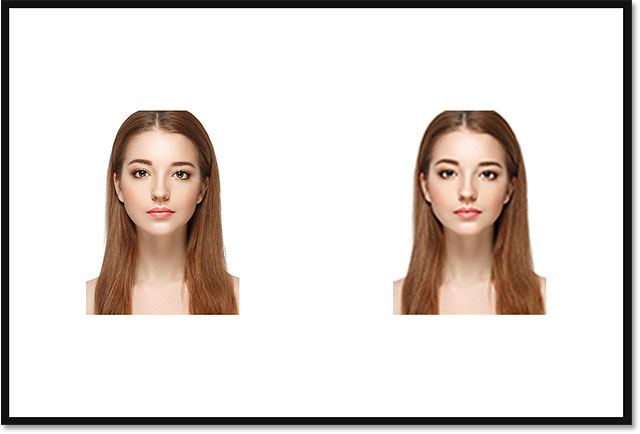
Once again, I’ll press Enter (Win) / Return (Mac) on my keyboard a couple of times to accept the new size and close out of Free Transform. Both versions of the image have now been upscaled:
Comparing The Results
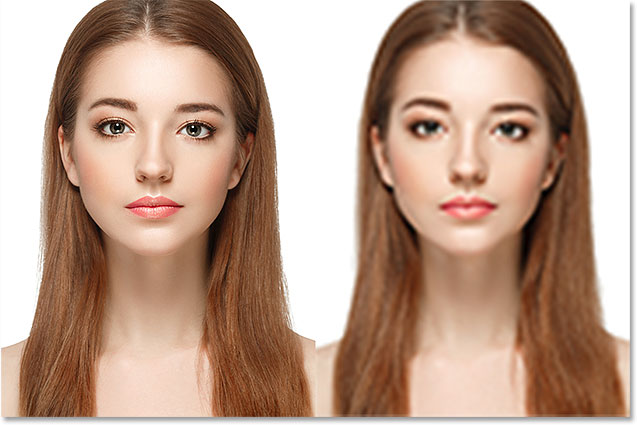
Let’s take a closer look at the results. I’ll drag the Smart Object version over beside the pixel version, and here we can clearly see that the pixel version on the right did not survive the upscaling very well. It looks soft and blurry, and it’s missing much of the original detail. That’s because all Photoshop could do with it was take the pixels that remained after the initial downscaling and make them bigger. It couldn’t restore any of the detail that was lost.
By comparison, the Smart Object version on the left looks good as new, as if the initial resizing never happened. That’s because every time we edit a Smart Object, Photoshop redraws it from the original image embedded safely inside of it. Since the Smart Object is being redrawn from the original image data each time, there’s never any loss in quality; every edit looks as good as the first:
Viewing The Embedded Image Inside The Smart Object
If you ever want to view the original image inside your Smart Object, you can. All you need to do is double-click directly on the Smart Object’s thumbnail in the Layers panel:

The image will open in its own separate document:
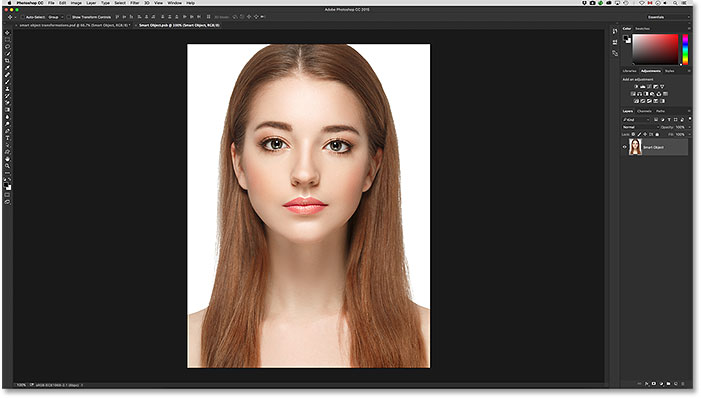
There’s many reasons why you might want to view or access the original image and we’ll look at some of them in other tutorials. For now, since we don’t really need to do anything with it for our purposes here, I’ll simply close the document by going up to the File menu at the top of the screen and choosing Close:

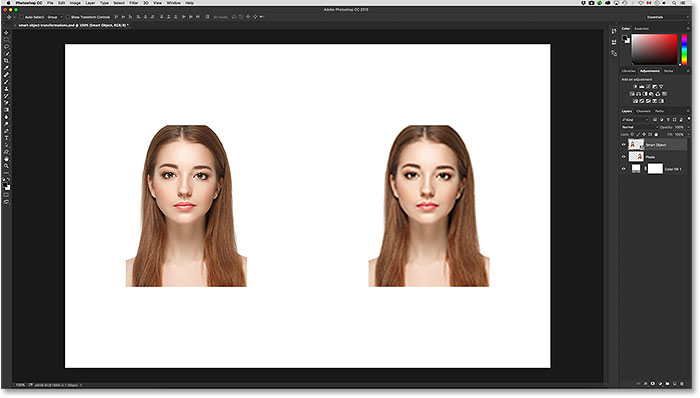
This returns me to my main document:
Upscaling The Images Back To Their Original Size
Finally, let’s see what happens when we try to upscale the two versions of the image back to their original size. I’ll start again with the pixel version by selecting the “Pixels” layer in the Layers panel:
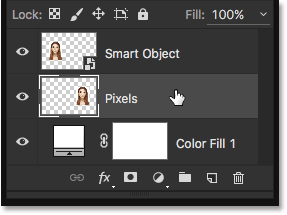
Then I’ll press Ctrl+T (Win) / Command+T (Mac) on my keyboard to bring up the Free Transform command, and notice once again in the Options Bar that the Width and Height values for the pixel version are back to 100%. Again, that’s not because Photoshop thinks the image is back to the size it was at initially. It’s because the image is currently at 100% of its new size after upscaling the width and height to 50%:

To upscale the pixel version back to its initial size, I’ll again need to do some math in my head. I know that the width and height are currently at 50%, so to get them back to 100%, I’ll need to double the width and height values by setting each one to 200%:

I’ll press Enter (Win) / Return (Mac) on my keyboard a couple of times, and here we see the pixel version on the right now upscaled back to its original size. We’ll look more closely at the result after we upscale the Smart Object:

Next, I’ll click on the Smart Object in the Layers panel to select it:
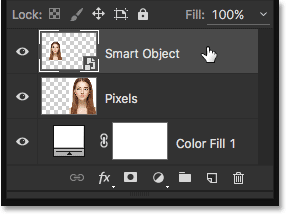
I’ll press Ctrl+T (Win) / Command+T (Mac) on my keyboard to bring up the Free Transform command, and once again we see something very different from the pixel version. The Width and Height values in the Options Bar are still showing 50%, and as we’ve learned, that’s because Photoshop remembers the current state of the Smart Object; it knows that the Smart Object is being displayed at half of its actual width and height:
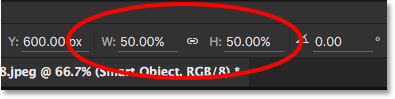
Just as before, changing the size of the Smart Object is easy. To upscale it back to its original size, all I need to do is change the Width and Height values from 50% to 100%:
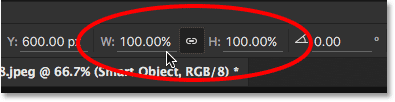
I’ll press Enter (Win) / Return (Mac) on my keyboard a couple of times, first to accept the new values and then to close out of the Free Transform command. And here, we see both versions of the image now upscaled back to the size they were at the beginning of the tutorial:

Even in this rather small screenshot, we can clearly see the difference in quality between the Smart Object on the left and the pixel version on the right, but if you’re following along with your own image in Photoshop, the difference on your screen will be even more noticeable. The pixel version looks terrible, and again, it’s because back when we initially downscaled the image to just 1% of its original size (10% of the width and 10% of the height), we lost 99% of the original pixels, and all of those lost pixels meant lost detail. To upscale the width and height, first to 50% and then back to 100% of the original size, all Photoshop could do was take that remaining 1% detail and make it bigger. To its credit, Photoshop was able to do a few tricks to smooth things out and make the upscaled image look as good as possible. But with so little detail left to work with, “as good as possible” still looks terrible.
The Smart Object, on the other hand, looks good as new! Since Smart Objects are virtual, indestructible containers, and Photoshop redraws them from the embedded original image each time we make a change, all Photoshop had to do was return the Smart Object back to its original size and then redraw it from the original image. The result looks just as good as if we had never resized the image at all.
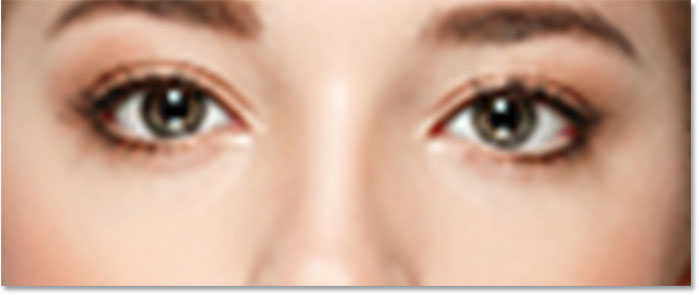
To really see the difference between the pixel version and the Smart Object at this point, here’s a few close-up shots for comparison. First, here’s how soft and blurry the woman’s eyes now look like in the pixel version:
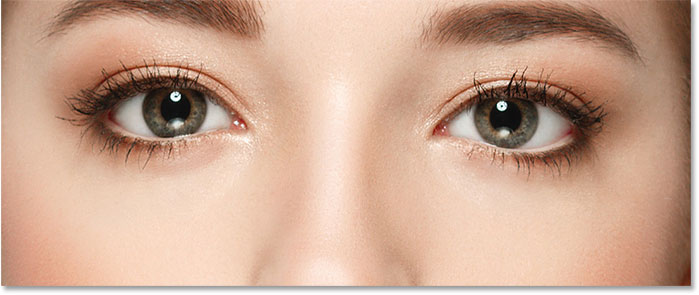
Compare that with the same area from the Smart Object which looks crisp and sharp:
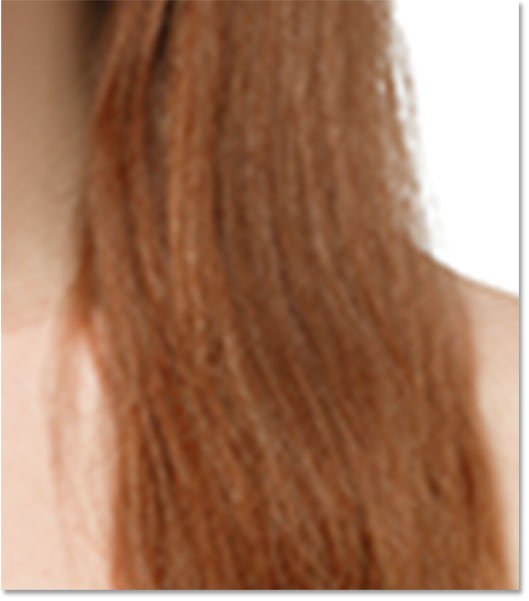
Another place we can easily see a difference is in the woman’s hair which, in the upscaled pixel version, has now lost most of its detail:
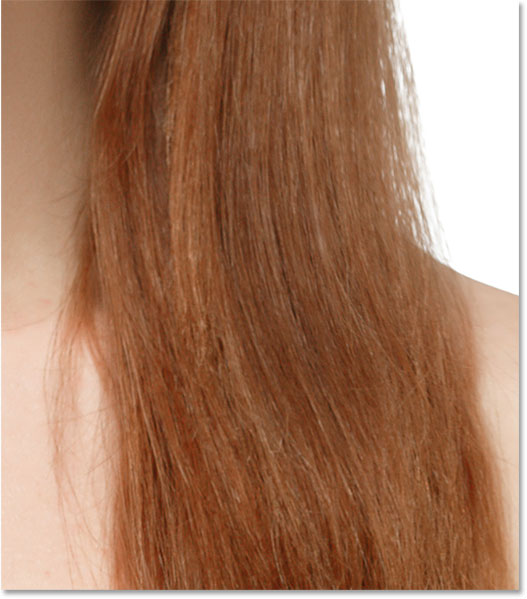
Yet even though we downscaled the Smart Object to just 1% of its original size before upscaling it back to 100%, the hair has not lost any detail at all:
Going Beyond The Original Size (And Why You Should Avoid It)
Before we finish up, something important to keep in mind is that while Smart Objects clearly have an advantage over pixel-based images when scaling and resizing them, the advantage only applies as long as you keep the Smart Object at, or smaller than, its original size. There’s no advantage when trying to scale a Smart Object larger than its original size.
By going beyond 100%, you’re asking Photoshop to create detail that simply isn’t there, just like with pixel-based images. And since Photoshop can’t do that, all it will do is take the original detail and make it bigger, just like with a pixel-based image. It won’t matter if you’ve converted the image to a Smart Object or not; the result will be the same. So, to benefit from Smart Objects, make sure you don’t go beyond the original size of your image.