Summary
Toolbars can be very useful in SPSS. They allow users to do a lot of stuff with a single mouse click. However, some users may feel there’s some limitations to their default configuration. An ideal way to get around these is to assemble your own toolbar.
Some limitations of standard toolbars
- Incompatibility: you can use the standard toolbars only in the windows they were designed for. For example, you can’t have the syntax toolbar in the Data Editor window;
- Some tools seem rather useless (for example, there’s a
printicon in the Data Editor for sending raw data to a printer); - Other tools are accessed faster with a shortkey (for example,
undoandredo); - Experienced users may perhaps prefer type syntax for some other tools;
- Some useful tools (opening a new syntax file for instance) are absent from all toolbars
An alternative toolbar configuration
Creating a New Toolbar
After clicking 


Populating Our New Toolbar
After clicking we can choose a name for our toolbar and start editing it. Toolbar tools have been categorized. After selecting (clicking) one of the categories in the left main box, all tools belonging to it will appear in the right main box. From there, we can drag-and-drop the tools we find useful onto our toolbar.


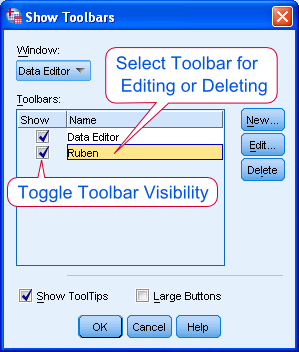
After clicking ‘Continue’, we return to the Customize Toolbar window. Under ‘Show’ each toolbar’s visibility can be toggled. Under ‘Name’ a toolbar can be selected for editing or deleting. Note that the default Data Editor toolbar can be edited but not deleted.