


Most modern PC’s come with a built-in Camera. You can grant Camera access to certain apps like video calling apps. But many times, the Windows 11 Web Camera may not work; the underlying issues may be many, from faulty setup to denied access.
Possible Reasons
Windows 11 camera may stop working due to one or more of the below reasons –
- Missing drivers after a recent update.
- After installing a buggy application.
- An antivirus program is blocking your camera.
- The default privacy settings might be preventing apps from accessing your Webcam.
1] Restart your PC
A sudden change on the operating system like installing new apps, updating Windows, etc. might cause existing programs to behave inappropriately. It is therefore advised to reboot your PC after performing any changes to your device. To do so, use these steps –
- Close all running windows on your laptop.
- Press Alt + F4 and choose the option – Restart.
- Click OK so that your device reboots afterward.


When Windows 11 reloads, check if you can access your Webcam normally.
2] Check if your PC can detect the relevant Camera driver
Before applying any workaround, you need to confirm whether your PC is detecting the installed Webcam or not. If not, there’s no point in applying any solution.

Here’s how to check if your PC can detect the ‘relevant camera driver’ on Windows 11 –
- Press Win + X, and select Run.
- On the Run dialog, type ‘
devmgmt.msc‘, and hit OK. - When Device Manager opens up, expand the section – Camera.
- Inside this, check if you can find any relevant Webcam driver or not.
If there isn’t any camera driver, go to the Action tab, and select Scan for hardware changes. Device Manager will reload all its items and you should find the Camera driver enlisted here. In case it is not appearing even after scanning for hardware changes, restart your device again.
Note: If you are using Webcam via some USB cables, check for loose connection, or any wear and tear on the connecting cables. You may also try interchanging the ports to ensure the USB port is all okay.
If the issue persists time and again, visit your PC Manufacturer’s site, download the Webcam driver, and install it on your device. Doing so will bring back the Camera driver on the Device Manager.
The problem may remain as it is only in cases wherein the Camera itself has been damaged or become corrupted. In such scenarios, all you can do is buy an external Webcam and plug it into your device.
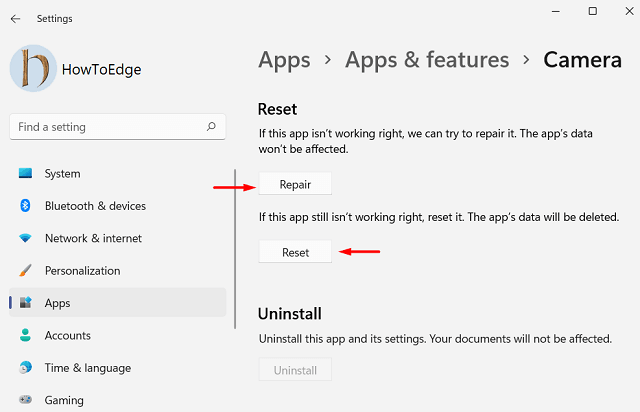
3] Reset Windows 11 Camera
Resetting the camera app often fixes the underlying causes that prevent it from starting in the first place. However, you may apply this workaround only if your system can locate the camera driver. Here’s how to reset Webcam in Windows 11 –
- Right-click on the Windows icon and select Apps & Features.
- Alternatively, you may browse to the path below –
Settings > Apps > Apps & Features
- Locate and click on the Camera app.
- When it expands, hit Advanced options.
- On the succeeding setting page, find and hit over the option – Reset.
- Restart your computer so that changes made come into effect.

4] Disable your Antivirus program
Many a time, there isn’t any problem with the Camera itself yet it stops working. This is because an active antivirus program is blocking the Webcam from functioning alright.
Open your default antivirus program, and look for settings that might be unintentionally preventing access to your camera or permission to use it on Windows 11.
5] Configure Windows 11 Camera’s privacy settings
While setting up a Windows PC, several users opt-in to disable privacy. Well, this, in turn, restricts apps from accessing your Camera. Even if you hadn’t disabled this option, go and check for this as sometimes Microsoft may disable the privacy on your behalf. They do so to improve the overall functionality of Windows 11 OS. Here’s how to check and re-configure this setting –
- Press WinKey + I to launch the Settings app.
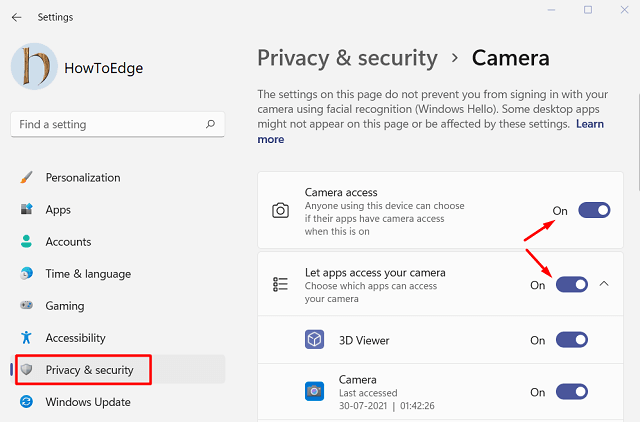
- Select Privacy & Security on the left pane.
- Move to the right pane, and enable both ‘Camera access’ and ‘Let apps access your camera’ toggle switches. See the snapshot below –
- Scroll down on this page and locate the program on which you want to access the camera app. If found disabled, turn On the same.
- Restart your PC next and see if this resolves the Camera not working issue on Windows 11.

6] Download and Install Optional Updates
Though you can check and update drivers on the Device Manager, this doesn’t work as intended. This is because Microsoft has now started providing relevant updates via the Windows update Section. So, better check if there is any pending optional update for your device or not. You may follow the instructions below to download and install optional updates on your computer –
- Click on the Windows icon and select Settings.
- On the Settings page, select Windows update available on the left pane.
- Switch to the right side, and click Check for updates.
- The system will then connect to Microsoft’s server and search for any pending updates online.
- If it does find any driver updates, the same will appear under the link – Optional updates.
- Click over this link, mark the checkbox left of available driver updates, and hit install.
When the installation completes, there’s appears a notification on the taskbar prompting you to reboot your PC. Well, hit the option – Restart this PC.
Windows 11 Camera should start working normally from the next sign-in.
7] Uninstall Latest Cumulative Updates
The Camera may stop working after a recent patch or a new software installation. If you are aware of any recent installation on your device, better undo them.
- Uninstall lately installed programs – Navigate to Settings > Apps > Apps & Features. Scroll down and locate the app that you have installed recently. Click once over it and choose the option – Uninstall.
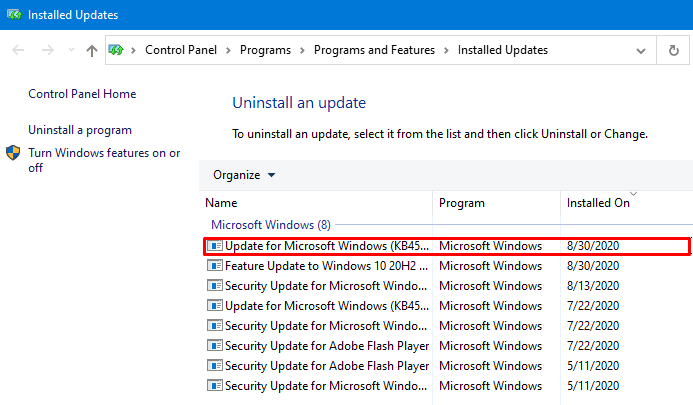
- Remove recently applied cumulative updates – Open Control Panel, and select – Programs > Programs and Features > Installed Updates. Right-click on the recently installed update and hit uninstall using the context menu.

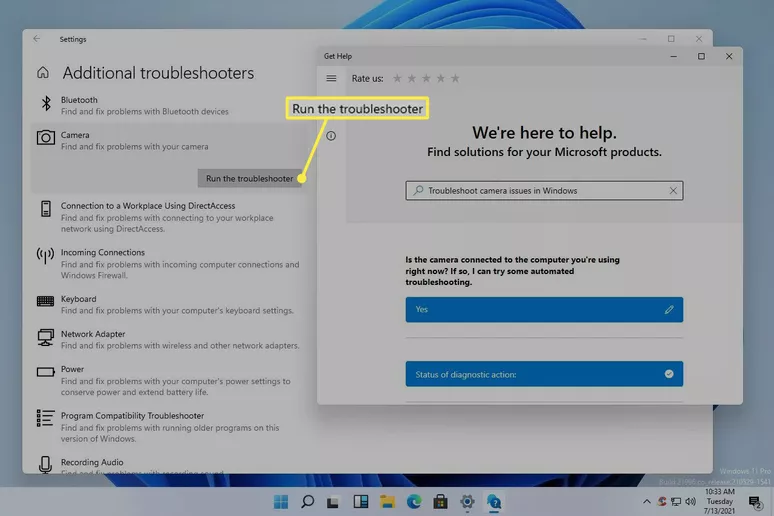
8] Troubleshoot Hardware and Devices
If none of the solutions above fix the Camera not working issue on Windows 11, there may lie some hardware issues on your device. Microsoft includes a basic tool for all such problems that goes by the name “Hardware and Devices” troubleshooter.
Running this tool will identify and diagnose all the hardware present on your computer. During the scan, this tool will also look for options that can fix the problems that it discovered. Here’s how to initiate a hardware check –
- Open Run dialog by pressing WinKey + R.
- When it opens up, copy/paste the below code, and press Enter –
msdt.exe -id DeviceDiagnostic
- The hardware and device troubleshooter window will appear next.
- Click Next so that it can start a scan for any hardware issues on the computer.
- When it returns with an option that says “Apply this fix“, click over the same.
- After applying the provided fix, restart your computer.
9] Enable Cam or Disable Secondary Cam
If your Camera is completely disabled, then it would be impossible for you to access the Webcam. Along the same lines, if you have more than one camera connected to your PC, it is best to disable the secondary camera, as it may interfere with normal functioning for some apps.
- Open the Settings menu on your PC.
- Then go to the Bluetooth and Devices section from the left menu bar.
- Please scroll to the Camera section and click on it.
- Now go to the Connected Camera section and select your webcam from the list.
- Finally, Hit Enable button if the Camera is disabled or Disable any secondary Camera.
10] Restart Device in Device Manager
Sometimes a simple device manager reboot will fix most of the complex PC issues. You can use Windows 11 Device manager to disable and then again enable the device to check if the issue is resolved.
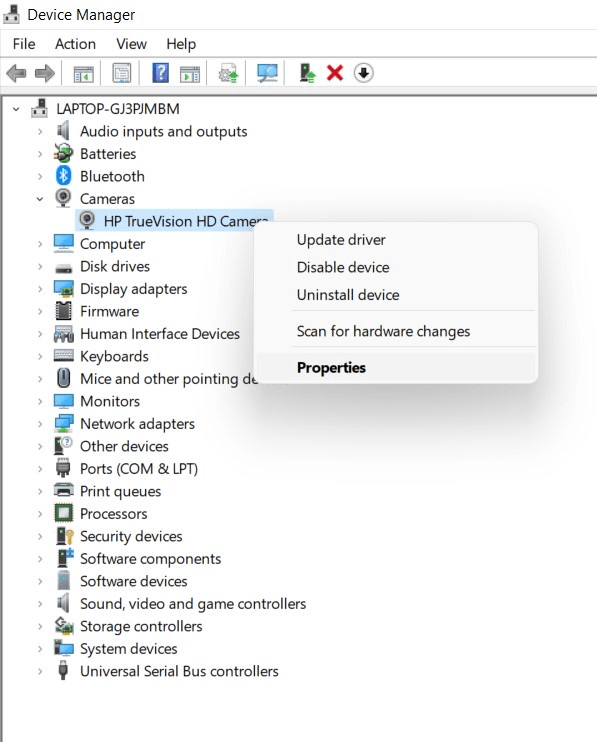
- Right-click the Start menu and select the Device Manager option.
- Find your camera device listed under the Cameras category. If you’re using a Bluetooth camera, you may find it listed under the Bluetooth category instead.
- Right-click it, then select the Properties option.
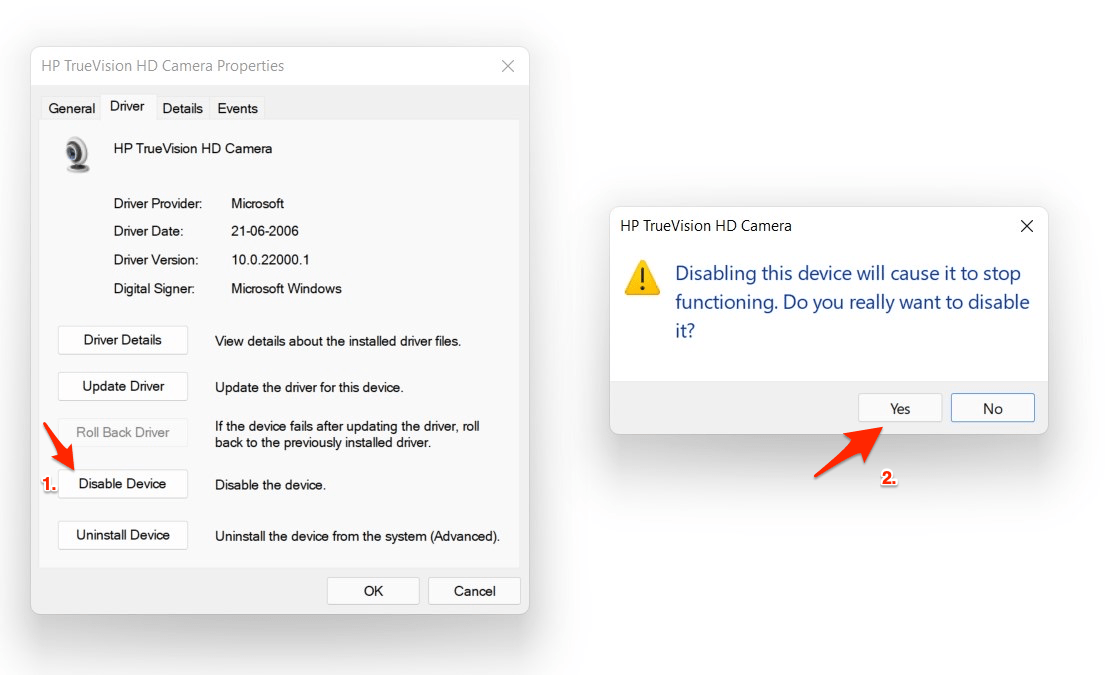
- Select the Driver tab, then select the Disable Device option. Windows will ask you to confirm, so select Yes to do so.

- Once disabled, select the Enable Device option in the same menu to re-enable your camera.

Done.
11] unplug and plug the cord of camera
If the webcam is attached through a cord, unplug it and then plug it back in. Take this opportunity to use a different port to eliminate the first port as the problem.
Also unplug unnecessary USB devices (e.g., external hard drive, printer). Although unlikely, other plugged-in devices could be interfering with the camera’s ability to communicate with Windows.
12] Temporarily disable antivirus, firewall, and privacy software
Temporarily disable antivirus, firewall, and privacy software. Some programs have webcam protection built-in, which could be what’s blocking it.
If turning off these programs makes the camera work, examine their settings to find out what needs to be changed, and then promptly re-enable them. There’s probably a Webcam Protection option enabled, or something similar that’s preventing your apps from using the camera.
14] Install the Camera driver in compatibility mode
At times it may happen that, the Windows 11 Camera not working error persists even after reinstalling the camera driver in usual method. In that case, installing this driver in compatibility mode found to deal with the error effectively.
To carry out this workaround, follow the below guidelines –
- Download the latest camera driver from its maker’s website.
- Right-click the Setup file of the downloaded driver.
- Select – Properties.
- Enter into Compatibility tab.
- Check the box that reads – Run this program in Compatibility mode.
- Select the Operating System from the drop-down list.
- Once the driver is installed, check the functionality.
- Restart the computer and check for the error once more time.
Sources:
www.howtoedge.com
www.digitbin.com
www.lifewire.com