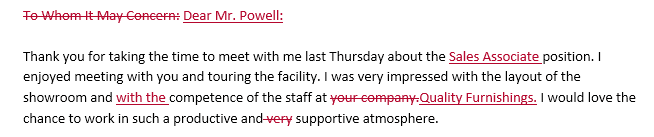
When you turn on Track Changes, every change you make to the document will appear as a colored markup. If you delete text, it won’t disappear—instead, the text will be crossed out. If you add text, it will be underlined. This allows you to see edits before making the changes permanent.

What is Track Changes?
Activating this feature will save all changes made by one person it highlights all these with red colour to tell the other one about these changes. after activating this feature, when you change your test, this tool will change the colour of your new added text, or deleted text. Now at the end if you like these changes, then you can ACCEPT otherwise rejecting them will revert your document to original material that was before changes
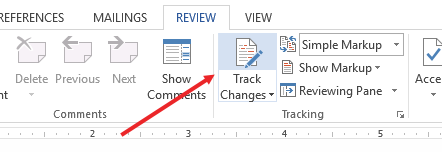
How you track changes in the new Word.
It has been always a strong link between editor and writer and Microsoft has make this link stronger by introducing Track Change feature. In past it was very necessary to mark the changes with red colour for suggestion and correction. So now editor and writer can use this tool to correct the copy digitally, that a nice step for both of them.

How to Activate this feature?
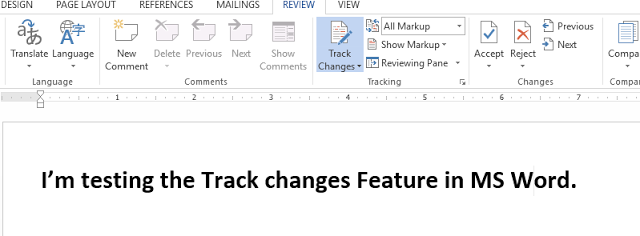
Example with picture:
One man wrote this text “I’m testing Track change Feature.”


Reviewing changes
Tracked changes are really just suggested changes. To become permanent, they must be accepted. On the other hand, the original author may disagree with some of the tracked changes and choose to reject them.
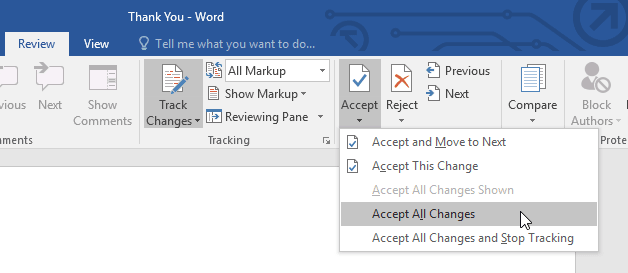
How to Accept Changes

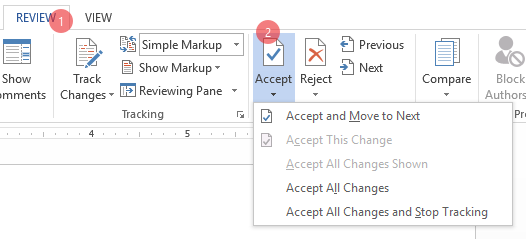

To accept all track changes
To accept all changes at once, click the Accept drop-down arrow, then select Accept All. If you no longer want to track your changes, you can select Accept All and Stop Tracking.

Rejecting the track changes
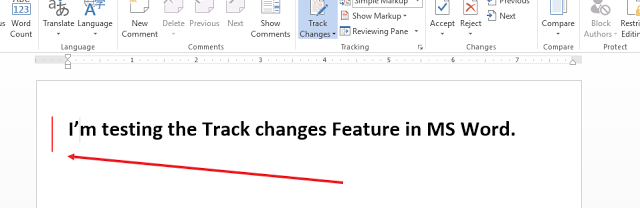
Note: Some time after activating this tool, MS Work does not show your changes with red colour but it place a vertical line on left side of your changes like in below picture. see

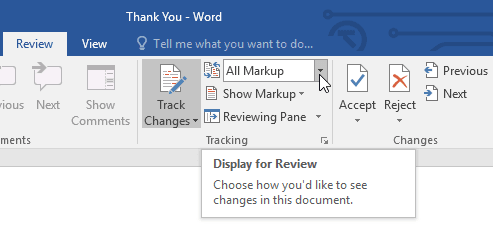
Just by clicking on red line, you will see your changes in red colour like shown in following picture. in detail your can visit TRACK CHANGES VIEW OPTION below at the end of the post.
Watch all above working in the Video

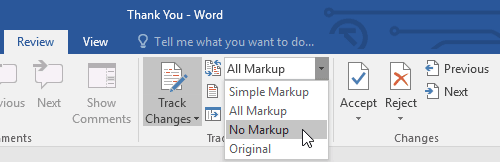
Track Changes viewing options
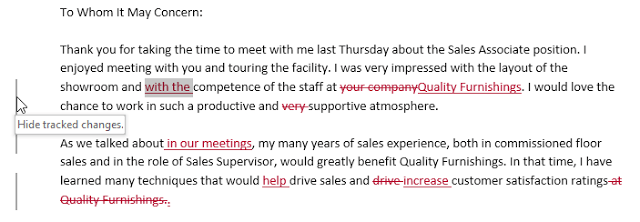
If you have a lot of tracked changes, they may become distracting if you’re trying to read through a document. Fortunately, Word provides a few ways to customize how tracked changes appear:
- Simple Markup: This shows the final version without inline markups. Red markers will appear in the left margin to indicate where a change has been made.
- All Markup: This shows the final version with inline markups.
- No Markup: This shows the final version and hides all markups.
- Original: This shows the original version and hides all markups.
To hide tracked changes:
From the Review tab, click the Display for Review command. The Display for Review command is located to the right of the Track Changes command.

Select the desired option from the drop-down menu. In our example, we’ll select No Markup to preview the final version of the document before accepting the changes.

You can also click the marker in the left margin to switch between Simple Markup and All Markup.

Remember that hiding Track Changes is not the same as reviewing changes. You will still need to accept or reject the changes before sending out the final version of your document.
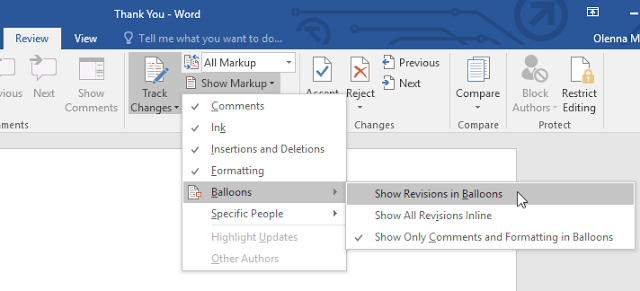
To show revisions in balloons:
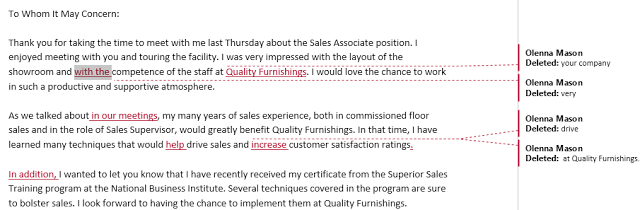
By default, most revisions appear inline, meaning the text itself is marked. You can also choose to show the revisions in balloons, which moves most revisions to the right margin. Removing inline markups can make the document easier to read, and balloons also give you more detailed information about some markups.
From the Review tab, click Show Markup > Balloons > Show Revisions in Balloons.

Most revisions will appear in the right margin, although any added text will still appear inline.

To go back to inline markups, you can select either Show All Revisions Inline or Show Only Comments and Formatting in Balloons.
Inserting Comments
Sometimes you may want to add a comment to provide feedback instead of editing a document. While it’s often used in combination with Track Changes, you don’t necessarily need to have Track Changes turned on to add comments.
To add comments
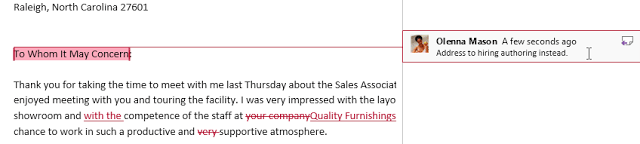
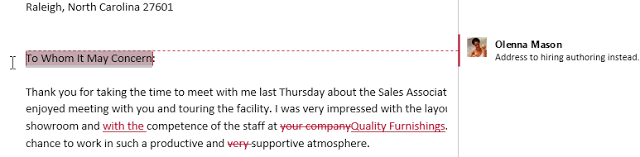
Highlight some text, or place the insertion point where you want the comment to appear.
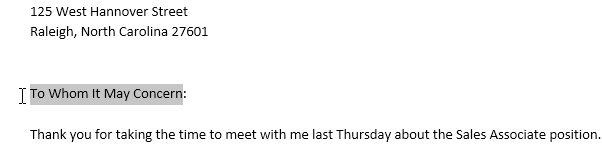

From the Review tab, click the New Comment command.
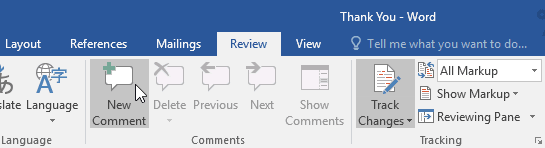

Type your comment. When you’re done, you can close the comment box by pressing the Esc key or by clicking anywhere outside the comment box.

To delete comments
Select the comment you want to delete.

From the Review tab, click the Delete command.
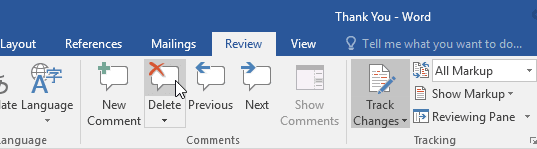

The comment will be deleted.
To delete all comments, click the Delete drop-down arrow and select Delete All Comments in Document.


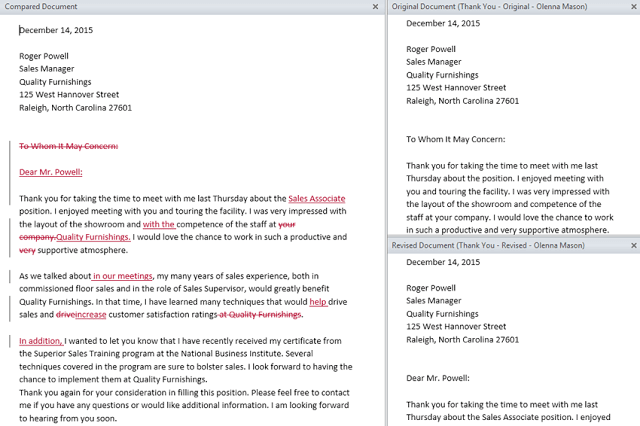
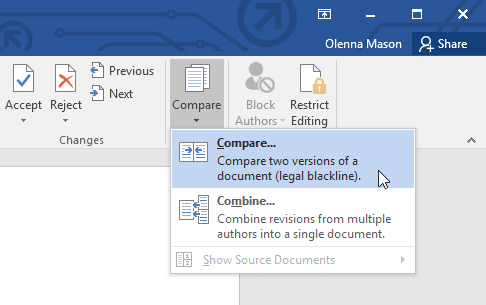
Comparing documents
If you edit a document without tracking changes, it’s still possible to use reviewing features such as Accept and Reject. You can do this by comparing two versions of the document. All you need is the original document and the revised document (the documents must also have different file names).
To compare two documents
From the Review tab, click the Compare command, then select Compare from the drop-down menu.

A dialog box will appear. Choose your Original document by clicking the drop-down arrow and selecting the document from the list. If the file is not in the list, click the Browse button to locate it.
Choose the Revised document, then click OK.
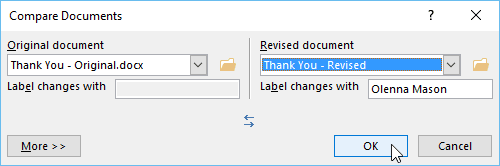

Word will compare the two files to determine what was changed and then create a new document. The changes will appear as colored markups, just like Track Changes. You can then use the Accept and Reject commands to finalize the document.