In this article we will discuss about how to add your desired Google font in wordpress website. let’s do it.
Step 1 – Choose your font from the Google font store
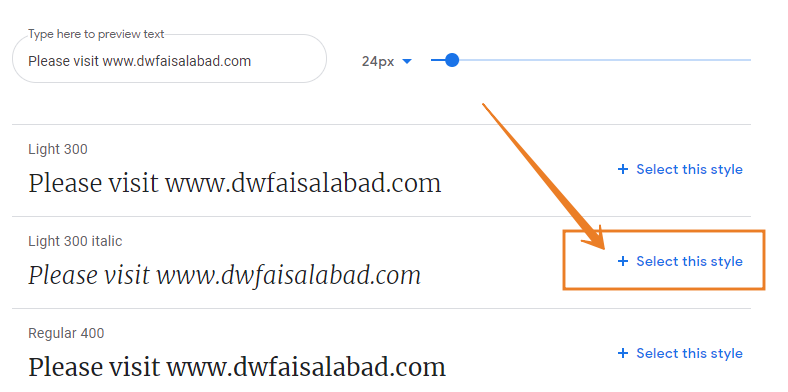
Browse Google Fonts and select a font that you want to add in your site. In this site, i want to add Merriweather font (See below). I found this font in different style and i selected italic font.
Click on (+ Select this style) link given on right side of it.
After clicking you will find code box on right side as shown below. Keep these codes save as we are going to use them in our site.
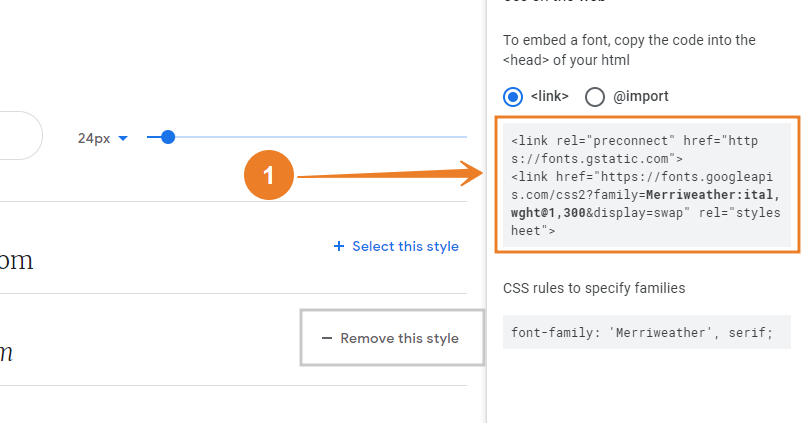
Now come to its imlimentation but before doing it, just backup your site for security. What we need to backup, see next step.
Step 2 – Back up your theme functions.php file
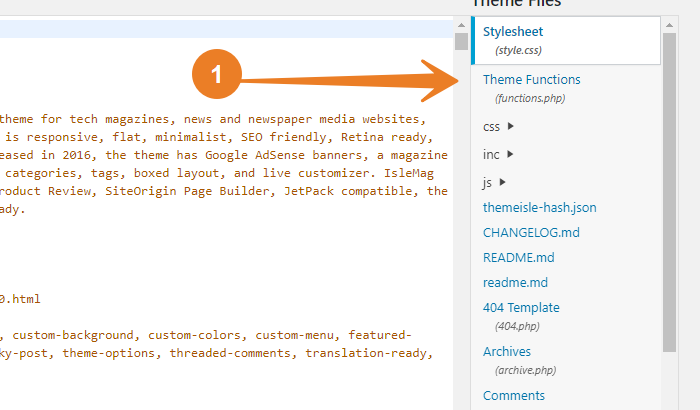
Login to your website and go to Appearance > Theme Editor as given below.

Find theme Funtion (function.php) and save its code for security.
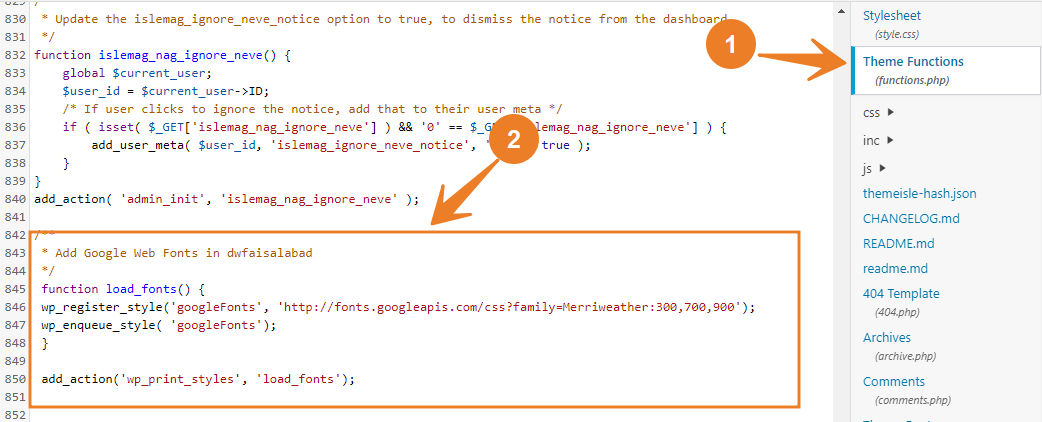
Now we are going to add font code in Theme Function page (function.php)
Step 3 – Add your chosen Google font stylesheet
Then at the very bottom of this file paste this piece of code
/**
 * Enqueue Google Web Fonts
 */
 function load_fonts() {
 wp_register_style('googleFonts', 'insert URL');
 wp_enqueue_style( 'googleFonts');
 }

 add_action('wp_print_styles', 'load_fonts');
Before you hit update, go back to the code you copied from Google and pasted into your text editor. Copy just the URL portion of the code.
For example:

Copy font post code and paste it in red highlighted inser URL
/**
 * Enqueue Google Web Fonts
 */
 function load_fonts() {
 wp_register_style('googleFonts', 'http://fonts.googleapis.com/css?family=Merriweather:ital,wght@1,300');
 wp_enqueue_style( 'googleFonts');
 }

 add_action('wp_print_styles', 'load_fonts');
See Below
Now take a second to just double check it looks ok. Have you still got single quote marks around your pasted URL?
Now your ready to hit Update.
Step 4 – Insert some CSS styles
The last step requires you to tell your site what you want to have that particular font. Some of you may know how add styles to your CSS with relative ease, other may not. The following is some guidelines for those needing help.
There are several ways to proceed and it largely depends on your theme and set up. First find your stylesheet…
Option 1.
Navigate to your theme’s Custom CSS settings page.
Option 2.
Navigate to Appearance>Edit CSS. If you have the Jetpack plugin and its custom CSS module activated.
Option 3.
Navigate to your active theme’s stylesheet via Appearance>Editor.
Then select Stylesheet style.css from the right-hand file list.
Once you found the place to add styles lets start writing a style.
The style you need to type in will look something like this…
h1 { font-family: 'Merriweather', serif; }
How many styles you need to write, obviously depends on how many elements you want that font style to apply to.
Done, Do it yourself and enjoy new desired font in your website.