In this article we will discusas about how to share printer on a network (Computer 1 and computer 2) having windows 10 installed on both computers.
Computer 1 (Main)
- Setting Network Private
- Advanced sharing settings
- Device Setting (Sharing Printer)
Computer 1 (Client)
- Setting Network Private: Revise this step as done in main Computer above
- Advanced sharing settings: Revise this step as done in main Computer above
- Access Shared Printer
Computer 1 (Main)
1. Setting Network Private
To set the network profile to private, use these steps:
1. Open Settings.
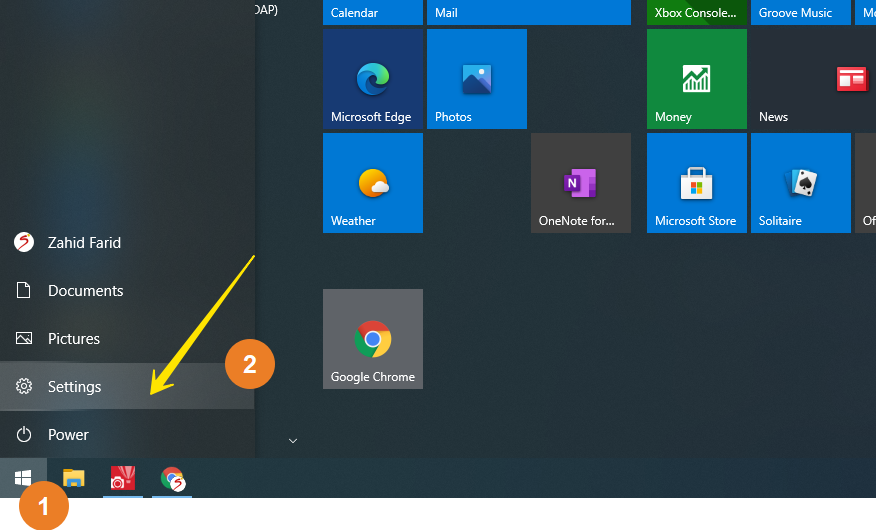
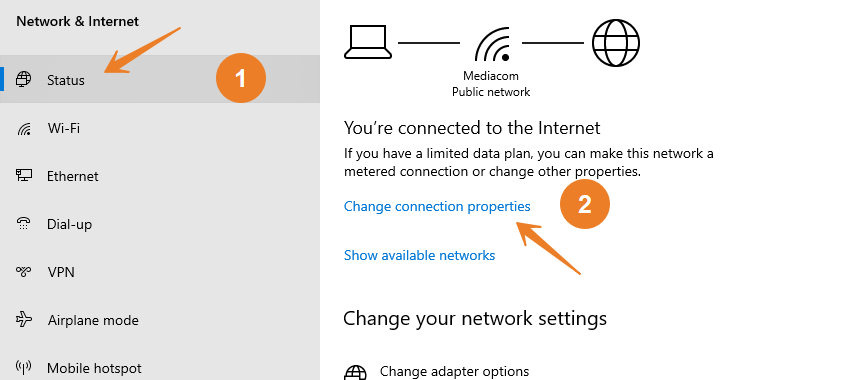
2. Click on Network & Internet.
3. Click on Status.
4. Click the Change Network Properties buttons for the current Ethernet or Wi-Fi connection.
5. Under the “Network profile” section, select the Private
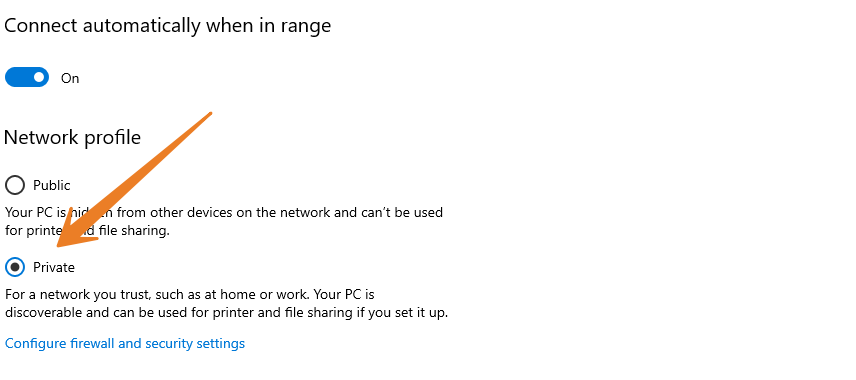
Once you complete the steps, users should be able to access shared files and printers from any computer in the local network.
2. Advanced sharing settings
1. Open contril Panel
2. Click Network and Sharinf Center
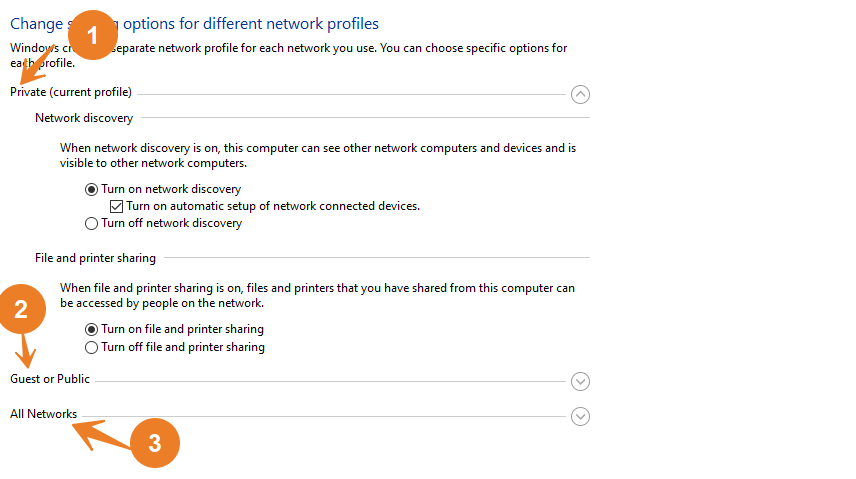
Here you will find 1. Private (Current Profile), 2. Guest or Public, 3. All Networks setting
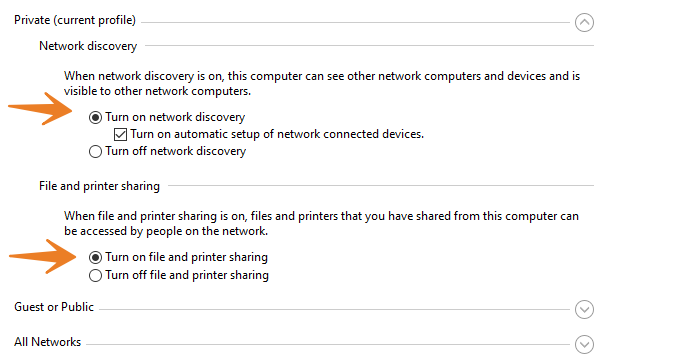
In Private (Current Profile), do the following setting.
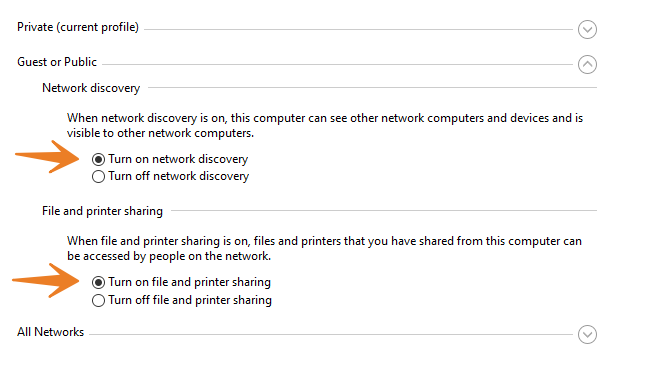
In Guest or Public, Do the following setting.
In All Networks setting, “Turn on sharing “ and “Use 128-bit encryption” option as well as also Select “Turn off password protected sharing”
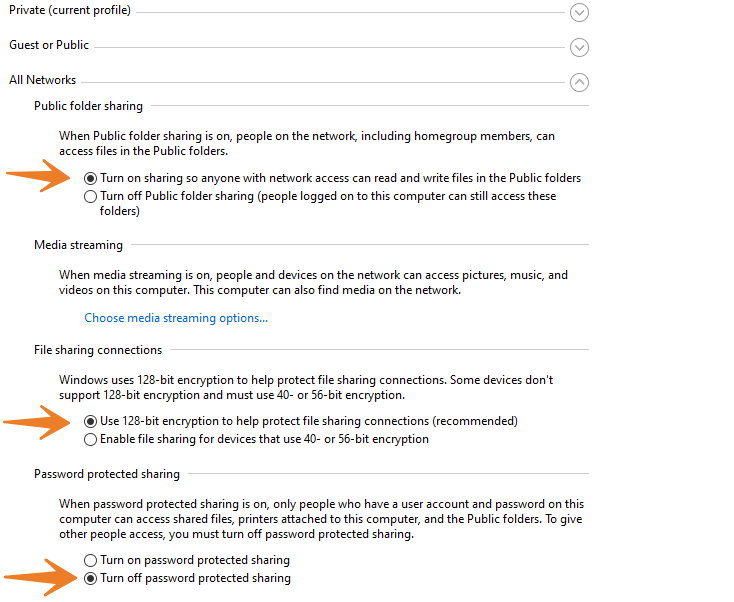
After doing all above Network setting, Click Save Changes Button to save these settings.
3 . Device Setting (Sharing Printer)
To share a printer on Windows 10 (assuming it’s already installed), use these steps:
- Open Settings.
- Click on Devices.
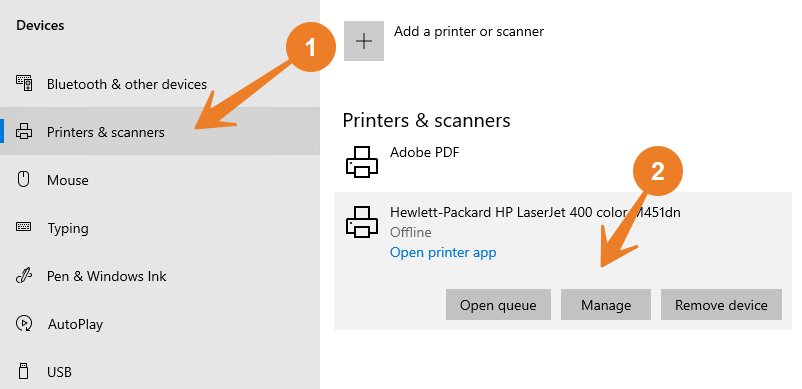
- Click on Printers & scanners.
- Under the “Printer & scanners” section, select the printer that you want to share.
- Click the Manage
- Click the Printer properties
- Select Sharing option
- Check the Share this printer
- In the “Share name” field, specify a new short and descriptive name. (If this is the only printer on the network, you can use the default name.)
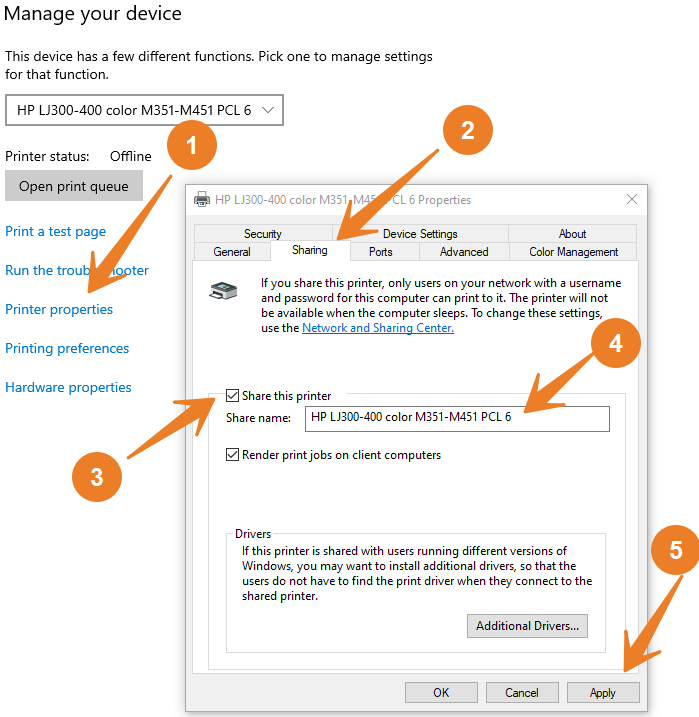
- Click the Apply
- Click the OK
Computer 1 (Client)
- Setting Network Private: Revise this step as done in main Computer above
- Advanced sharing settings: Revise this step as done in main Computer above
- Access Shared Printer
First two steps are same as we have done at Main Computer. revise these two steps again at Client computer to do the same Network setting. Now turn to third step; Access Shared Printer.
Access Shared Printer
To connect devices to the shared printer, use these steps:
- Open Settings.
- Click on Devices.
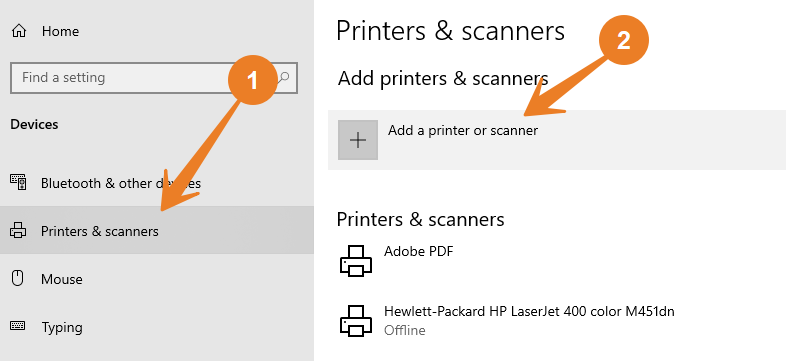
- Click on Printer & scanners.
- Select the Add a printer or scanner
- Select the printer from the list.
- (Optional) If the discovery feature doesn’t work, click The printer that I want isn’t listed
- Choose the Select a shared printer by name
- Type the path of the printer location: \\xxx.xxx.xxx.xxx\DESKTOP-ZAHID
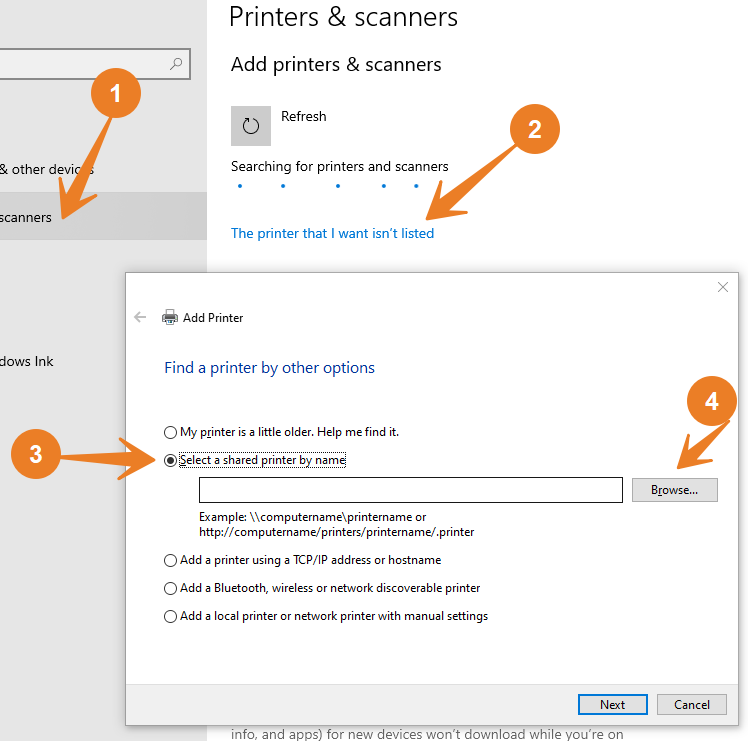
- Click the Next
- Click the Install driver button (if applicable).
- (Optional) Specify an name of the printer connection. For xample, Network Printer.
- Click the Next
- Click the Finish
Stop sharing printer on Windows 10
If there’s no need to share a printer over the network anymore, then use these steps:
- Open Settings.
- Click on Devices.
- Click on Printers & scanners.
- Under the “Printer & scanners” section, select the printer that you want to share.
- Click Manage
- Click on Sharing
- Clear the Share this printer
- Click the Apply
- Click the OK
- Once you complete the steps, the printer will no longer be available for network users.
Leamore about computer and its basic skills, click here