If you have too many apps for one taskbar to handle, why not add more taskbars to Windows 11 with Linkbar? Default taskbar in Windows 11 can only include so many shortcuts. If you add more shortcuts to it, there will also be less space available for minimized windows. As such, adding another taskbar to Windows 11 would be a great way to give yourself some more room. And you can do just that with Linkbar. here we will learn how to add an extra taskbar.
Download and Extract Linkbar
- First, open the Linkbar download page on Softpedia.
- Select the Download Now option there to save Linkbar’s ZIP archive.
- Next, click File Explorer’s taskbar button, which has a folder icon.
- Open the folder that includes the Linkbar ZIP file.
- Double-click Linkbar’s ZIP archive to open it up.
- Click the Extract all option within File Explore
- Press the Browse button within the Extract Compressed (Zipped) Folders window, and choose an extraction location.
- Select the Show extracted files when complete checkbox, which will save you having to manually open the extracted folder.
- Click the Extract option to finish.
Once done, an extracted folder will open. There is no installer for Linkbar, so you need not have to run any install wizards.
Add New Linkbar
Now you can add a new taskbar to Windows 11 with Linkbar. To do so, double-click Linkbar64 within Linkbar’s extracted folder to open the window shown directly below. The alternative Linkbar EXE within the folder is for 32-bit system architecture.
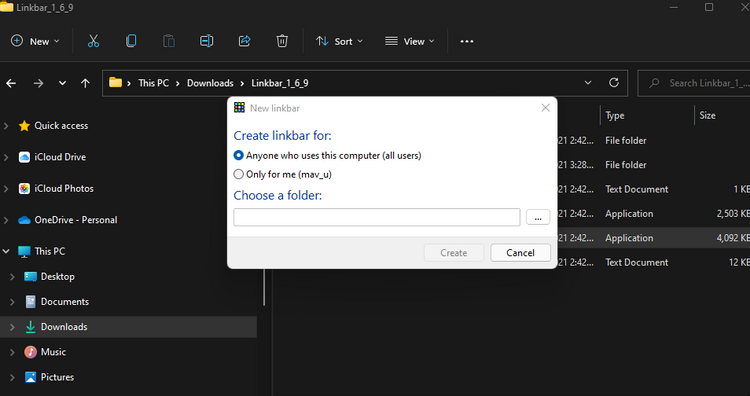
Select the Only for me radio button. Click the dots button to select a working directory for the taskbar. It’s best to select your user folder for that. Then press the Create button to add a blank new taskbar like in the snapshot directly below.
Don’t forget that you can add more than one taskbar when you’ve set up the first one. Simply double-click Linkbar64 again and then again to add a second or third bar for even more shortcut space. When you’ve added multiple taskbars, they’ll stack up as shown directly below.
Add Taskbar Shortcuts
You can now add many shortcuts to your new taskbar. To do so, right-click the Linkbar taskbar and select New > Shortcut. Select Browse on the window that opens to choose the software you want to add.
Press the Next button, enter a shortcut name, and click Finish. Click the shortcut on the Linkbar taskbar to open its software.

Alternatively, you can drag and drop desktop shortcuts onto the Linkbar taskbar directly. To do that, left-click a shortcut on the desktop and hold the left mouse button. Then drag the shortcut over the new taskbar, and release the left mouse button.
To remove an item from the Linkbar taskbar, right-click a shortcut and select Delete. Select Delete the linkbar on the Linkbar submenu if you want to erase the whole taskbar. You can also change shortcut names by selecting the Rename option on the context menu.
Configure the Linkbar Taskbar
Once you’ve added some shortcuts, you can then check out Linkbar’s additional customization options. Right-click an area of the Linkbar taskbar and select Settings. The Linkbar settings window includes settings for taskbar position, appearance, shortcuts, separators, and auto-hide customization.
You can change the position of the Linkbar taskbar via the Panel tab. Click the Position on screen drop-down menu there. Then select a Left, Right, Top, or Bottom option.
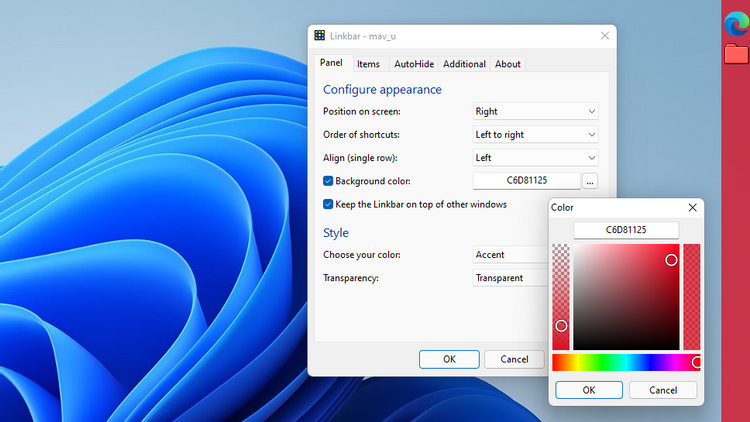
If you want to change the taskbar’s color, click the Background color checkbox. Choose a color on the palette by clicking the dots button. You’ll need to select Apply for all changes to take effect.
There’s also a taskbar transparency option on the Panel tab. To select it, click the Transparency drop-down menu. Select Transparent on that menu.
You can fit more on your Linkbar taskbar by adjusting its icon size. To do so, select the Items tab shown directly below. Then decrease the value for the Icon size option.
Source: www.makeuseof.com